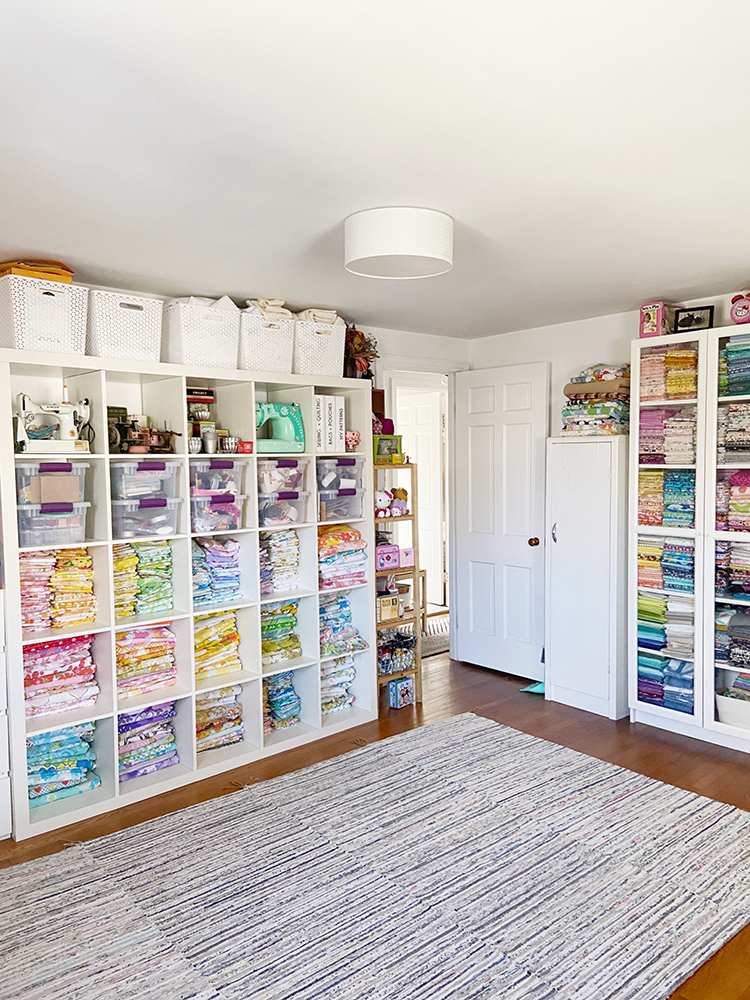
Tips for Keeping Your Sewing Room Clean
Wednesday, June 29, 2022
It's time for another post in my Sewing Room Organization Series. Today we're talking all about tips for keeping your sewing space neat and tidy. I highly recommend checking out the other posts from this series if you haven't already, we've covered a lot of topics over the last few years!
Start by Assessing Your Messes
It's important to start any cleaning/organization project by determining the problem areas. Everyone is messy in their own unique way, so take some time to think about where you're struggling the most. Where are the messes and what are they? Spend some time looking around your space and notice all the messes you see and where they are concentrated. They could be your work surface, the floor, in hidden storage like a drawer or bin. Is your mess unfolded fabric, projects in progress, or clutter from other rooms/hobbies?
I think the key to keeping your sewing space clean is to come up with a system that works for your unique space and your natural habits. We want it to be as easy as possible for our spaces to get cleaned up and stay clean! I recommend making a list of your messes so that it's easy to tackle each one specifically.
Use a Return Basket (or two!)
One of my personal problem areas has been fabrics I've just used that need to go back into my storage cabinet. They tend to pile up on my sewing table, especially if I've pulled a large number of prints for a quilt. Sometimes I don't have time to put each fabric back in the proper spot in my cabinet, so I added a return basket to the bottom shelf. I can quickly put fabrics in that basket so that they are off my cutting table. Then when I have time I can put the fabrics away properly. If I'm really on the ball the fabrics go straight from my table to the cabinet, skipping the basket, but I know that won't always happen. Having an in between spot works well for me!
Similarly I have a return basket for my scraps. I keep my scraps organized by color, but I don't always want to stop mid-project to put my scraps away in their designated bins. Instead, I keep a basket/bin near my sewing machine where I can quickly toss scraps as I'm working. When it fills up, I take time to organize them.
Have a Place for Everything to Go
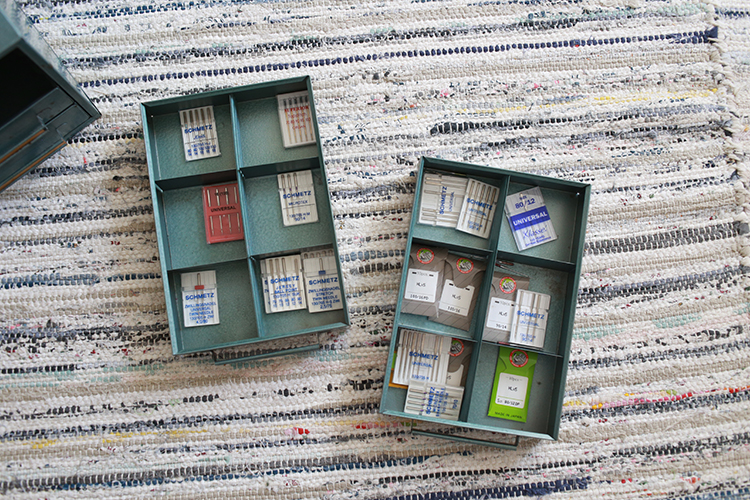
This might seem like a no-brainer but it is so important. If you don't have a designated space for something to go, it's difficult to put it away! These tend to be items that perpetually clutter your space. For a long time this was machine needles for me. I didn't have a dedicated spot for them, so they were everywhere! Not only were they cluttering my sewing table, I often couldn't find the ones I wanted when I needed them. Carving out a spot for them means I can quickly and easily find them, and my space is neater.
Single Layer Storage
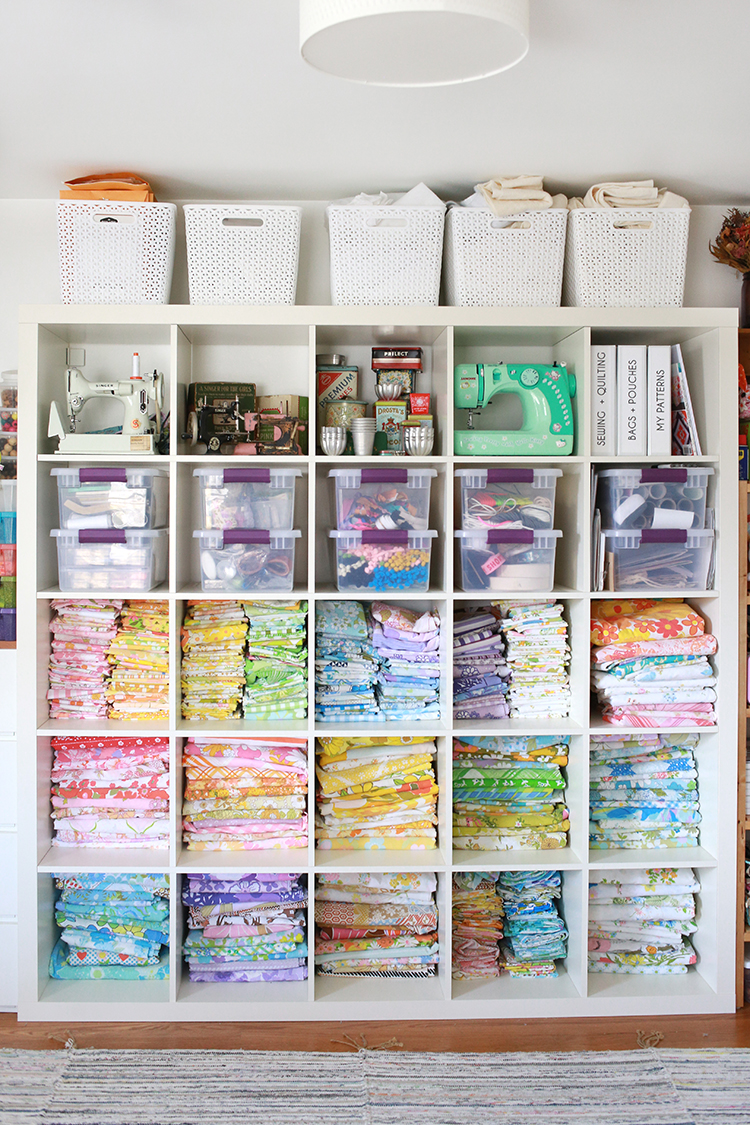
When possible, it is ideal to have things stored in a single layer. What I mean is that you don't need to move one or more boxes/bins to get to something. As someone who has previously sewn in small spaces, I know this isn't always possible. My general advice is simply to prioritize based on how often you use something. If you use a tool every time you sew, it should be the easiest thing to get to/put back. Save the storage spaces that are harder to access for things that you use less often. This can apply to everything from notions and tools to fabric and patterns.
Take Advantage of Wall Space
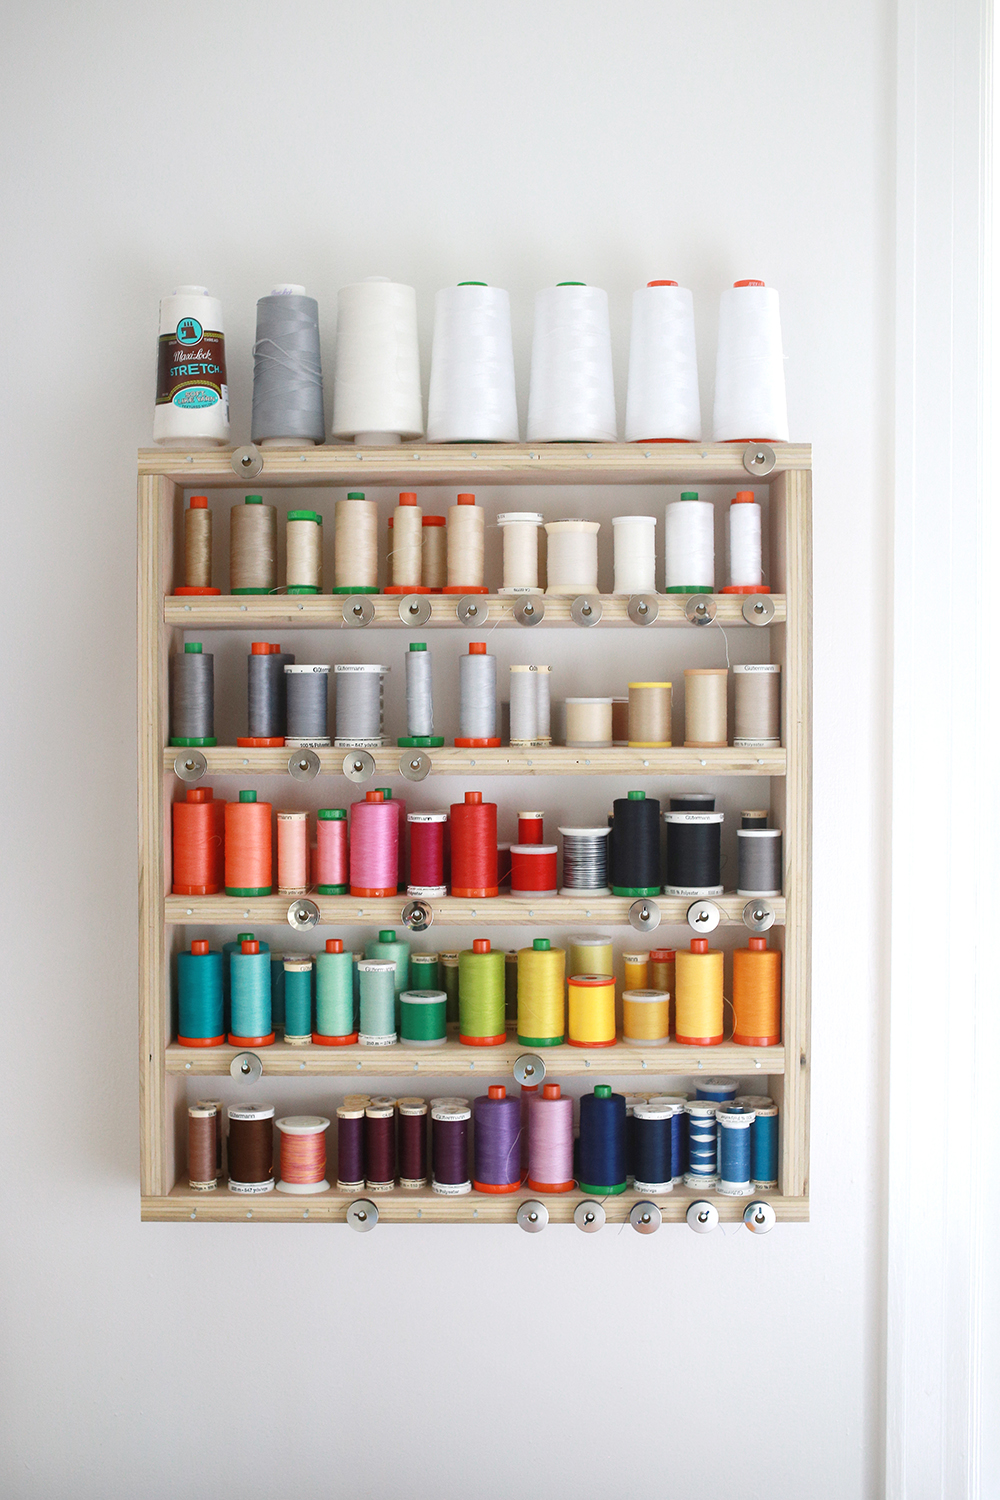
This is probably the thing that has helped me the most in my space. An easy way to keep items off your sewing table is to hang them. This is particularly great for acrylic rulers, which can be difficult to store. You could take advantage of a pegboard or bulletin board, or keep it simple with a few nails or screws! I love having my thread storage on the wall too because I can easily reach what I need, but also see everything I have. In my space I went a step further and hung a few small shelves above my machine so hold my most used tools and notions.
Leave Empty Space
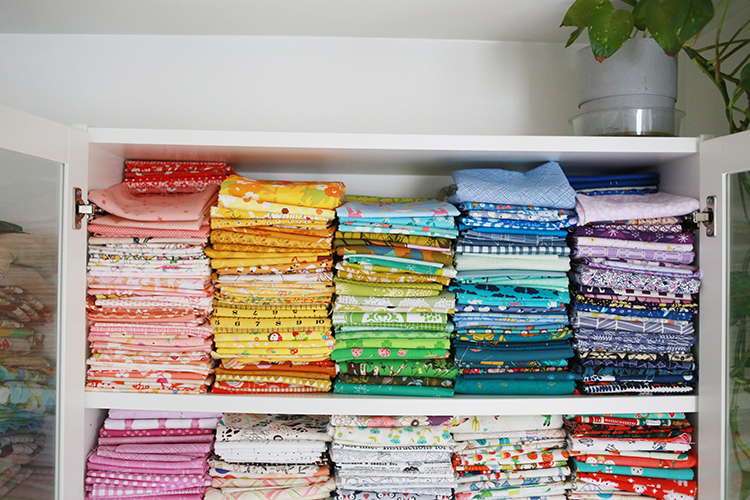
When you're working on storage for items like fabric or thread, you want to be able to expand into them without having to start over. This means leaving some empty space. For example, when storing fabric, I leave a few inches at the top of each stack so that I can add more fabric over time without having to shuffle all the fabric to make room. Making that space in advance makes the whole process easier to keep neat.
For a full tutorial on how I fold fabric, see this post: Fabric Folding Video Tutorial
Schedule Regular Maintenance
Just like everywhere else in your home, you'll need to spend time maintaining your space. Once you have systems that work for you set up, you should be able to spend less time cleaning overall, but it is still necessary! Depending on how much you sew, you may need to set aside time once a week or once a month. Take time to empty those return bins, or refresh your folded fabrics. These small tasks will help keep everything running smoothly and hopefully stop messes from getting out of control.
I think this is a great thing to do alongside cleaning your sewing machine!
Adapt Your Systems
When you set up a new way to organize or store something, it's important to circle back a few weeks or months later to check in. Decide whether or not that organizational system is working for you. Perhaps a small adjustment could make it work even better for you! Or maybe you need to try something totally different. You'll know if things aren't working if you've ended up with a big mess again!
Want to make your own thread shelf? Check out this post: My DIY Thread Storage Shelf
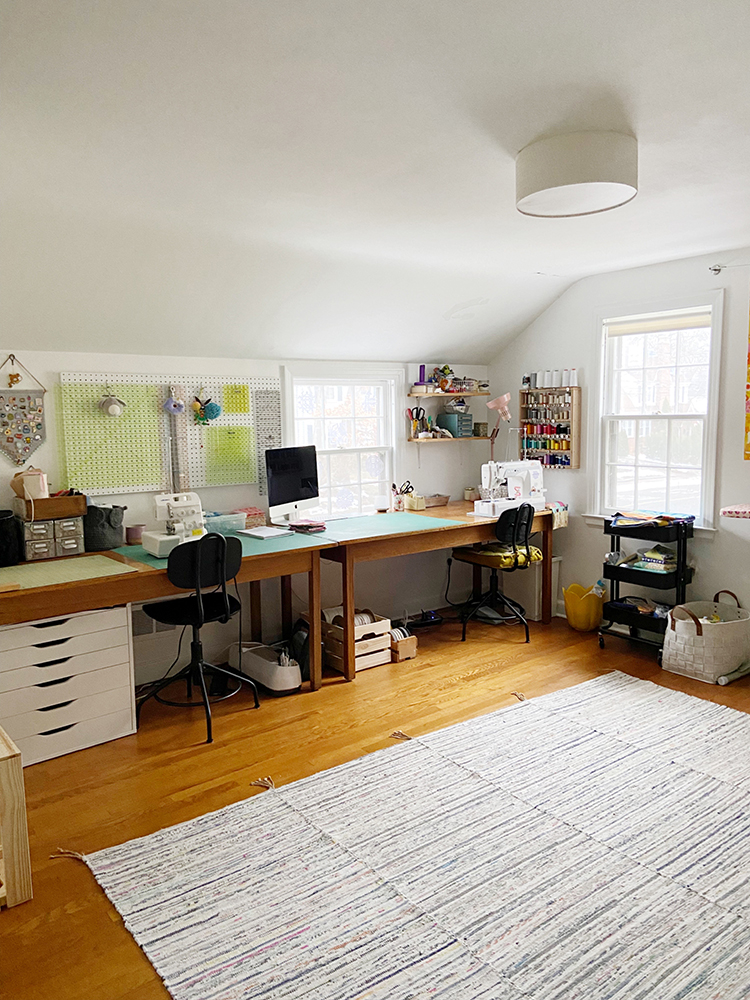
I hope this post has given you some ideas for keeping your sewing space tidy. If you have any tips to add I'd love to hear them in the comments!
Happy Sewing!
Friday, June 24, 2022
Happy Friday! It's time for another Friday Favorites post! This is my 24th post in this series, and it's also the 24th of June today. Neat!!
- Strawberry season is in full swing which means it's time for angelfood cake. I always make this recipe from my friend Deedrie. If you're looking for a good angelfood cake pan, I love the one I have*!
- I made my first batch of icecream for the Summer this week. We love the cinnamon icecream recipe from this book*, I add vanilla! The strawberry sourcream recipe from the same book is another favorite.
- I love this applique pillow set by Yasmeen in the latest issue of Love Patchwork and Quilting.
- Excited about these two vintage pillowcases I found thrifting this week! From the feel of them, I don't think they've ever been used or even washed!
- Absolutely loving my friend Amanda Jean's finished hand pieced and hand quilted Mark Twain quilt!
- This post from the Muppets made me giggle, I love Beaker.
- On a whim I bought a pack of Calendula seeds and direct sowed them (pretty late) in a pot. They're blooming and much to my delight was reminded that it was a mix of colors!
- We streamed this new movie* and loved it! It's was so fun to see all those characters again.
- I've been on the hunt for a napkin holder to hold our chemex coffee filters. I ended up turning to Etsy's vintage section and bought this one*. It was tough to narrow it down, this one* and this one* were also in the running.
- Dusty is loving the sunny weather we've been having!
Have a Great Weekend!
*Note: Any links marked with an asterisk in this post are affiliate links. This means if you click through and buy something, I make a small commission, at no extra cost to you.
Wednesday, June 22, 2022
Happy Wednesday! Today I want to share a little home decor project I've worked on putting together over the past year, our little music station!
This spot in our living room was once occuppied by George bunny's play area. After he passed I immediately filled this wall with our armchairs and small table just so that it wouldn't be empty. We knew that was a temporary solution until we could decide what to do with the space. We ended up deciding to set up a music station here, centered around our record collection. Pretty much ever since Michael and I started dating (14 years ago, whoa!), we've been collecting vinyl together, and we've never really had a nice place to display it.
As if we could ever look over to this view without thinking of George, we hung some bunny artwork over the cabinet. The watercolor portrait on the left is by Kayanna Nelson, the center portrait is by Melissa Averinos, and the art print on the right is by Little City Love. We pulled it all together with the garland I had custom made for our wedding by Aidie's Hideaway (they've since closed their shop). Lots of meaningful stuff in this little stretch of wall.
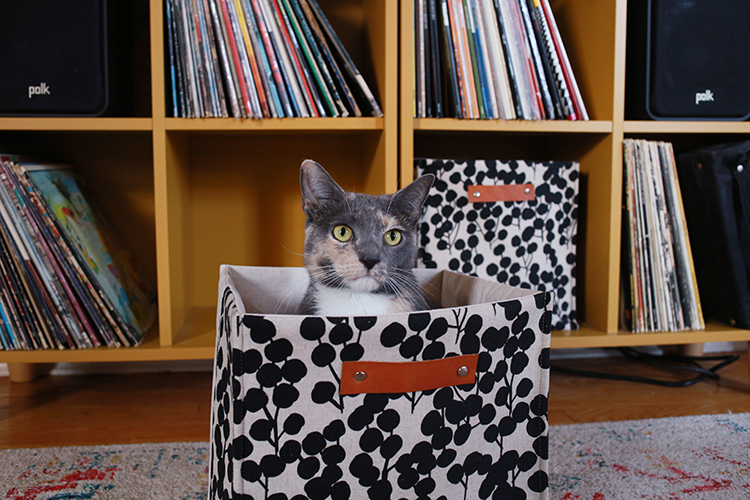
A few quick details on the actual cabinet. I really would like a vintage mid-century cabinet, but while I wait to find the perfect one I decided to put together something that could be repurposed one day. It's actually two Eket cabinets from Ikea (ours are mustard, which they no longer sell it seems), which is great because they can be seperated and used for somewhere else when I find my dream cabinet! The legs from Ikea were perpetually out of stock so I ended up with these legs from Home Depot.
The cabinets are able to hold our entire vinyl collection, CD collection, plus all the electronics. Our receiver, turntable and speakers, plus our $6 thrifted CD player. I still need to manage the cords underneath a bit better, but for now it's been working great for us.
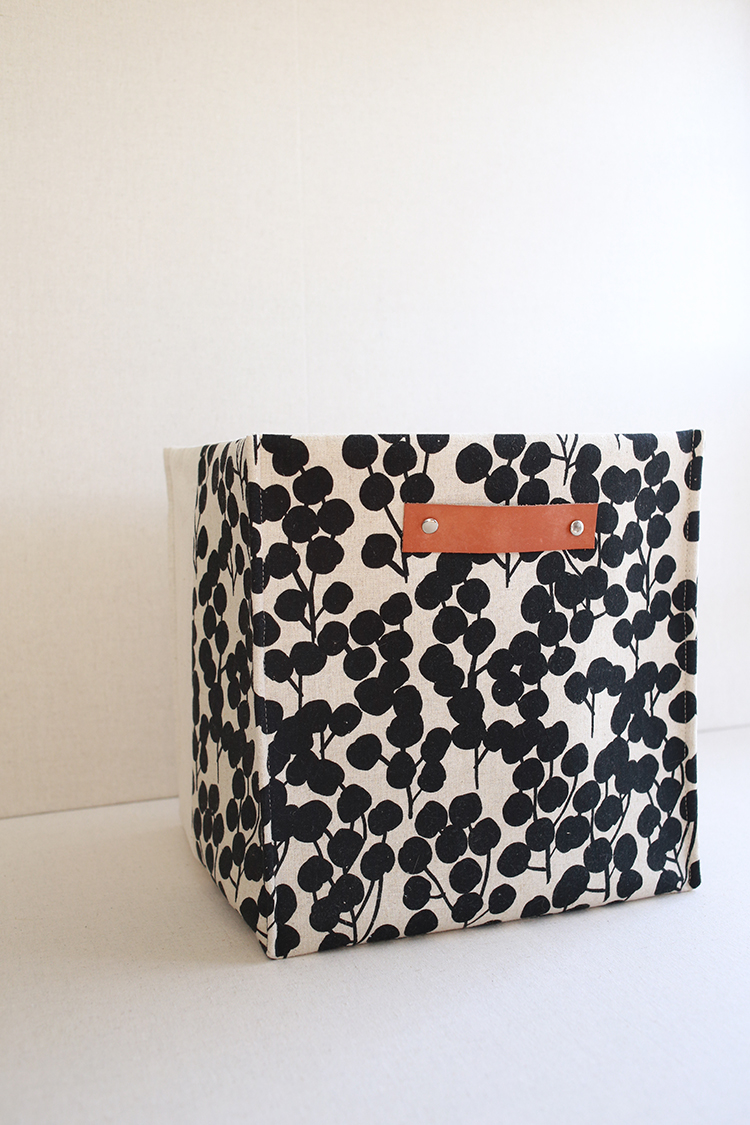
I wasn't too interested in any of the baskets from Ikea that fit this cabinet, so of course I decided to make something! These are super simple, they're basically just square tote bags without handles. They're completely square, approximately 11.5" tall, wide, and deep. They fit nicely inside the cubbies. I did add little leather pulls to the fronts, mostly just for looks. My rivet installation skills could use some work!
I used some cotton linen yardage that I've had for many years, I beleive it's a Kokka print. I also used some Essex Linen in natural paired with the print. I know I used interfacing, but I can't remember what kind!
I didn't want to use up all my yardage of this print, so I only used it on the front of the baskets. I wasn't sure if it would work out, but it did! You can't tell that only the front has the print until you pull the basket out. Perfect! So glad I did that.
Of course Dusty had to help me take photos. So helpful!
I'm really happy with how this space turned out. I want to make a new runner for the top at some point, but otherwise it's done for now! Unless we're watching TV we pretty much always have music playing in our house, so it feels right to have a dedicated space for music. One note on vinyl records, when we put this space together I decided to catalog our record collection and discovered Discogs. It's like Ravelry but for your music collection. Just wanted to mention it because I've really loved it, in case anyone is interested.
Happy Sewing!
Friday, June 17, 2022
Happy Friday! In lieu of my typical Friday Favorites post this week, I am having a weekend pattern sale in my online shop to kick off the beginning of Summer!
All patterns are 25-75% off now through 6/20/22!* No code needed, prices are already marked down for your convenience! Shop Here.
Happy Sewing!
*Pattern bundles are not included in this sale. Sale applies only to jenibakerpatterns.com.
Wednesday, June 15, 2022
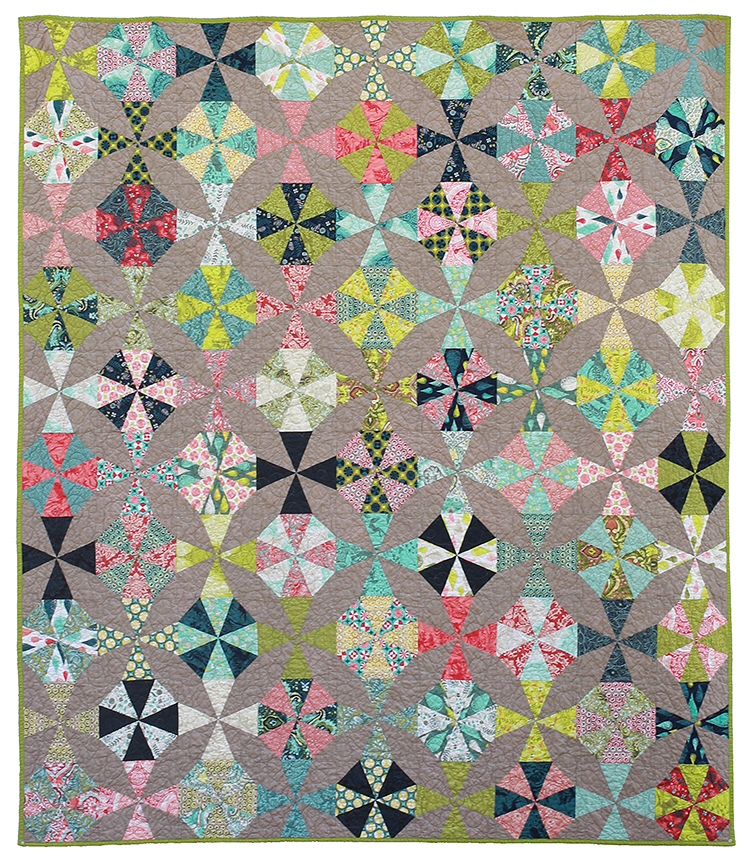
Happy Wednesday! I can't believe I'm finally sharing this quilt! I actually finished this late last year, but only took photos of it last month. Then I dragged my feet pulling it all together, for who knows what reason. Regardless, today is the day to finally put this quilt to bed!
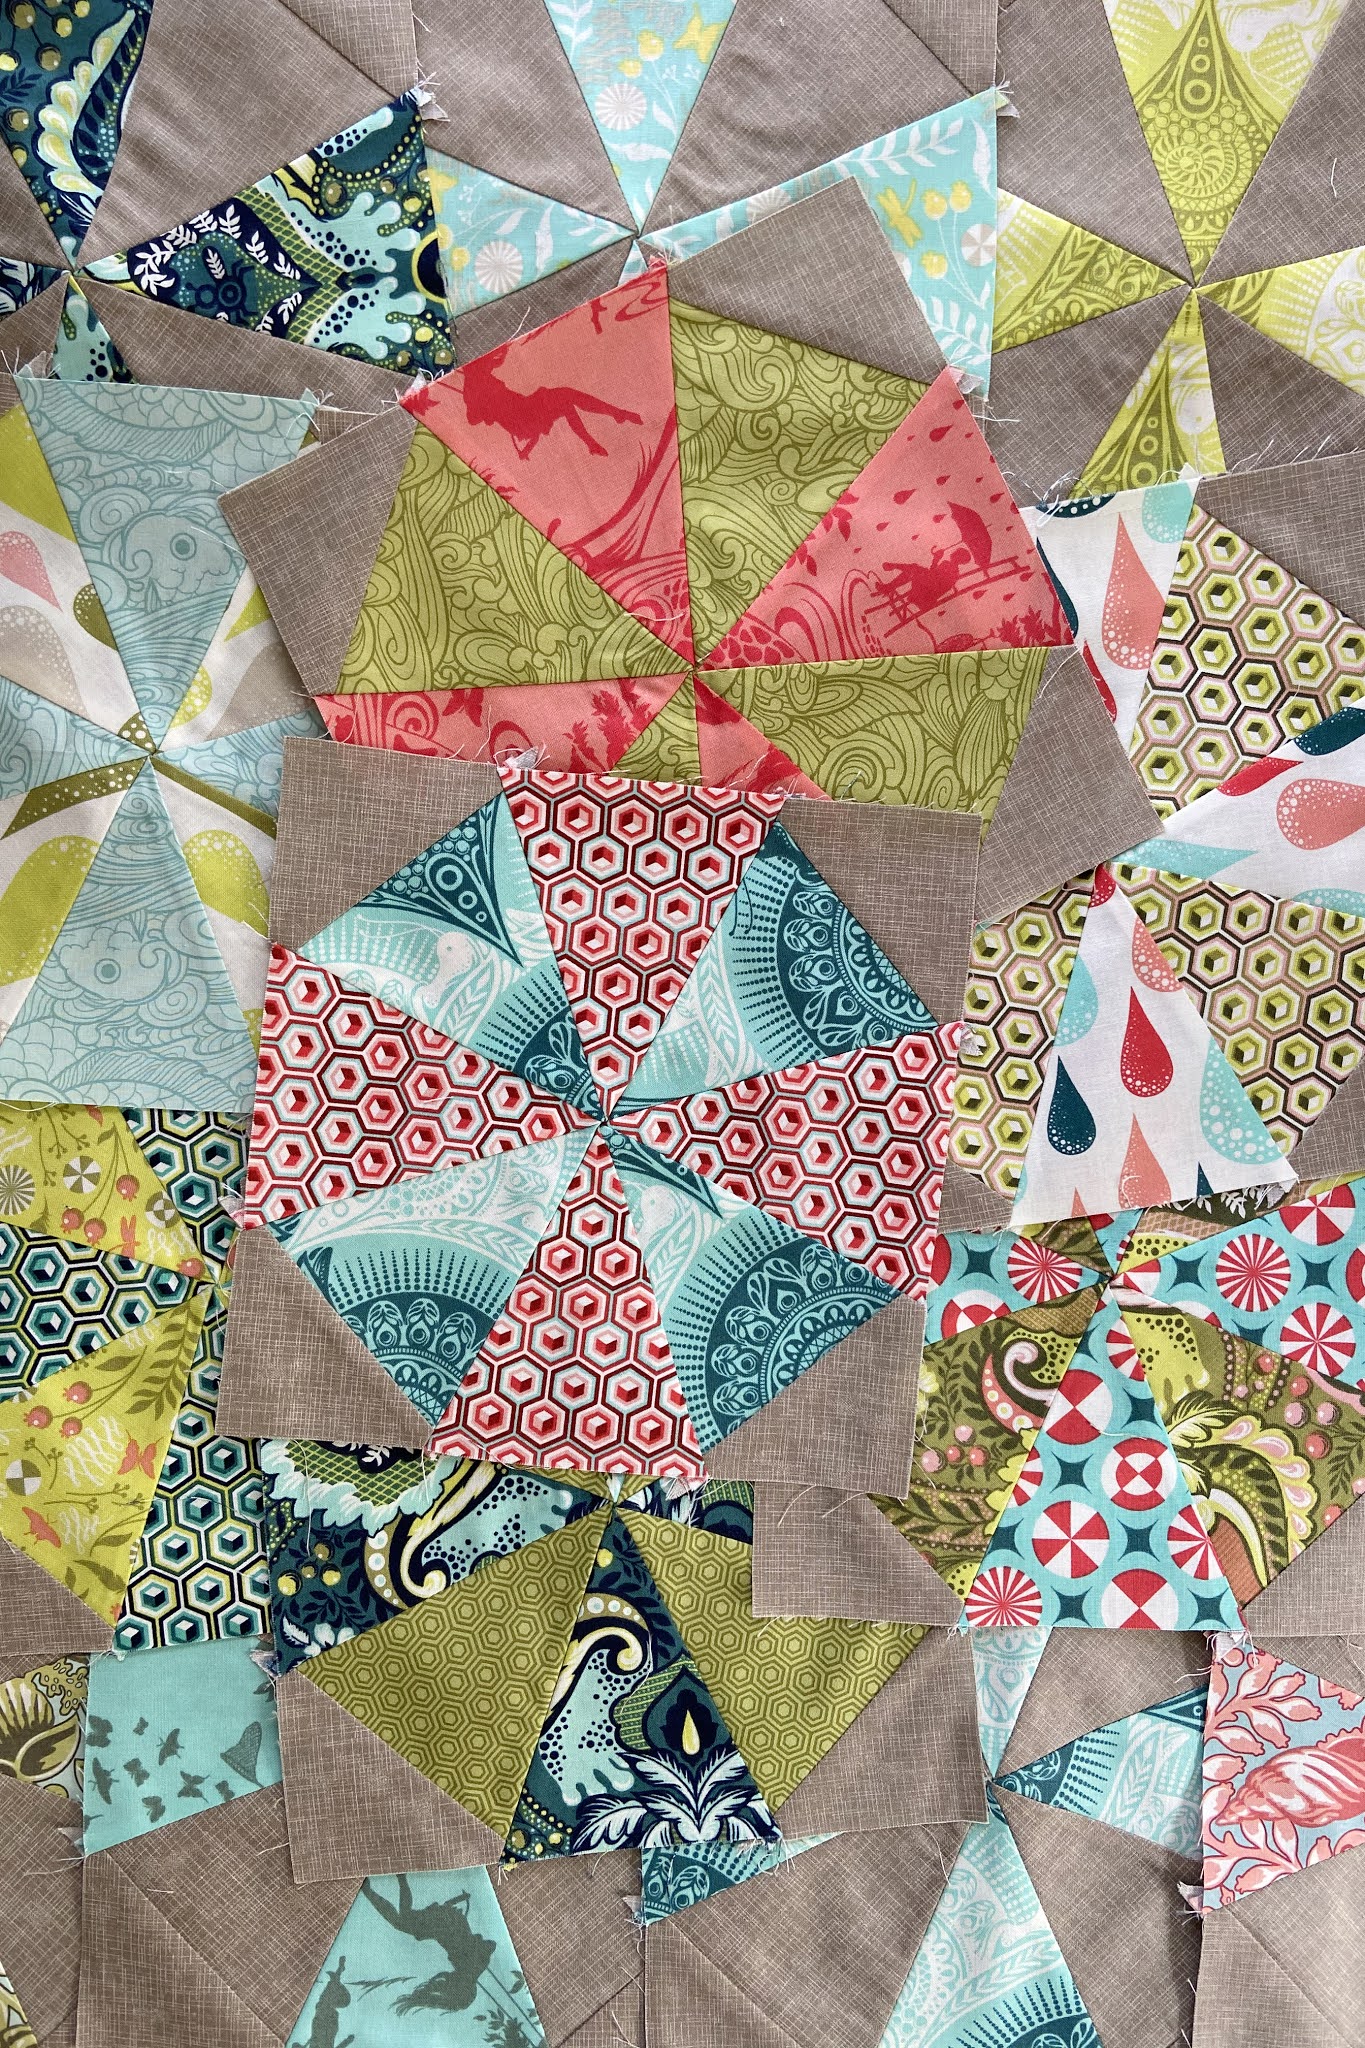
I pulled fabrics for this quilt in 2012, so it has taken nearly 10 years to get this quilt from idea to finish. I chat more about why I think that happened in this post if you're curious: Work in Progress: Kaleidoscope Quilt. The short version is that from the cutting to the piecing, this just isn't my favorite type of work. That's okay though, we don't have to love the process for everything we make!
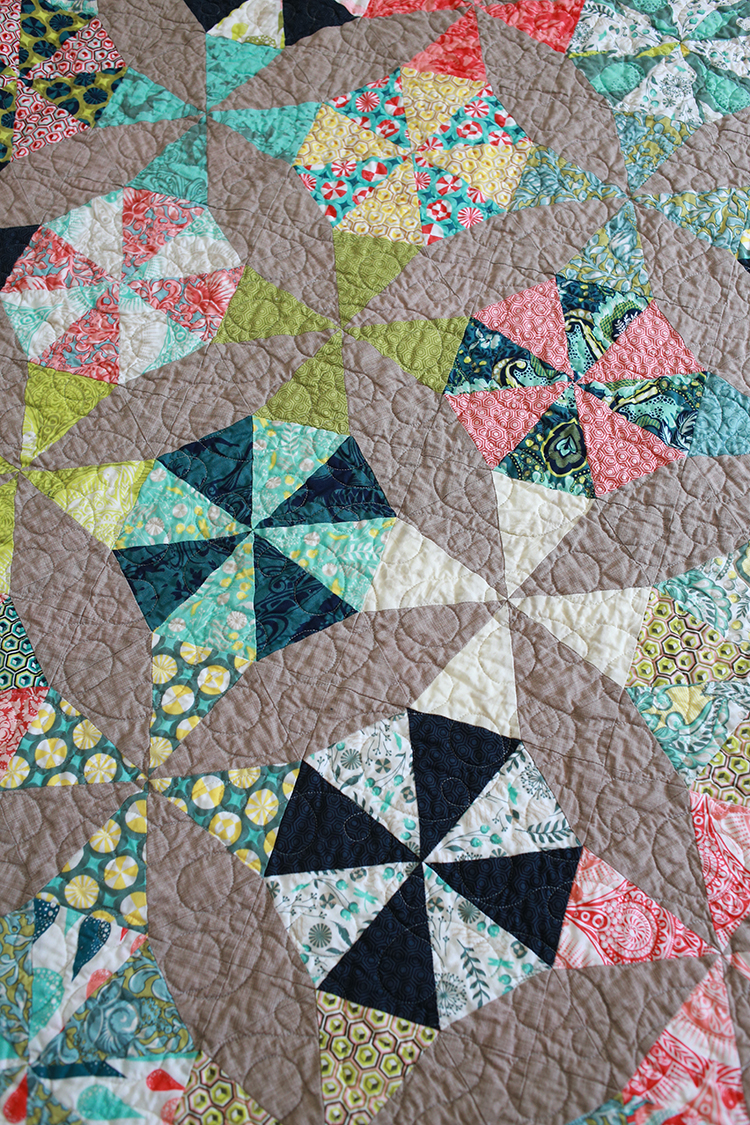
This quilt is a mix of two collections by Tula Pink*: Neptune and Prince Charming. I paired it with Quilter's Linen* by Robert Kaufman. I think the color is Parchment, but I am not 100% sure.
All the pieces for this quilt were cut with the Marti Mitchell Kaleido Ruler*.
Here it is, in all it's glory! This quilt has 90 blocks that finish at 7.5" square. The finished quilt is approximately 67.5"x75".
Last month I took this quilt home with me and photographed it on my parent's barn! It's such a reliable photo spot. For so long I would duct tape my quilts to the side of our brick apartment building. It's funto look back and see all the backdrops I've used over the years.
I sent the quilt top to Melissa Kelley of Sew Shabby Quilting for longarm quilting. The quilting design I chose is called Loops and Swirls. Since the fabrics and piecing are both so busy, a simpler pattern felt like the right choice! Can't go wrong with loops in my book.
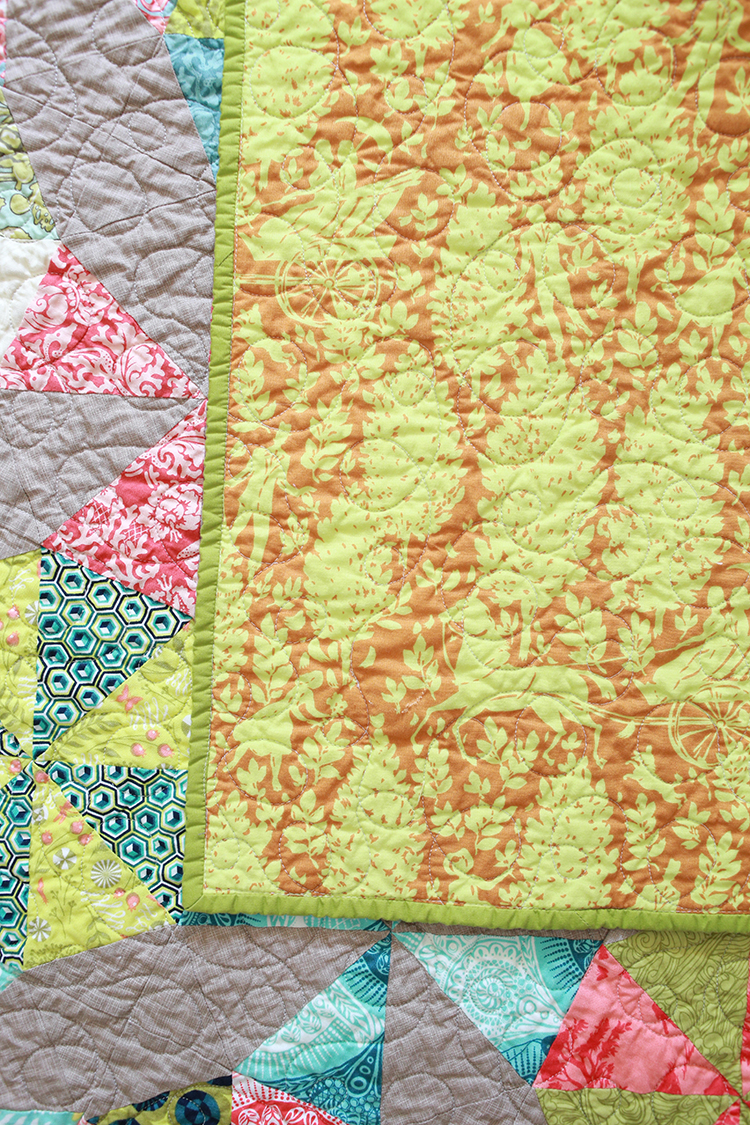
I bound the quilt in a green solid. I don't know why I love green fabrics for binding so much, but I don't fight it anymore. I had a hard time deciding on a backing for this quilt. Originally I had some Prince Charming yardage for the backing but I sold it a few years ago. I knew I didn't want to spend much, and I was able to find this print from Cameo* by Amy Butler for a bargain locally. It's not the best match for the quilt top, but that's okay. I think it works well enough.
This quilt languished as a work-in-progress for such a long time, it's honestly hard for me to believe it's really finished! I wish I could say I love the finished quilt, but it's not really my favorite. I'm not that into the fabrics anymore and I would definitely lay things out different if I were to make it again. All that said though, I'm happy that it is finished! I might revisit the Kaleidoscope design one day, but probably on a much smaller scale. We'll see. Never say never!
Pattern: No pattern
Fabrics: Neptune and Prince Charming by Tula Pink*, Quilter's Linen* by Robert Kaufman, Cameo* by Amy Butler, Pure Solids* by Art Gallery Fabrics.
Notions: Marti Mitchell Kaleido Ruler*
Happy Quilting!
*Note: Any links marked with an asterisk in this post are affiliate links. This means if you click through and buy something, I make a small commission, at no extra cost to you.
Monday, June 13, 2022
Happy Monday! Today I have a finished project to share, a wallet!
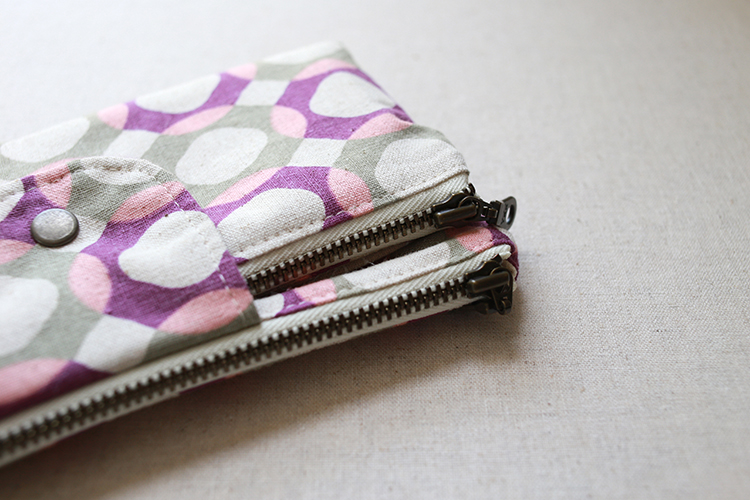
My Mom requested a new travel wallet for her birthday and I knew exactly which pattern I would use. The Double Zip Wallet from my friend Anna Graham's book, Handmade Style*. I made myself one of these wallets to take on our honeymoon seven years ago (see it here: Sandra Saddle Bag + Double Zip Wallet ). It has held up really well and I remembered it came together really fast!
One of my favorite things about this wallet design is that it has room for flat cash and also zippered pockets that can be used for change, coupons, or extra cards. I used canvas and cotton-linen fabrics for the entire wallet, with no interfacing. It's the perfect weight in my opinion! For the inside of the wallet I used one of my favorite prints from Euclid by Carolyn Friedlander*. I've used it in so many different projects.
For the exterior of the wallet I used a cotton linen print from my stash that I think Anna might have given to me. Or perhaps it came from the free table at a retreat? It has no selvedge info, so I don't know anything about it! It's been in my stash for a while now though, so it felt good to use it. Instead of a magnetic snap for the closure, I used a metal snap instead. I didn't have any magnetic snaps on hand.
For the zippers I used my favorite metal donut pull zippers* from Zip-it. I believe this color is vanilla.
I kept things really basic for the pocket linings and used utility canvas. This gave the wallet good structure and I was even able to use up some scrap pieces which was very satisfying!
I think the finished wallet turned out really cute. Honestly it makes me want to make another for myself, just for fun. My Mom likes it too, so that's good! She's coming to visit soon, so she'll be able to give it a proper test drive.
Pattern: Double Zip Wallet from Handmade Style by Anna Graham*
Fabrics: Euclid* by Carolyn Friedlander
Notions: Metal zippers*, antique brass snaps
Happy Sewing!
*Note: Any links marked with an asterisk in this post are affiliate links. This means if you click through and buy something, I make a small commission, at no extra cost to you.
Friday, June 10, 2022
Happy Friday! It's time for another Friday Favorites post!
- I spent most of the last week in the garden, so this week's post is going to be plant and garden heavy. Starting with this beauty! My mock orange tree is in full bloom right now and smelling so wonderful.
- My Mom sent me this lego set*! I've put the base together, and I'm trying my best to savor each bit and not rush through it.
- I am thrilled that for the second year in a row, my Hoya Krimson Princess* has graced me with a bloom! The flowers are so otherworldly. In contrast to the mock orange however, they do not smell good (at least not to me!).
- I ordered this garden colander* for myself. I can't wait to use it when I harvest veg this season!
- My first dahlia bloom of the season is opening! It's also my very first fully double seedling, which is very exciting. The seed parent is Crichton Honey, one of my favorite varieties.
- I made snickerdoodle cookies for the first time this week using this recipe from Smitten Kitchen. I used my very strongest cinnamon from Penzey's, which I think helped put them over the top!
- It is obvious yet how much I love Smitten Kitchen? I made her strawberry cake last weekend with farm fresh strawberries and it was so good. A keeper for sure.
- Loving this quilt in progress by Saija! The color arrangement is stunning.
- Speaking of strawberries, I'm not sure I'll be able to resist this new collection* from Kimberly Kight. So many strawberries!!
- Kitten has been enjoying our armchairs lately as a morning nap spot. She snuggles right up against my bear paw pillow. :)
Have a Great Weekend!
*Note: Any links marked with an asterisk in this post are affiliate links. This means if you click through and buy something, I make a small commission, at no extra cost to you.
Friday, June 3, 2022
Happy Friday! It's time for another Friday Favorites post!
- Our coreopsis has absolutely exploded. It is just the happiest plant. It makes me smile every time I pass by it!
- Love this scrappy quilt in progress by Laurelle!
- How cute are these little paper-pieced blocks by Rosie Taylor? She's got a free download for the templates in her online shop.
- We made this new slaw recipe from Smitten Kitchen. It was super tasty! We ate it as a side the first day and then as a main dish with crispy BBQ tofu on top the second day.
- I've been working on this puzzle* this week. There are so many fun details to find!
- We flew through the new season of Stranger Things this week! Michael wasn't too keen on it, but I really liked it! The first two seasons are still the best in my opinion, but this one was entertaining!
- This album* is playing on repeat at our house right now. We just picked up the vinyl and it's yellow (a Target exclusive)!
- My new favorite instagram account to follow is @littletudordiary. I love brick tudor houses!
- Dusty would like you to know that this is the best cat toy* in the whole world, according to her limited research. I'd take a photo of her playing with it, but it would just be a gray blur! :)
Have a Great Weekend!
*Note: Any links marked with an asterisk in this post are affiliate links. This means if you click through and buy something, I make a small commission, at no extra cost to you.
Subscribe to:
Posts
(
Atom
)