Scrappy Bear Paw Baby Quilt
Tuesday, January 30, 2024
Happy Tuesday! Today I have a little quilt finish to share!
This quilt ended up being a few years in the making, on accident! At the time I started it, I was working on building up my stash of baby quilts for gifting. I pulled fabrics around the adorable animal print from Lore by Leah Duncan*, which is one of my favorites of hers. I don't use a lot of this royal blue color, so that was a fun challenge.
I used my Scrappy Bear Paw Baby Quilt Tutorial for this quilt. It had been a while since I made one, and I liked the idea of using the paws as a place to showcase a special print.
I picked fabrics and pieced the quilt top back in Spring 2022, but then in just sat folded up in the sewing room. Fast forward to late this last Summer (2023) and I decided it was time to finish it! Baby P was here and I realized just how handy it was to have lots of little quilts. I kept the quilting super simple with my signature wavy quilting.
For the backing I used one of my prints from Geometric Bliss*! I always thought this print made good backings. And it's a relatively good match for the front of the quilt.
The binding is another print from Geometric Bliss*. Probably my most used print from that collection to be honest! I love a yellowy green!
This quilt has gotten so much use the last few months! It's the perfect size to cover a play mat we use upstairs. Keeps me from having to wash the cover for that every day. It's been a relief to see how well my quilts have held up to really frequent washings. Makes me feel like they're going to last a long time, which is good. Anyways, this was a fun one to make and nice to use up a bunch of stash and a long kept print!
Pattern: Scrappy Bear Paw Quilt Tutorial
Fabric: Main print from Lore by Leah Duncan*, backing and binding from Geometric Bliss*, the rest from scraps and stash.
Happy Quilting!
*Note: Any links marked with an asterisk in this post are affiliate links. This means if you click through and buy something, I make a small commission, at no extra cost to you.
Thursday, January 25, 2024
Happy Thursday! Today I want to catch up on some of the fun things I've thrifted in the last few months. I would love to get back to regularly sharing my thrift finds. I still love to thrift, and visit thrift stores most weeks! Baby P likes it too, so much stuff to look at!
First up, these towels! I feel like they have a bit of a quilty vibe. I love thrifting towels, they're one of my favorite things to look for. I've found some really cool designs over the years, and I love that they're broken in and already absorbent! Brand new towels that won't absorb water are a pet peeve of mine. These two are beach towel sized, which is probably what we'll use them for!
I have thrifted so many clothes for Baby, but this is probably my favorite piece I thrifted for her recently. It's a vintage rainbow t-shirt! It's 12 month, so we still have some time before she can wear it, but so cute.
Just last weekend I thrifted this homemade easel. It was in dire need of a cleaning, which really didn't take long. The plexiglass can be unscrewed from the base, which made cleaning easy. A little scraping and goo-gone took care of the tape. There were some screws missing, so I replaced them all with new. I think it cleaned up nice!
We are lucky enough to have a crafty thrift store nearby called Ecoworks. I am trying to stop in more regularly, and I found a bunch of good stuff last time I went! I was especially excited about the vintage sheet piece. It's not huge, someone turned it into a simple cafe curtain.
Sewing Through Fog has an extensive directory of secondhand fabric stores, there might be one near you! Check it out here: Secondhand Fabric Finder.
Another Ecoworks haul! I can never resist this sheet. Also check out these sweet cottons I found! I love the bows especially. And deadstock vintage greeting cards!! I went in this time for glass beads to make some bow ornaments. I should share those at some point, they turned out really cute.
I didn't realize how much good fabric I've thrifted recently until putting this post together! I don't have a lot of brown in my stash, so I though this vintage print was a good addition. The sheep ornaments kind of fall into my favorite creepy/cute category. I waited until they were half-off and then rescued them! I love stuffed animal ornaments. I swapped the ribbons on a few of them to dress them up.
This was a freebie! Someone in our neighborhood had it out at the curb. I think its a reproduction meant to look vintage, but I don't care. I really like it! I've got it next to my side of the couch.
Another free find. I picked up this funky wine rack table on the side of the road this Fall. I needed a nightstand for our guest room so I altered it for that. For the wood I used a wide board we pulled out a closet when we first moved in. I wish I had flipped the wine shelves upside down to disquise it a bit more, but oh well! It's functional and it was free, so that's what counts! At some point I want to paint the red fake tiles (they're metal covers).
Picked up a few yards of this glorious plaid at my local Goodwill. I love the colors so much!
It's been ages since I bought any vintage pyrex! I don't see much of it at all anymore, and this daisy piece was so cheerful. It was really dirty, but otherwise in good shape.
Last but not least some supplies for painting and a striped sheet! I have a hard time leaving these stripes behind. This one isn't in the best shape, but there are definitely still plenty of usable bits.
Happy Thrifting!
Tuesday, January 23, 2024
Happy Tuesday! Today I have a new bag project to share using my Workshop Tote Pattern.
I didn't make a lot of handmade gifts for the holidays this year (just lots of drawstring bags!), but I did make this tote bag for my brother's partner! We picked the fabric together and decided on this piece of cotton canvas that I indigo dyed. It was nice to finally cut into it and let it live its life as a functional object! This particular one I dyed here in CT and the fabric was accordion folded before being clamped. I love how you can see the clamp detail on the two ends of the fabric. I want to recreate something similar to this next time I do some dyeing!
It feels like this fabric was meant to be a bag! It's nice that it can really shine in a project like this. It's just cut into two pieces, so you still get to appreciate all the interesting shapes and details of the hand dyeing.
I didn't have a ton of yardage of this particular piece, so I just used it for the front and the back of the tote bag. For the sides and bottom I used some undyed bits of the same base cloth. It's a utility fabric that I bought from JoAnn's years ago. I really like it, I should see if I can find more!
I am actually running pretty low on indigo dyed fabrics! I've made four quilts with just indigo, which has used up a lot! You can see three of those quilts in the posts below, I still need to share one. I didn't really have a big enough piece for the lining, but I still wanted to use something indigo. So I cut into one of my drop cloths for the lining of this bag! I have a few sets of thrifted white sheets that I use as drop cloths when I dye and paint, thinking one day they'd be fun to use in some projects. Well the time finally came! For the handles I used some 1" cotton webbing.
Quilts I've made with Indigo Dyed Fabrics:
Indigo Courthouse Steps Quilt (and tutorial!)
Indigo Picnic Quilt
Indigo Patchwork Quilt
It felt good to use up a piece of my hand dyed stash, I don't always reach for the canvas ones when I'm pulling fabrics for projects. I also like the way the finished bag turned out with the contrasted sides and bottom. Sometimes not having enough fabric leads to good places! A good reminder (for myself!) to make things work with what you have.
Pattern: The Workshop Tote Pattern
Fabrics: Indigo dyed cotton canvas and thrifted bedsheet
Notions: 1" cotton webbing
I have a sew along for this pattern, which you can find here: The Workshop Tote Sew Along
Happy Sewing!
Friday, January 19, 2024
Happy Friday! I have a fun treat to share with you today, a new version of my stash tracking worksheet!
If you're new here, a little background. For the last eight years, I've been keeping track of the fabric (and yarn) that comes in and out of my stash. Each year I start at zero and try to end the year by using up more than I bring in. It's just a part of how I operate creatively at this point, and I've loved sharing about it over the years. When I first started tracking it was really eye opening to see just how much I was buying compared to how much I was actually using. Tracking helped me find a better balance (I still buy fabric!), and keep my stash at a much more manageable level. I've talked about this process a lot, but here are a few main posts to get you started if you're interested in trying something like this:
- How I Track My Fabric and Yarn Yardage
- Stash Tracking Worksheet
- What I've Learned Tracking My Fabric Yardage
Late last year, Megan Wenger (@lifeofmegananne on IG) reached out about a new zero fabric challenge that she is organizing! As a part of that challenge she expanded on my stash tracking worksheet and gave it a lovely refresh. She added an extra sheet with some of the yardage calculators from my tracking post, plus columns for tracking destash sale amounts or finished product sale amounts. And best of all, she's graciously sharing it with you! Find the new worksheet here: 2024 Net Fabric Zero Challenge Tracker
If you're interested in joining Megan's challenge be sure to follow along on her blog and instagram! I'm excited that she is turning this into a community event! Here is her intro post about the challenge: {Net Zero Fabric} January look ahead.
Happy Tracking!
Wednesday, January 17, 2024
It's a few weeks into the new year, and I think I've finally nailed down some crafty goals for 2024. To be honest, it has been difficult to get this post written. It took about a week into the year before I even felt like I could make any goals. Being the primary caretaker for our daughter has meant that my time to dedicate to creative work is extremely limited. Making super specific or challenging goals doesn't feel particularly motivating to me at the moment. And so I kind of fell into the "why bother" line of thinking for a few days. But, I realized that just because I don't feel like I can make the kinds of goals I usually do, doesn't mean I can't make any goals.
This year my goals list is pretty short, and I'm keeping it simple. I don't want these goals to add any stress to my life! I want there to be more wiggle room than I've given myself previously. This year is not about production, it's about nurturing my creativity. I realize I don't have to make goals at all, but I find comfort in a little structure. I think it would feel weird for me to have no goals at all. So without further ado, here are my goals for this year:
2024 Crafty Goals
- My #1 goal: When I do have time to make, spend most of that time playing. Work on whatever will make me the happiest in that moment.
- Try to use up more yardage than I bring in for both fabric and yarn. I'll track my yardage each month to help me stay on target. I'm less worried about this goal, I feel confident that my buying habits are in check after many years of tracking.
- Finish up 1 or 2 long-term projects in progress.
- Sew something with my vintage sheet stash.
- Finish my colorwork mittens (I'm so close already, this should be a quick win!).
- Restart my art practice. This one is already in progress, I'm taking this class at the moment and feeling so inspired.
- Crochet more amigirumi.
That's it! Low-key and (hopefully) managable. A few specific goals, but most are pretty open ended, which I think will be good for me. Have you made any crafty goals for 2024? If you're looking for some advice for making crafty goals, I wrote a post about my general approach to crafty goals a few years ago, you can find it here: Tips for Making and Keeping Crafty Goals.
Happy Making!
Saturday, January 13, 2024
Happy New Year! It's time to for my annual wrap up of the creative year. This is the 15th (!!) year I've posted a creative review, see previous years here.
For the first time in 8 years, I do not have stash numbers to share! I fell off my stash tracking pretty early in the year, and never had a chance to catch back up. I hope that at some point I can go back and at least get some rough numbers, but I can't spare the time right now. It is what it is and I'm trying not to stress too much about it! I did buy some fabric this year, but I feel confident that I still used up more than I brought in. I hope to just start this year of tracking fresh and try not get behind.
For yarn on the other hand, I definitely bought more yarn than I used. I hadn't bought any yarn in four years (whoa!), and it's much harder for me to use it up compared to fabric.
Some of my favorite finishes of the year I actually still haven't shared here yet, so I'm going to share a list of finished projects instead! This is actually more typical of my yearly review posts in the past. In 2023, I made...
3 Throw quilts (Large Keep Turning Quilt), 3 baby quilts, 1 mini quilt and 1 table topper
Lined Drawstring Bags: 28 Tiny bags, 2 Snack bags, 7 Everything bags, 4 Project bags, 2 Artist bags, 2 Wine bags, and 2 Laundry bags.
2 Tote bags (Patchwork Workshop Tote) and 3 scrappy zipper pouches
3 Christmas stockings (tutorial)
2 Pincushions
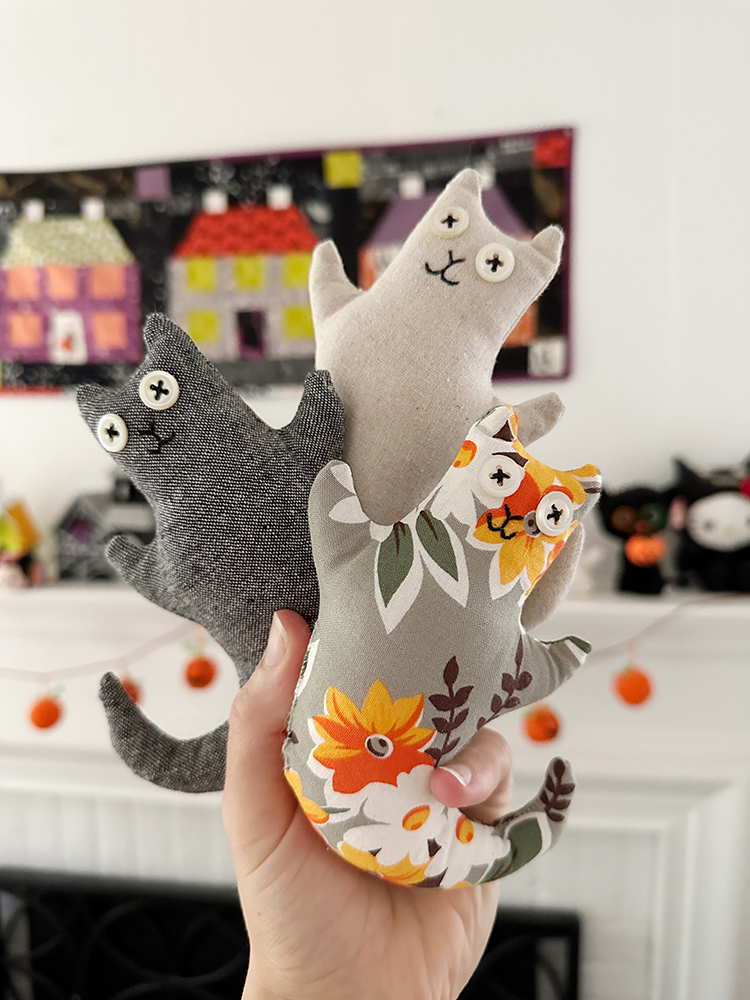
3 Ghost kitty softies (Ghost Kitties Tutorial by Ann Wood Handmade)
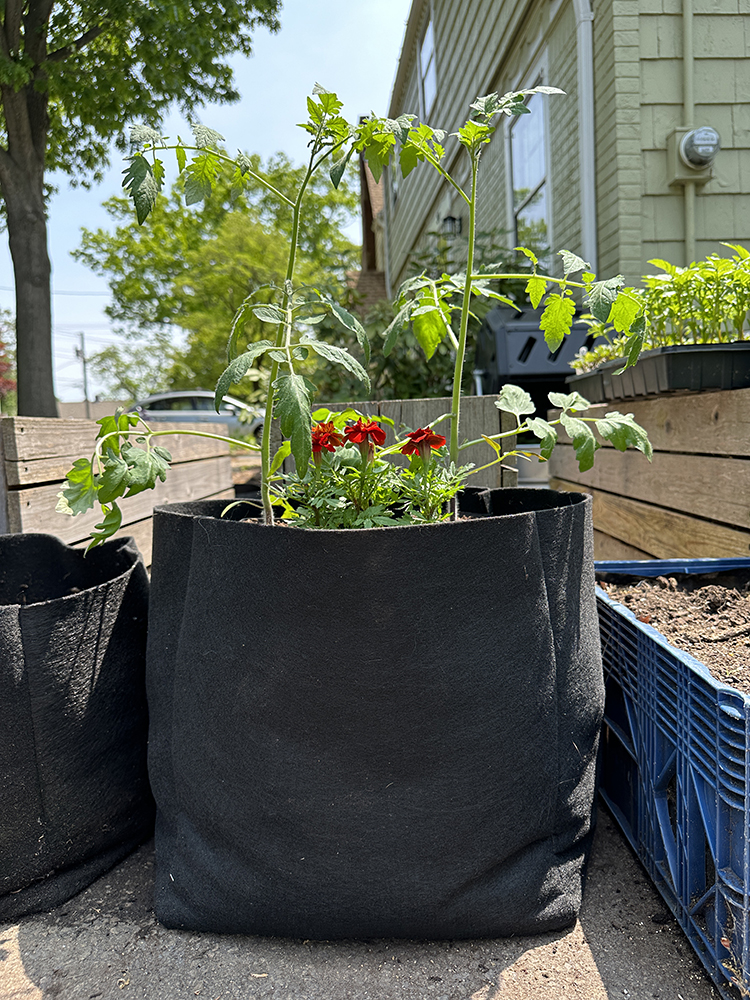
2 Felt grow bags (tutorial)
2 Vintage sheet dresses, 1 knit dress (Out and About Dress Pattern by Sew Caroline)
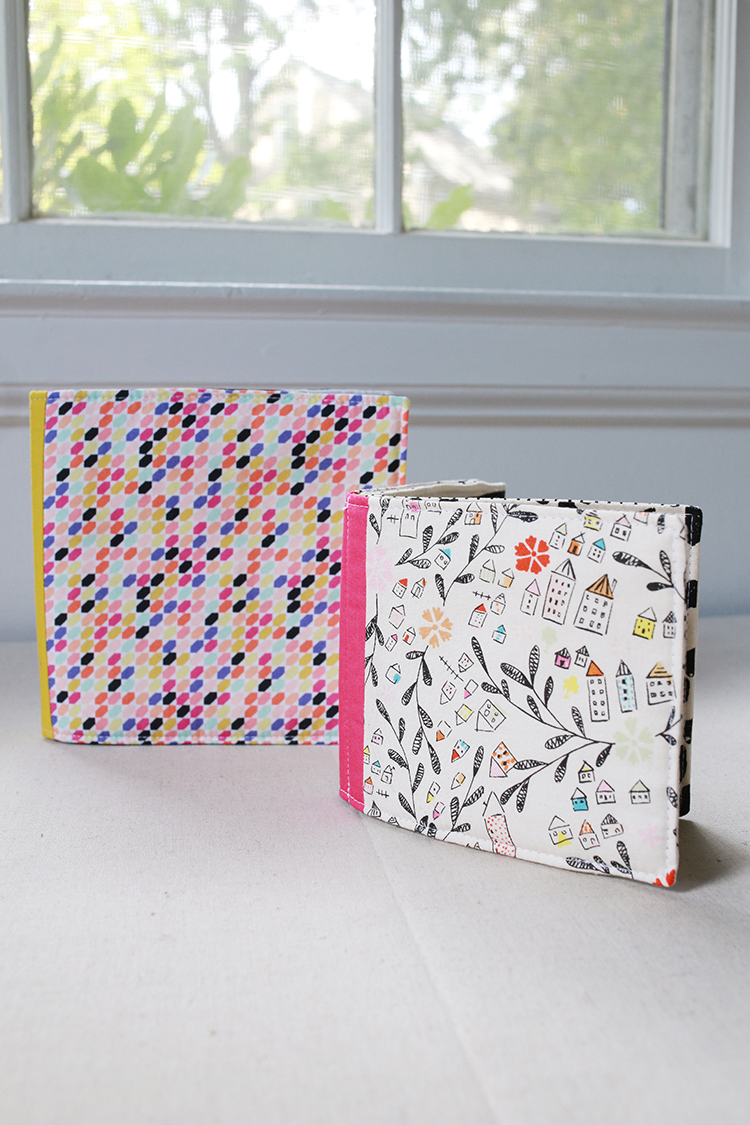
3 Fabric baby books, 2 pairs baby leggings, 2 knit baby hats, 1 car seat cover, 4 changing pad covers, 1 travel changing pad, 2 nursing pillow covers, 5 tag toys, and 2 crinkle strips. (See this post for baby sewing.)
Knitting + crochet: 2 Baby hats (Garter Ear Flap Hat by Purl Soho), and 5 Woobles amigurumi softies
I shared 8 informational or tutorial posts in 2023:
- Simple Two-Color Baby Quilt Tutorial
- DIY Felt Grow Bags (with Video Tutorial)
- High Contrast Fabric Baby Book Sewing Tutorial
- Easy Puppy Chow Recipe
- Gingerbread House Lined Drawstring Bag Tutorial
- Peppermint Stripe Lined Drawstring Bag Tutorial
- Exposed Gusset Lined Drawstring Bag Tutorial
- All About Cotton Twill Tape and How to Use it for Drawstring Bags
Now a quick look back at my 2023 Crafty Goals. I didn't do great in this department, but I was pregnant/had a baby this year, so at least I have a good excuse!
Sewing & Quilting Goals:
Use up more yardage than I bring in. I'll track my yardage to help me stay on target.
I believe I still brought in less than I used. I got behind on tracking yardage and never found the time to catch up.
Finish last quilt top from my HST book.
So close, I got it basted!
Finish my double wedding ring quilt.
I finished the arcs, but ran out of steam after that. This was a really overly ambitious goal, considering.
Work on my scrappy spiderweb quilt or liberty churn dash quilt each month.
This did not happen at all.
Start another vintage sheet quilt.
No, but I did plan my next one!
Make 1 small project (pincushions, zipper pouches, softies, etc.) per month.
I think I came close on this one. I did sew every month, not sure I always finished something.
Knitting/Crochet Goals:
Use up more yardage than I bring in. I'll track my yardage to help me stay on target.
I fell off tracking just like with fabric. But in this case I know I bought more yarn than I used, for the first time in a long time!
Knit a little every month.
Defintely did not do this.
Crochet a softie.
YES! Finally, after so many years of wanting to, I learned to crochet Amigurumi. I am so happy about this.
Finish current mitten project.
No, but I'm working on it right now!
Finish/frog a shawl project.
Neither.
Finish at least one pair of machine knit socks.
Nope.
And that's it! I'll be back soon to share my 2023 garden wrap up post plus my 2024 crafty goals!
Have Great Day!
Tuesday, January 9, 2024
Happy New Year! Before I post my yearly review or my goals for the new year, I wanted to make sure and properly wrap up the 2023 Lined Drawstring Bag Sew Along. Every year I intend to do this immediately after the sew along ends in December, but I've usually run out of steam and shift right away to getting ready for our holiday festivities. This past year was no exception!
First and foremost, thank you to everyone who participated in the sew along this season! It was the fourth year and I'm always blown away by all the beautiful bags everyone makes. It is a treat to watch them pop up on Instagram and know that not only are you all taking eco-friendly steps to reduce your waste, but you're also making my pattern a part of your holiday. It's really special.
I'm already thinking about ideas for next year's event! If you have any requests, please be sure to let me know. I've saved as many of your posts as I could in my highlights on my Instagram profile, which you can find here. The highlights are called "Your Makes".
All of the bags in this post were made using my tutorials or pattern:
Lined Drawstring Bag Tutorial (Everything size)
Lined Drawstring Bag Pattern (Tiny, Snack, Everything, Project, Artist, and Laundry sizes)
Lined Drawstring Bag Expansion Pattern (All the variations)
Wine Bottle Drawstring Gift Bag Tutorial
And now onto the bag parade! This also ends up being a bit of a recap of all four tutorial posts that I shared during the sew along, since I made bags for each post. Let's start with those and then move on to the just-for-fun bags that I made.
I made an Everything size bag (free tutorial size) to showcase the Gingerbread House Lined Drawstring Bag Tutorial. I love how this one turned out! Designing paper-piecing patterns is not something I do a lot of, so it was fun to stretch myself a bit.
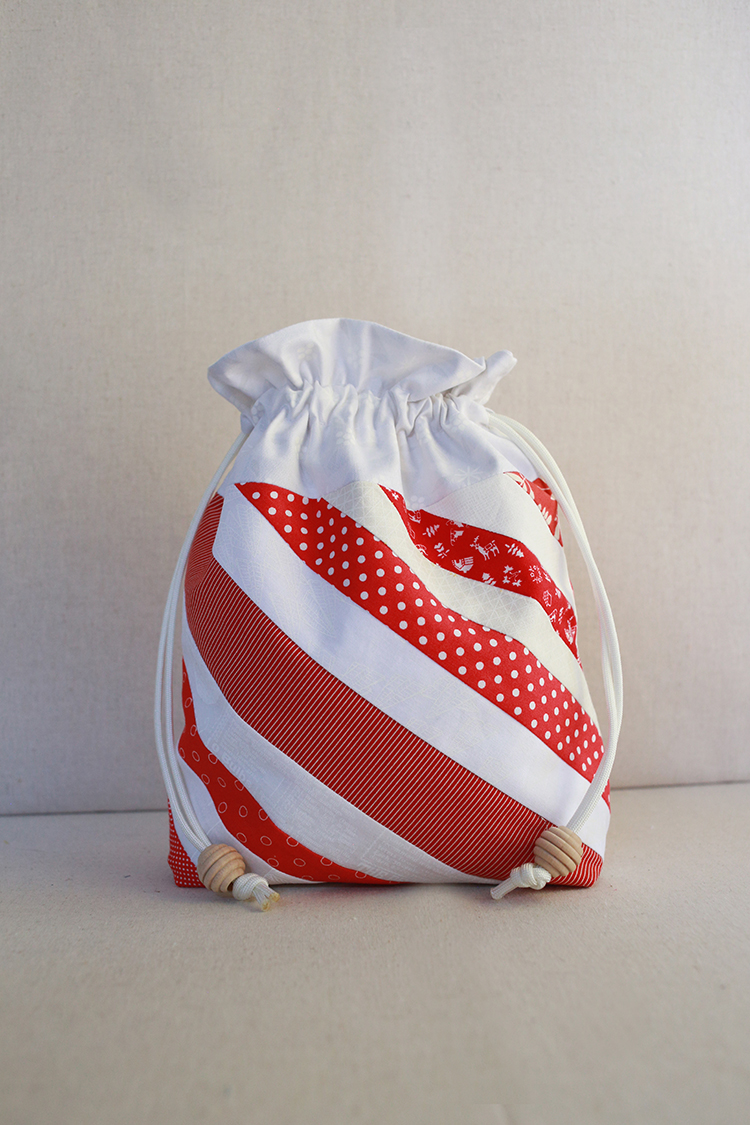
The bag I made for the Peppermint Stripe Lined Drawstring Bag Tutorial is also an Everything size bag. I made this bag when I was in the middle of sorting and reorganizing my scraps. I think I've been more inspired by my scrap collection than anything else these last few months!
For the Exposed Gusset Lined Drawstring Bag Tutorial, I made another Everything size bag! For this one I dug really deep into my stash. I think that blue print was in my destash pile for a while, but I'm glad I kept it around. Went for primary colors on this bag, just because!
I used one of my favorite prints from Hope Valley by Denyse Schmidt* for this Everything size bag. I made this one for the All About Cotton Twill Tape and How to Use it for Drawstring Bags post. See the little twill tape decorative tag! :)
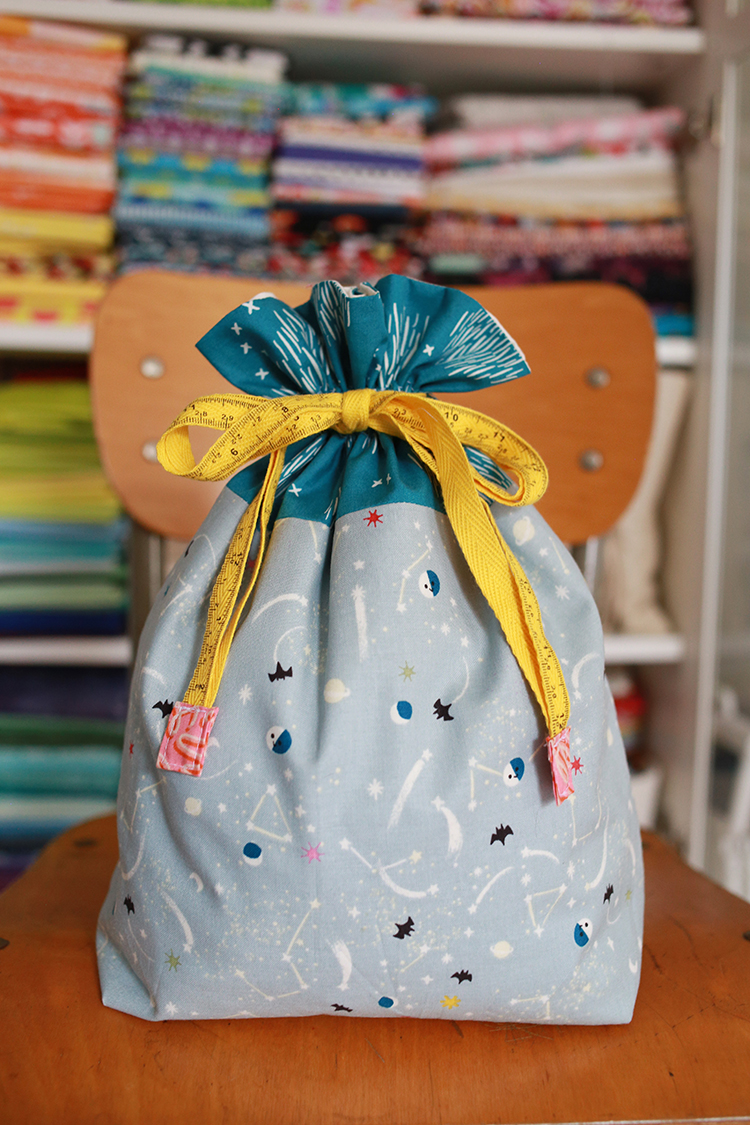
One more bag that I made specifically for the posts was this Project size bag for the All About Cotton Twill Tape and How to Use it for Drawstring Bags. Making the little twill tape end covers was a bit fussy, but so cute! I bought this fabric from Tiny Treaters by Jill Howarth* on a whim, maybe last year? I don't remember, but I love it! So whimsical.
Okay, let's take a look at the bags I made specifically to use with my family and add to my stash of bags that we use every year:
I made three Tiny size bags using this long scrap of fabric from Love at Frost Sight by August Wren*. When I ordered holiday fabric from Stash Fabrics a few years ago, a strip of this print was tied up around my order and I've been just waiting to turn it into a bag. When I finally cut into it, I realized I could get three bags out of it, so I did! The other parts are also from the scrap bin, so that felt good.
I think the Snack size is the size I make the least, so I'm trying to make more of that size lately. I went with the bottom accent variation in the expansion pattern for this bag. The main fabric is from Christmas in the City by AGF Studio*. Would be a cute bag to gift a sweet treat in!
I wanted to make a bag that would be holiday-ish that would double as a little knitting project bag, so I used this sweater print from Jolly Darlings by Ruby Star Society*. This is an Everything size bag. I don't have a lot of opportunity to use this hot pink paracord, so I added it here for some extra fun!!
These two bags were last minute additions to the line-up because we had some bottled gifts to give. For both I used my Wine Bottle Drawstring Gift Bag Tutorial. The main fabrics that I used were from Peppermint by Dana Willard* and Cozy Christmas by Lori Holt*. For the accents and linings I went in a slightly less Christmas-y direction to mix it up a bit!
I was really excited to finally make something using this print from Christmas in the City by AGF Studio*. I love the colors and of course I love vintage ornaments. This is a Project size bag made using the peek-a-boo lining variation from the expansion pattern.
My Mom collects these ceramic light up Christmas trees, so when I saw this fabric from Merry Kitschmas by Louise Pretzel*, I immediately thought of her. I went with the Easy Going variation in the expansion pattern for this Artist size bag. I tried to really mix up my twill choices with these bags, and I use the yellow measuring tape twill the least. Managed to make three bags with it!
Finally, one of two laundry size bags that I made this year. This print was an in person impulse buy from Holiday Classics by Rifle Paper Co*, and for some reason I bought a whole yard! Very unlike me. That's okay, it still made a cute bag.
Now this bag I love! I love stamps so much, and when I saw this holiday stamp fabric from Holiday Classics II by Rifle Paper Co*, I immediately bought it. Zero regrets!! This one is also a Laundry size bag.
I hope you enjoyed this little bag parade! I will be back soon to share some year end/new year posts.
Happy Sewing!
*Note: Any links marked with an asterisk in this post are affiliate links. This means if you click through and buy something, I make a small commission, at no extra cost to you.
Subscribe to:
Posts
(
Atom
)