Snack Size Pincushions Pattern
Tuesday, July 30, 2019
Happy Tuesday! It's been a while, but I actually have a new pattern to release today! The Snack Size Pincushions Pattern!
I've been thinking about writing this pattern ever since I wrote my All About Pincushions post. I made a tiny patchwork pincushion as a gift and decided to expand on the idea and create six pincushions that use up the smallest scraps!
All six pincushion designs are included in the pattern, and they are all paper pieced. This is the easiest way to work with small pieces in my opinion. There are paper piecing templates with cutting measurements included for all the pincushions, or you can work directly with your scraps.
Need a paper piecing refresher? Check out my step-by-step paper piecing tutorial here: Paper Piecing Tutorial. I consider this an intermediate pattern, previous paper piecing experience would be helpful!
The pattern is available as a PDF download in my online shop, here: Snack Size Pincushions Pattern
At this time it will not be available as a printed pattern. I'd love to do more patterns for smaller projects like this. What do you think? Is there a particular type of pattern you're on the lookout for? :)
Happy Sewing!
Thursday, July 18, 2019
Now that I have two all double gauze quilts under my belt, I wanted to upgrade from my little list of tips to a full post all about quilting with double gauze. I've learned a lot between these two quilts so I wanted to share all of that with you today. If you've ever had questions about working with double gauze, where to buy it or even what it is, this post is for you!
What is Double Gauze?
Double gauze is a really lovely lightweight woven fabric. It is made up of two thin layers of gauze fabric, that are tacked together with small stitches every 1/2" of so. You can't see the stitches from the front side of the fabric, but they are somewhat visible from the back especially if the print is dark and the second layer is lighter. Most of the double gauze that I've seen on the market today is 100% cotton.
Personally, my favorite double gauze fabrics are Nani Iro by Naomi Ito for Kokka. The designs and quality of the fabrics are so good and really appeal to me. I also love the solid double gauze fabrics by Kobayashi. They're really reasonable in price and come in great colors.
Where to Buy Double Gauze
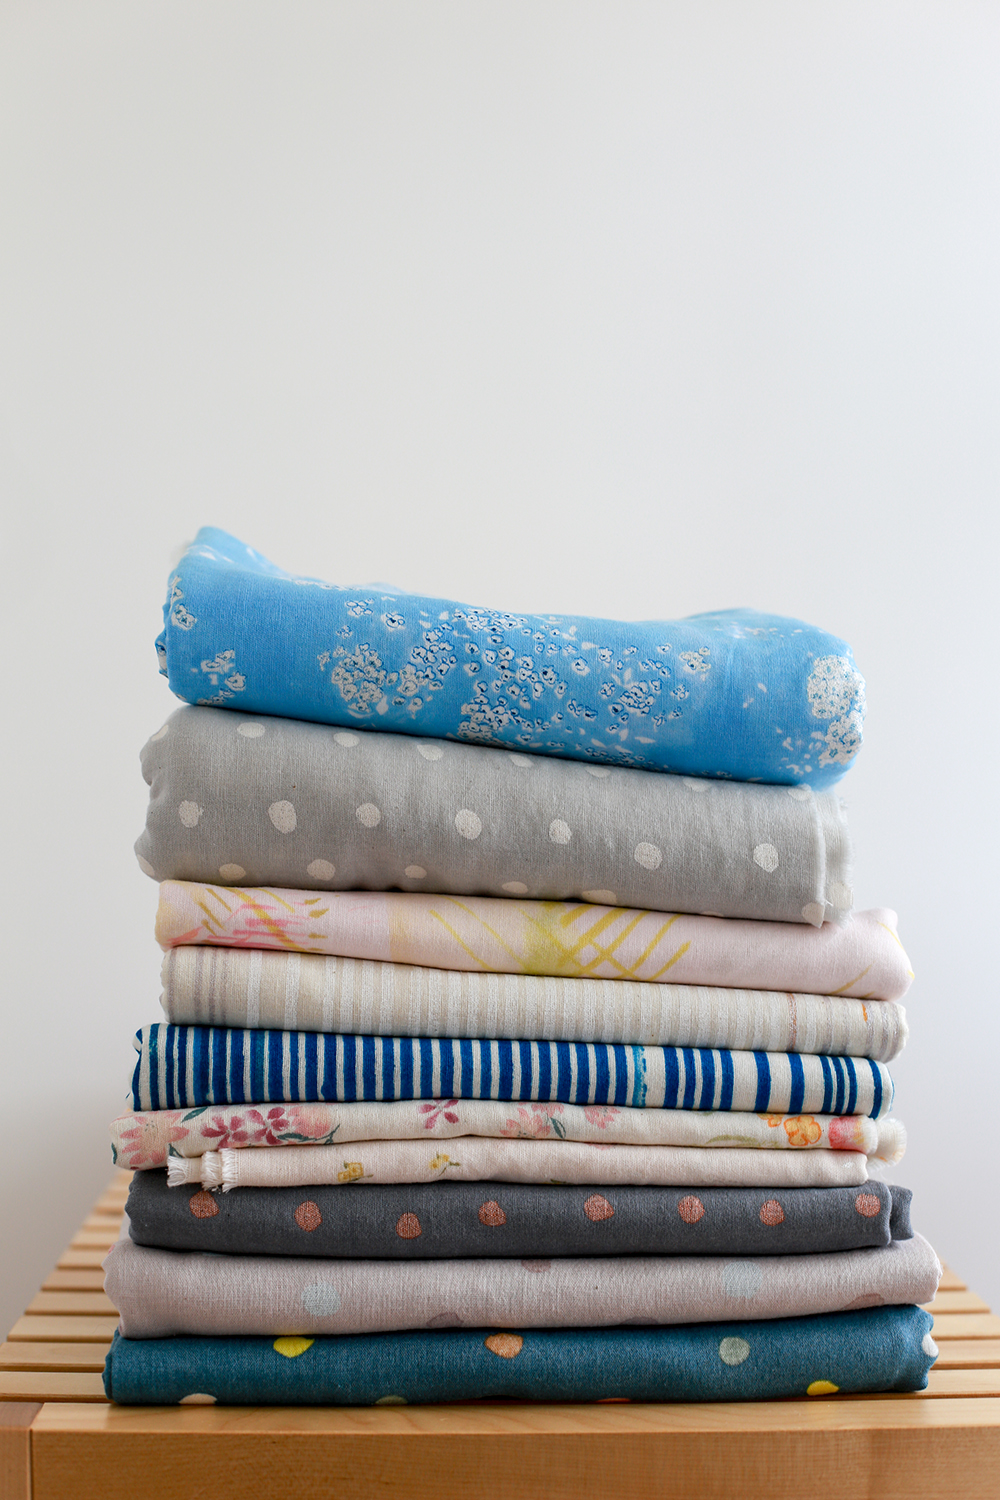
If you’re unable to find double gauze in your local fabric shops, here are a few online shops that carry double gauze:
Miss Matatabi (JP)
Fabric Worm (CA)
Jones & Vandermeer (NY)
Pink Castle Fabrics (MI)
Imagine Gnats (OH)
Stonemountain & Daughter Fabrics (CA)
Dry Goods Designs (WA)
Super Buzzy (CA)
Pre-washing Double Gauze
Double gauze has a tendency to shrink quite a bit. It's also pretty loosely woven, so it can be prone to unraveling. Both of these factors make pre-washing important in my opinion. I normally only pre-wash fabrics for garments, but I think it's worth taking the time to wash double gauze for a quilt. I prefer to wash it on cold with a mild detergent and tumble dry with heat.
Prepping and Cutting Double Gauze
You may find that double gauze is easy to cut and handle if it's pressed with spray starch or a starch alternative like Flatter by Soak. Personally, I don't find I need either to work comfortably with double gauze, but I do use a lot of steam. I like to change to a fresh rotary blade before cutting double gauze, so that all my cuts go cleanly through the fabric.
Seams, Needles, and Thread for Double Gauze
When working with double gauze I find it helpful to use a nice new needle. My favorite size for working with fine fabrics is 75/11. I've used both 50wt cotton thread and 100% polyester thread when piecing double gauze quilts and found that they perform pretty similarly. I do think that especially for the quilting, polyester is the way to go. It's typically stronger than cotton and it glides nice and smoothly through the fabric. I use 1/2" seam allowances when piecing with double gauze to make it a little extra durable. I press all my seams to the side, alternating direction every other row so that the seams nestled. Double gauze seams can get pretty thick, but I'm not comfortable pressing these seams open. My favorite sharp, thin pins are ideal for working with double gauze.
Batting for Double Gauze
For both of my double gauze quilts I've used Dream Orient quilt batting which is a bamboo/silk/tencel/cotton blend batting from Quilter's Dream. It is really airy and lightweight, which is a fantastic combination with the double gauze fabrics in my opinion. Regular cotton and cotton blend batting would be lovely too. Personally I wouldn't use anything super thick, but I have used 100% wool batting with double gauze and it's wonderful.
Quilting Double Gauze
For my first double gauze quilt, I sent it out for longarm quilting to Gina Pina. She did a beautiful dense loopy meander. For my second double gauze quilt, I did the quilting myself, simple lines on the diagonal. I followed all the usual steps that I take when basting/quilting and found no real difference between quilting this quilt and a quilt made from quilting cotton. I used pins for basting, spacing them about 7" apart. I used a walking foot and 100% polyester thread for the quilting, and I reduced the pressure of my presser foot slightly. I used a new 90/14 needle.
Binding Double Gauze
With double gauze quilts (and other non-quilting cotton quilts) I like to take an extra step to ensure it will hold up to wear. After trimming off the excess backing and batting, I use my serger to finish the edges of the quilt. In my mind this helps with durability if the binding were to get worn, but I have also found it made the edges lie flatter while attaching the binding which is a nice bonus. It's a totally optional step, but gives me extra piece of mind.
My other recommendation is to avoid double gauze for the binding. It can be thick and difficult to manage on garments, so I think it would be hard to use for binding on an all double gauze quilt. I've used voile or lawn as binding on my double gauze quilts and I love the difference in texture. It reminds me of baby blankets that have the wide silky binding.
Washing and Care for Double Gauze Quilts
I wash double gauze quilts pretty much the same way I wash all my quilts. I wash them by themselves, on cold. I use a mild detergent without fragrance and I throw 1/2 cup of regular table salt into the washer with my quilt to prevent color bleeds. A few years ago my Mom mentioned that my Grandmother used to do this and I've been doing it ever since! I don't know why it works, but I haven't had a problem since I started using salt. The fabrics are pre-washed in this case, so bleeding isn't as likely, but I still use it as a precaution. Once it's washed I throw it in the dryer and tumble it dry on high. I want it to shrink up to get that nice double gauze crinkle.
One difference I have noticed between my two double gauze quilts is that it seems like the more dense the quilting, the more wrinkled up the quilt will get. The extra quilting also makes the quilt surprisingly heavy compared to the one with less quilting. Just something to keep in mind when you're planning your quilt!
I wanted to share a little side-by-side comparison of the quilt before and after washing/drying. The fabrics were pre-washed before piecing. The photo on the left was taken right before I threw the finished quilt in the wash. The photo on the right was taken after it was washed on cold and dried on high.
My Double Gauze Quilts
Nani Iro Dreams Quilt
Double Gauze Plus Quilt
Nani Iro Vast Quilt
Happy Quilting!
Tuesday, July 16, 2019
Happy Tuesday! I have my most recent quilt finish to share with you all today!
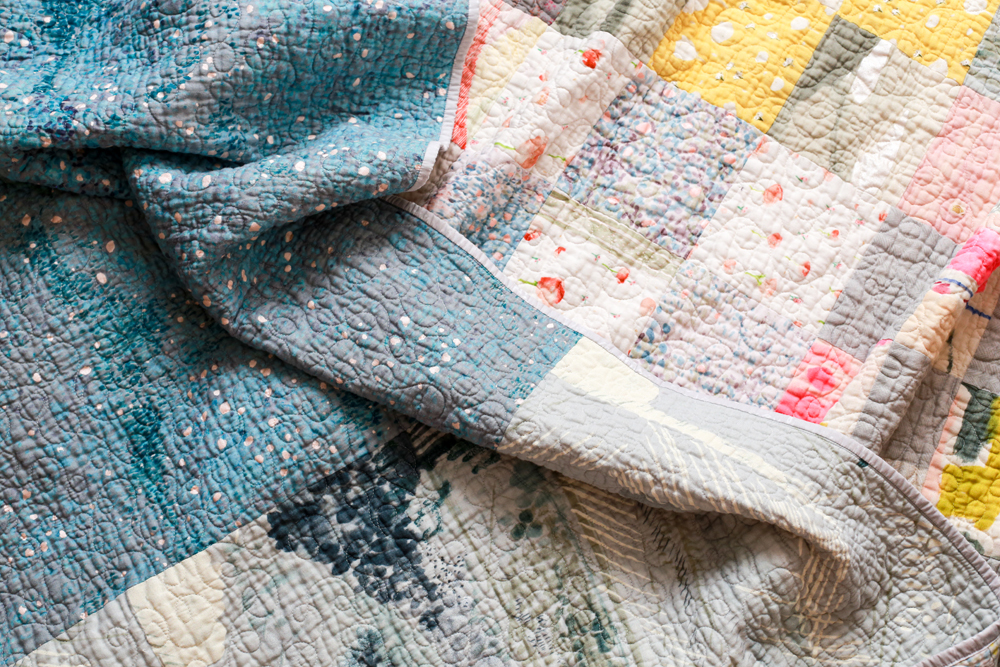
After I finished my first double gauze quilt (see that quilt here: Nani Iro Dreams Quilt), I knew I wanted to make another one. It's been a few years and I managed to collect even more beautiful double gauze fabrics. All the ones I used in this quilt are Nani Iro by Naomi Ito. They're super soft and the colors and patterns are just so appealing.
For more information on quilting with double gauze, see this post: Nani Iro Dreams Quilt + Tips for Quilting with Double Gauze.
Where to Buy: If you’re unable to find double gauze in your local fabric shops, here are a few shops I've ordered from that carry double gauze:
Miss Matatabi (JP)
Fabric Worm (CA)
Pink Castle Fabrics (MI)
Super Buzzy (CA)
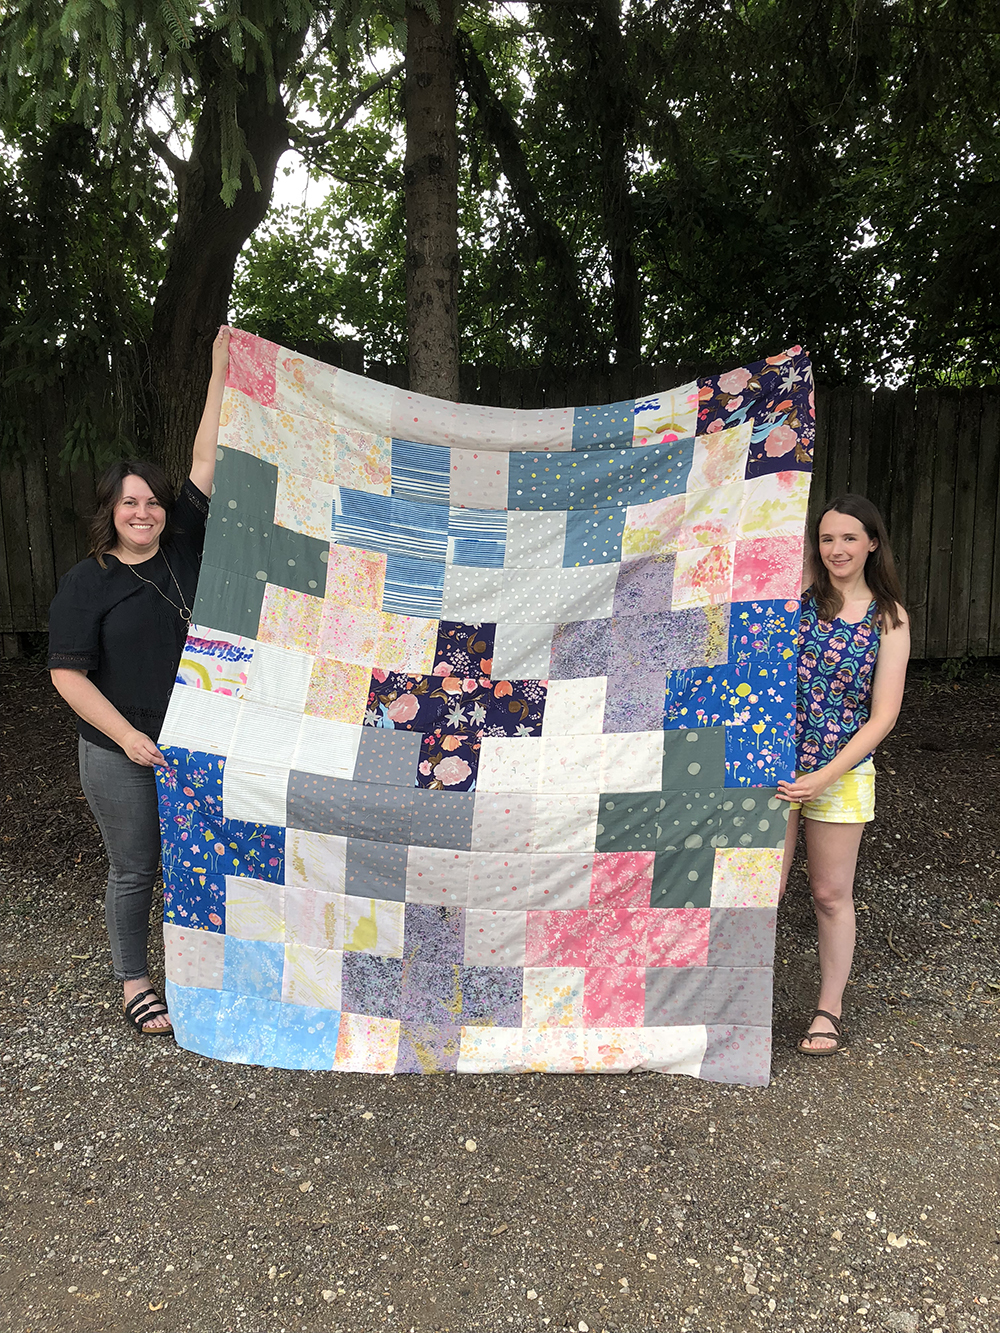
I wanted to keep things simple for this quilt because I wanted the fabric to be the star of the show. I decided to make a plus quilt with my Arithmetic Quilt Pattern. This is the largest square size in the pattern. I did use 1/2" seam allowances on this quilt, so the square end up a little smaller.
I finished the quilt top last August at our annual quilt retreat (thanks to my friend Brianne for helping me hold it!). In the Fall I started hand quilting it, but never really made it that far. Last month I decided to rip out the quilting. I basted it and quilted it that same week! I want to try hand quilting again, but on something a bit smaller.
All quilted up and washed! I kept the quilting as simple as possible and went with diagonal lines. This is my tried and true quilting, and I'm honestly not tired of it. Sometimes I wish I had the energy/desire to do more complicated quilting, but for the most part I like the sweetness of designs like this. It has a vintage-y feel to me.
I used Quilter's Dream Orient Batting for this quilt and it is such a wonderful combo with the double gauze. I love the way double gauze gets all crinkly and soft.
For the backing I used lots of double gauze dot yardage. I knew I'd have to piece something, and I liked the idea of sticking with a theme.
For the binding, some cotton lawn I had in my stash. I'm not sure exactly where it's from, I think I picked it up off the fabric table at camp actually! I feel like I typically use lighter colored binding fabrics, so it was fun to mix it up!
I wanted to share a little side-by-side comparison of the quilt before and after washing/drying. The fabrics were pre-washed before piecing. The photo on the left was taken right before I threw the finished quilt in the wash. The photo on the right was taken after it was washed on cold and dried on high.
You can find pattern I used in my online shop here: Arithmetic Quilt Pattern
Happy Quilting!
Friday, July 12, 2019
Patchwork Essentials: Unicorn Vast Quilt
Happy Friday! I wanted to take some time to check in with my 2019 Crafty Goals. We're a little over half-way through the year and I thought it would be fun to see how things are going so far! Here is my goals posts from January: 2019 Crafty Goals.
It's not too late to make some crafty goals for this year! If you're looking for a place to start, I wrote a post a few years back all about how I make mine. You can find it here: Making and Keeping Crafty Goals.
- Use up more fabric yardage than I bring in. I'll track my yardage each month to help me stay on target.
Doing pretty well with this goal so far! At this point I'm down 39.5" yards for the year! I have bought so little fabric this year, I'm feeling confident that I can continue down this path.
- Make sewing a daily habit, even if it's only for 15 minutes.
This has been a challenge for me. I've been sewing most days lately though, so making good progress. I think I need to designate a specific project for this goal, so that I can easily pop into the sewing room even on days where I feel like I don't have the time to sit down and sew. I also think I could benefit greatly from a simple paper calendar that I could put stickers on to watch my progress and keep myself motivated.
- Complete one small scrap project per month.
I think I've had the most success with this goal! Especially the last few months I've been making multiple scrap projects a month. I've been turning to my scraps way more often, which feels really good.
- Finish or destash four long-term WIPs.
I have finished two long-term WIPs so far, so I am on track. Would love to finish more than four if I can! If I was really serious I would decide exactly which ones, but it can be hard to choose!
- Make a quilt from my chambray stash.
Crossed this off the list early in the year! I made Michael a quilt for his birthday from all chambray, you can find it here: Chambray and Denim Flying Geese Quilt
- Sew four new garment or bag patterns, ideally one per quarter.
Originally when I made this goal I was thinking garments or bigger bags. I haven't made any of those, but I have used two new smaller bag patterns. I made a Strawberry Minimalist Wallet and some Confetti Zipper Pouches. I'm hoping to round those out with some bigger projects the second half of the year.
- Practice a new skill (like hand-quilting, applique, y-seams, curves)
I have tried hand-quilting and applique so far this year, but didn't really give either a very good effort. Hoping to maybe focus on curves in the second half of the year!
- Use up more yarn yardage than I bring in. I'll track my yardage each month to help me stay on target.
So far so good, I'm down 426 yards for the year.
- Finish a shawl WIP (Briochealicious, Daybreak or Hitchhiker).
Currently making no progress on this goal! I honestly haven't been knitting at all lately. It was really bothering my wrist and fingers, so it's been a needed break from it.
- Finish a pair of colorwork mittens.
I started a new pair in the new year, but it's too hot right now to knit!
- Knit or crochet a softie.
Haven't even settled on a pattern or project yet, but I have a lot of good contenders.
- Complete a vintage crewel embroidery.
I started one, and I actually worked on it yesterday. So there is hope!
- Weave a table runner.
Put my loom back together last month, but have not started this project yet. Again, it's too hot right now!
- Make wooden ornaments with the Cricut*.
Planning to work on these closer to the holidays.
- Create a stash of handmade greeting cards.
Really need to get moving on this one for sure!
Do you make crafty goals? How have you been doing so far this year? Let me know in the comments!
Happy Making!
*Note: Any links marked with an asterisk in this post are affiliate links. This means if you click through and buy something, I make a small commission, at no extra cost to you.
Wednesday, July 10, 2019
Time to share another quilt from my book, Patchwork Essentials: The Half-Square Triangle! You can find all the posts about Patchwork Essentials using the MY BOOK link at the top of every page, or here.
I'm going to share each quilt, in order, with the exception of a few that I've already shared. We're in the Patchwork Play chapter and it's time for the Prism quilt!
For more on how the book is structured see this post.
Need a copy of the book? Buy a signed one here: Patchwork Essentials: The Half-Square Triangle
This was one of the first quilts I made when I started writing the book. It was early enough in the process that I actually took a progress photo! I had good intentions of doing that with every quilt, but as the deadline inched closer I had more trouble keeping that up.
Prism is made with quarter-square triangles, and features a variety of jewel tones with a few pops of black and gray. All of these fabrics were from my stash, which is always fun! Included with this quilt there are also instructions on how to make any size quarter square triangle you'd like + what size squares to cut.
I quilted this one myself, with my go-to doodle loop meander. It's a pretty big quilt so it was no small undertaking. I quilted about half the quilts in the book myself and had the others longarm quilted.
I had the perfect backing fabric for this quilt, a pretty fuchsia butterfly print by Bari J. I bound it in one of my prints from Nordika.
I made another Prism quilt in 2017, this one a little bigger! You can see more of this quilt here: Minny Muu Prism Quilt
From a little further away, I think it almost looks like a faceted stone, hence the name Prism!
Happy Quilting!
Wednesday, July 3, 2019
Happy July! It's time for June's monthly report. See past reports here.
I can't believe it's been almost a month since I last posted! I didn't mean to take such a break, but I'm hoping to get back on track with sharing my makes this month. I went home to Ohio for a week, so I know that threw my schedule off a bit. This sweet quilt ladder is in the guest room at my parents, and just so happens to be filled with some of my quilts!
I actually did a lot of sewing last month, mostly gifts. It was my friend Amanda's birthday, plus my Mom's birthday and Father's Day, so I was kept busy stitching! First up, I made my Mom a fun little zipper pouch. This is the boxy pouch from my Triplizip Zipper Pouch Pattern. I used this patchwork cheater print from Echino and some Essex linen so it's got a nice weight to it.
I also made two more mini sewing tool organizers! I have loved making these little guys. One was for my friend Amanda, and one for my Mom. I used the #10 Sewing Caddy Pattern* by Sew Can She. You can see the other two mini ones I made here: Mini Sewing Tool Organizers.
Last but not least, I made my Dad a pillow to match a quilt I made him a few years ago. Thankfully I still have the matching fabrics, so it was a pretty straightforward project. Just a simple star block with a fussy cut center! I used up some leftover half-square triangles on the back too. Here is the quilt that goes with it: Deer Sparkling Cider Quilt.
To keep myself accountable for my stash goals, I track my yardage for fabric and yarn each month. Read more about how I track here. Here is how I did in June:
June Fabric
Used up: 13.75 yards
Brought in: 4 yards
Net: -9.75 yards
Year to date: -39.5 yards
June Yarn
Used up: 622 yards
Brought in: 0 yards
Net: -622 yards
Year to date: -426 yards
I finally bought some fabric! This was my first fabric purchase since March. We stopped at the Polka Dot Pincushion, which is one of my favorite shops that is local to my parents. Had to pick up a few things while I was there. Otherwise, I was still in the negative this month thanks to all the gift sewing I did. Plus I finished a quilt that I will be sharing soon. I also get into the negative on yarn, since I destashed a couple skeins this month.
Of course while I was home in Ohio we did plenty of thrifting. I was pretty lucky with vintage sheets this trip!
George the bunny, munching on some hay!
Have a Great Month!
*Note: Any links marked with an asterisk in this post are affiliate links. This means if you click through and buy something, I make a small commission, at no extra cost to you.
Labels:
Bags
,
Bunny
,
Monthly Report
,
Pillow
,
Sewing
,
Triplizip Zipper Pouch Pattern
,
Vintage Sheets
Subscribe to:
Posts
(
Atom
)