Pages

Wednesday, December 12, 2018

Semi-Handmade Gift Ideas


Does anyone remember the show Semi-Homemade Cooking with Sandra Lee? It was on the Food Network and I think it came on after Rachel Ray when I was a kid. The general premise of the show was to cook something with half pre-made products and half fresh ingredients. With limited time left before the holidays for gift making, it got me thinking about applying that basic concept to crafty gift giving.

I've pulled together some of my favorite tutorials/patterns and paired them up with ready made gift ideas. There's a mix of my tutorials/patterns as well as patterns by others that I've loved making (and giving) as well.

Make any gift a little more personal by wrapping it in a lined drawstring bag! Lined Drawstring Bag Tutorial + Easy Going Lined Drawstring Bag Tutorial

Triangular Zipper Pouches

Triangle Pouch Sewing Tutorial by A Spoonful of Sugar
(find my post on making other sizes here)
Pair it with: Any little stocking stuffers you want!

Sew Together Bag

Sew Together Bag Pattern by Sew Demented
Pair it with: Travel sewing supplies, hand piecing/quilting supplies, little stocking stuffers

Cosmetic Pouch
https://incolororder.bigcartel.com/product/triplizip-zipper-pouch-pdf-pattern
Triplizip Zipper Pouch Pattern
Pair it with: Bath set, manicure set, socks

Sewing Tool Caddy

#10 Caddy Pattern by Sew Can She
Pair it with: Sewing supplies, art supplies

Handmade pillow
https://incolororder.bigcartel.com/product/giant-vintage-star-quilt-pdf-pattern
Giant Vintage Star Quilt Pattern
Pair it with: Slippers, children's book, stuffed animal

Potholders
https://www.incolororder.com/2012/04/tutorial-half-square-triangle-pot.html
Half-Square Triangle Potholders Tutorial
Pair it with: Wooden cooking spoons, cookbook, baking mix

Small Fabric Bin
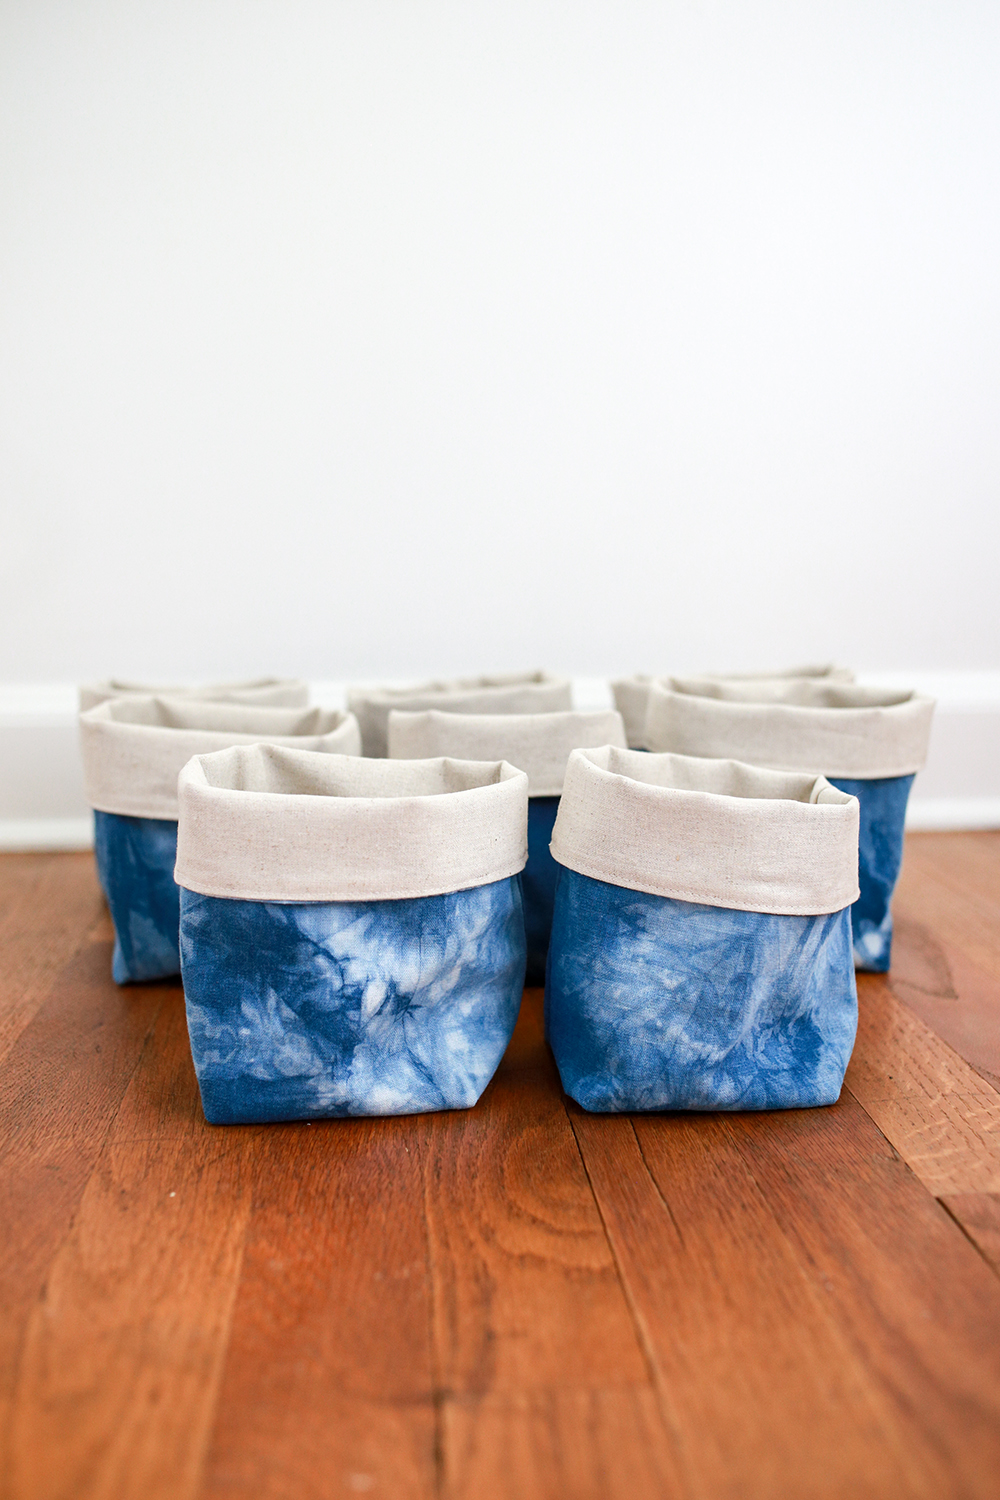
https://carolynfriedlander.com/quick-thread-catcher-tutorial/
Thread Catcher Bin Tutorial by Carolyn Friedlander
Pair it with: Candy/cookies, candle, plant

Mug Rug
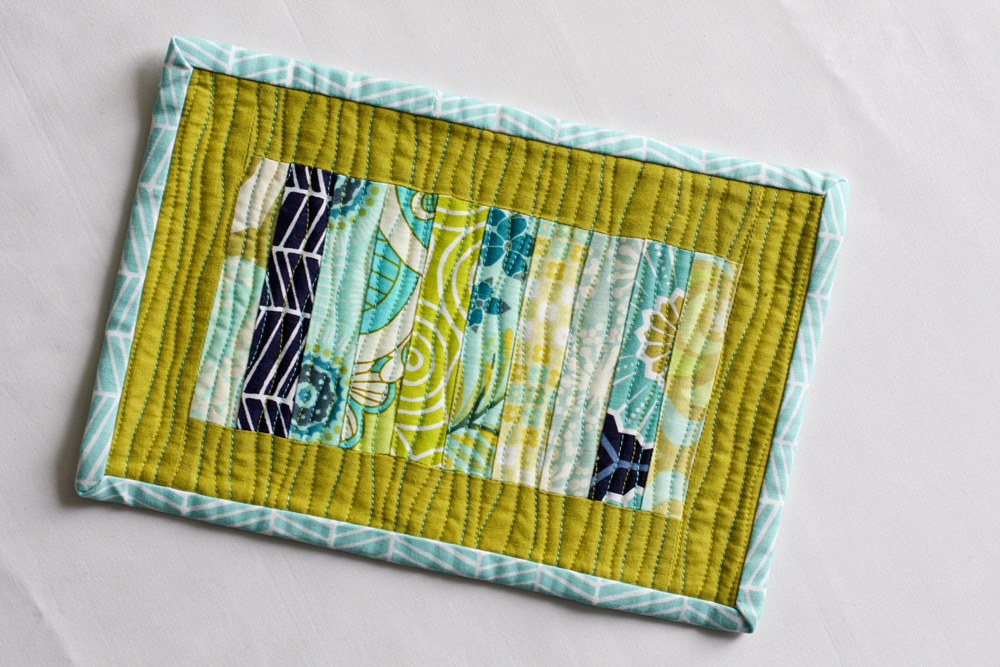
https://www.incolororder.com/2011/03/scrappy-stack-mug-rug-tutorial.html
Scrappy Stack Mug Rug Tutorial
Pair it with: A cute mug and some hot cocoa or coffee

Enamel Pin Banner
https://www.incolororder.com/2017/06/enamel-pin-banner-tutorial.html
Enamel Pin Banner Tutorial
Pair it with: A selection of enamel pins.

Open Wide Zipper Pouch
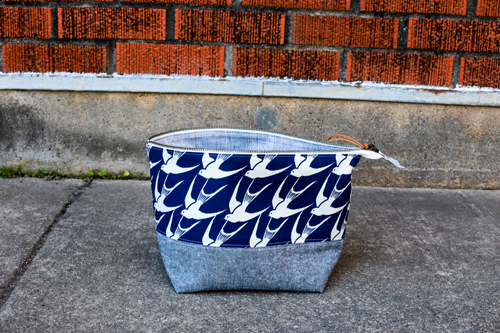
https://noodle-head.com/2012/06/open-wide-zippered-pouch-diy-tutorial.html
Open Wide Zipper Pouch Tutorial by Anna Graham
Pair it with: Yarn and knitting pattern, hand soap/lotion

Tote Bag
https://incolororder.bigcartel.com/product/the-workshop-tote-pdf-pattern
Workshop Tote Bag Pattern
Pair it with: Sketchbooks and art supplies, quilt kit

Looking for something sweet to make? Here are some of my go-to giftable recipes:

White Chocolate Check Mix
https://www.incolororder.com/2016/12/white-chocolate-chex-mix-recipe.html
White Chocolate Chex Mix

Chocolate Pretzel Cookies

Chocolate Pretzel Cookies

Salted Soft Caramels

Salted Caramels by The District Domestic

Red Velvet Cookies

Red Velvet Gooey Butter Cookies by Peace Of Cake

Cookie Mix

Don't have time to bake? Consider gifting a baking mix of your favorite recipe!

Happy Making!

Wednesday, December 5, 2018

Quilted Christmas Tree Skirt


Happy Wednesday! I'm so excited to share my Christmas tree skirt today! I've been having a lot of fun making holiday pieces this year, including the stockings I shared last week: Handmade Christmas Stockings


I have been wanting to make one of these ever since my friend Christina designed it for a swap way back in 2010. A few years later, she released her pattern for it, but I didn't have a tree! Now that we're in a house with room for a full size tree, I finally could make one!


For the fabrics and colors I wanted it to be traditional Christmas colors. I'm not a huge fan of red, so adding in pink helps balance it out for me. I started with this adorable green print from Little Joys by Elea Lutz and pulled blenders in shades to match. For the background and binding I used Le Creme Swiss Dots by Riley Blake in baby pink.


The top actually came together really quickly back in September. Then I let it sit for a little while. I wasn't sure how to quilt it right away, plus I was already worried about the binding!


I ended up dusting off my free motion quilting skills and did a simple doodle loop all over. It felt like it was the right choice for this project and I'm glad I took the time to do it. It took a little while to get comfortable with it again, but it was worth it!


For the binding, I knew I wanted to use the same fabric as the background so that it would blend in nicely. I don't know why I was so worried, the binding went on really smoothly. The inside corners were a breeze and even the inside circle went on easy. I attached it to the front by machine and took the time to hand stitch it to the back.


I love, love, love how this project turned out. It's such a unique design and I think it looks great around our tree. I'll look forward to pulling this out every year!

Happy Quilting!

Monday, December 3, 2018

November Monthly Report


Happy December! It's time for November's monthly report. See past reports here.


At the beginning of the month I traveled to Michigan to teach at this year's Glamp Stitchalot event hosted by Pink Castle Fabrics. I taught at the inaugural event in 2015, so it was really fun to be back again. It was a great time, thank you to all of the lovely attendees, fellow teachers and Pink Castle Fabrics staff! You can see my four samples from my class above.


I got to room with my fellow teacher and friend Amanda Jean at the event, so I knew I wanted to make her a little something! I stitched up a scissor cozy using this tutorial, with some fabrics I knew were right up her alley. This is a really satisfying little project to make, if you haven't made one yet!


Stop the presses, I'm actually knitting again! I have not spent much time knitting in the last year to year and a half. Lately I've been feeling the itch to knit, so I started a pair of colorwork mittens. I'm knitting the Sweet Nectar Mittens. And of course storing them in a drawstring bag. This is one of my favorites, it's the project size (pattern), which is perfect for a project that takes more than one skein of yarn.


To keep myself accountable for my stash goals, I'm tracking my yardage for fabric and yarn each month. Read more about how I track my here. Here is how I did in November:

November Fabric
Used up: 21.75 yards
Brought in: 7.75 yards
Net: -14 yards
Year to date: -29.5 yards

November Yarn
Used up: 0 yards
Brought in: 0 yards
Net: 0 yards
Year to date: +218 yards


I am really happy with my yardage in/out this month. I had a few purchases this month while I was at Glamp and also around black Friday, so I wasn't sure how my numbers would even out. I ended up finishing up a quilt, my tree skirt, two sweatshirts and a few other small projects that helped. 


We spent a ton of time in November dealing with our leaves. This tree in our front yard is so pretty all year, but especially right before it looses it's leaves. Just wanted to document it! We're really glad that we've got pretty much all our leaves taken care of until the Spring.


Spent some time over Thanksgiving weekend making a few handmade ornaments. I make these paper star ornaments every year so that I don't forget how to make them. This is a great set of instructions if you're interested in making some too: 3-D Stars Tutorial


George bun! He's as cute and sweet as ever.

Have a great month!

Wednesday, November 28, 2018

Handmade Christmas Stockings (and Template Download)


Happy Wednesday! Today I wanted to share a holiday project I made this Fall, stockings! Now that we live in a house and have a mantle, it was finally time to make some stockings.


I knew I wanted to make three stockings, one for each of us and one for George bunny. Initially I thought maybe I'd do something patchwork like the mini stockings (tutorial) I made a few years ago, but I decided something a bit simpler was best. So I dug into my Christmas fabric and had enough of this pretty vintage holly print I found thrifting.


I scoured the internet looking at different tutorials and patterns for stockings but I could not find one with the shape I was looking for. I wanted it to have a classic shape, with a straight "foot" and a straight "leg" too. So, I ended up drawing my own template, and I'm really happy I did! Since I had a hard time finding one, I want to share it with you. Pair it with your favorite stocking tutorial! I used a 1/2" seam allowance when sewing it up. It's approx. 16.5" tall, 6.5" wide at the "leg" and 10" wide at the "foot".

You can download it here: Vintage Stocking Template Download

For mine, I kept construction really simple. I used fusible fleece on the exterior pieces and added a small hanging tab to each one. I cut my hanging tab pieces 6"x2".


I skipped the cuff and instead made a bow for each stocking. I was inspired by these stockings, but instead of stitching them in place, these bows are attached with safety pins. That way if I ever change my mind and want to switch things up, they're easily removable. I cut my strips 7"x42" for each bow. The red is Kona Red that I picked up at a local shop here in CT.


I love how these turned out, I think they have such a vintage-y feel to them, which is exactly what I was going for. I couldn't find any holders I liked, but I did find some really budget friendly low-profile ones at Target that just kind of blend into the mantle. Win-win!

Happy Sewing!

Friday, November 23, 2018

Black Friday Pattern Sale


It's time for my annual Black Friday Pattern Sale! I'm making things easier for you and me by skipping the coupon code, all patterns are already marked down 25%! Sale will run from today (11/23/18) through the end of the day Monday (11/26/18).

Shop the sale here.

Happy Sewing!

Friday, November 16, 2018

Bear Paw Pillows in Quilts & More Winter 2019


Today I'm excited to share my project in the Winter 2019 issue of Quilts and More magazine! You'll find my trio of bear paw pillows in the Scrap Lab section!


*Update: These pillows are now a standalone pattern available for purchase!

Find the pattern in my shop here: Bear Paw Pillows Pattern


Photo used with permission from Quilts and More™ magazine. ©2019 Meredith Corporation. All rights reserved.

Scrap lab is a section in each issue where three designers share a project made with the same fabrics. This time around it was a selection of solids from Paintbrush Studio*. I loved working with these colors!


I made three pillows, which are a twist on a bear paw design! I love how bold they feel, in all solids! Here are all three:


Each pillow finishes at 20" square and has an envelope closure on the back. They fit on our theater seats perfectly!

Find the pattern in my shop here: Bear Paw Pillows Pattern

Happy Quilting!

*Note: Any links marked with an asterisk in this post are affiliate links. This means if you click through and buy something, I make a small commission, at no extra cost to you.

Monday, November 5, 2018

October Monthly Report


Happy November! It's time for October's monthly report. See past reports here.

Quilt top from Expanse Quilt Pattern.


October was a really busy month over here. My parents came to visit, and a few weeks later Michael's grandparents visited too. While my parents were here we tackled a bunch of projects around the house, including preparing and planting grass in our backyard. It was quite an undertaking, but I'm glad it's in! We also took a trip to Monger's Market and picked up this set of vintage lockers. I've always wanted some, and they had a huge selection.


Despite all the work on the house that we did this month, I actually got a good bit of sewing done. I didn't finish anything huge, but I made progress on a number of projects that were lingering. I did finish a few small things, including this patchwork drawstring bag. I had some smaller pieces of my friend Anna's fabric collection, Forage, to play with. I chopped it up into squares and made an Artist size lined drawstring bag!

Patchwork Drawstring Bag Tutorial


I also made a zipper pouch for my friend Brianne's birthday! This is the cosmetic pouch (slightly upsized to fit the zipper I had on hand) from my Triplizip Pattern. I added a little hand quilting for an extra fun detail. It was fun to use some of this linen cheater print from an old Heather Ross collection, Nursery Versery.


To keep myself accountable for my stash goals, I'm tracking my yardage for fabric and yarn each month. Read more about how I track my here. Here is how I did in October:

October Fabric
Used up: 5.5 yards
Brought in: 4 yards
Net: -1.5 yards
Year to date: -15.5 yards

October Yarn
Used up: 0 yards
Brought in: 0 yards
Net: 0 yards
Year to date: +218 yards

Pretty happy with my intake this month. I bought some solid red fabric that I used up right away for a set of stockings (I'll share those soon!). Closer to the end of the month I ordered some more sweatshirt fabric. I finished a new sweatshirt this month, and that spurred me on to make more!


Here is the sweatshirt I finished! This is my second hooded sweatshirt that I've made, and I'm loving it. I drafted the pattern for it from my favorite Loft sweatshirt. It was really simple to create the pattern, and with this one I was able to further adjust it so the fit is just how I want it. For this one I used organic cotton fleece from Birch Fabrics. I'm not sure what color this is, I found it in a remnant bin at a local shop last year.


I started a new project with some of my indigo scraps! I had a bunch of skinny strips, and one day I decided to just play with them. I used the June quilt pattern from my friend Amanda Jean's book No Scrap Left Behind. I only made a few blocks because of the limited fabric I was working with. I'm not 100% sure where I want to go with it from here, but I'm not in a hurry, so I'll let it sit for a while.


This was the first Halloween in our new house, and so our first time handing out candy! We had been warned that Halloween was pretty crazy in our neighborhood, so we decided to dress up and decorate the house too. We went with a Stranger Things theme, I dressed up as Eleven, and Michael is Mike. We had a ton of fun and we went through an insane amount of candy!


Even George was sleepy the day after! And maybe a little grumpy! :)

Have a Great Month!