Janome 1600P Sewing Machine Review
Monday, February 27, 2017
Happy Monday! A couple years ago I bought a new sewing machine. Since then I have had a number of questions about how well I like it. So, I thought today I would finally post a proper review of the machine I bought, a Janome 1600P-QC.
I'm slightly embarrassed to say it's now been almost three years since I bought my machine and I'm only now getting around to posting this review! On the plus side, I've had a long time and a LOT of projects (including all the projects for my book) to figure out what I like about it. Before we dig in though, I'd just like to say that I'm not affiliated with Janome in any way and this post is a reflection of my personal opinions.
With that being said, I love this machine. If it broke down today, I'd buy another one. But let's back up a little. Prior to the 1600P, I had a Janome Horizon 7700. I'll be honest, the Horizon and I did not get along. It had a lot of good qualities, but had way too many bells and whistles for me. When I decided to look for a new machine, I knew I wanted to simplify. I had been using my vintage Singer Featherweight a ton, and wanted to find a machine that most closely resembled that, but bigger. Enter the Janome 1600P.
It's a nice heavy duty machine, with a primarily metal body. It is a straight-stitch only machine which is what my Featherweight is. This means it can only do one stitch, but that it can do that one stitch very well. I had learned this from working on the Featherweight. Since it only stitches straight the needle plate has one little hole in it for the needle, so it's much less likely to pull fabric down into it.
This machine is fast! That's one of my favorite thing about it. It's got three speed settings: turtle, sitting bunny, and running bunny. It can stitch at up to 1600 stitches per minute. As someone who sews a lot (and likes to sew fast), it has been wonderful using this machine. Especially when piecing, I can cruise right along.
Another one of my favorite features about this machine is the separate bobbin winding motor and thread path. I have a dedicated cone of thread set up for winding bobbins and one for the top thread. I don't have to un-thread my machine or even stop sewing when I need to wind a new bobbin.
I have a few favorite feet for the machine that I use the most. The 1/4" foot is what I use the most (which I'm very happy to say has a remove-able guide.). I also bought a narrow straight stitch foot. It's super tiny and is perfect for topstitching. Next up, the walking foot. It's sturdy, and does it's job. Finally, the adjustable zipper foot, which you can move to either side of the needle.
With my old machine I never took advantage of even some of the simplest features, but I've been taking full advantage of them on this machine. I use the automatic thread cutter for just about everything, and I love how it lifts up the needle when it's done cutting. This really comes in handy when paper piecing.
Side note: Since it is a semi-industrial machine, it is pretty loud. I sit mine one a folded up mini quilt to help dampen some of the noise for our neighbors. I also invested in a pair of wireless headphones, which I use when sewing. Just an FYI!
Since the 1600P sews at high speeds, it does use special needles, HLx5 needles. My favorite for piecing are 75/11s. For bag making or projects using thicker fabrics I like 90/14s. Finally for quilting (free motion & straight line), I like 100/16s. This machine also needs oiling every few hours. I use the same precision oil pen I use for my featherweight.
One thing I would like to mention about this machine is that it does take some getting used to. The tension is set manually and it also has a pre-tensioner. It can take a bit of fiddling to get the tension just right, but once you do, it sews great.
I wanted to share my settings for this machine for free-motion quilting. There isn’t anything about free-motion quilting in the manual and when I first tried it on this machine I had to do some trial and error to find what worked for me. Here is what I do:
- Put on the free-motion quilting foot, and free-motion quilting needle plate.
- Use a new size 100/16 HLx5 needle.
- Set stitch length to 0.
- Set presser foot pressure to 0.
- Lower the upper thread tension a bit.
- Slightly loosen bobbin tension.
- Adjust free-motion quilting foot height as desired.
You'll definitely want to play around with a practice quilt sandwich to get the right combination of tensions. Don't forget the pre-tensioner if you're having trouble with the top tension. I keep my pre-tensioner pretty loose, and adjust with the main tension knob.
The 1600P is the perfect machine for the type of sewing I do. I primarily use it for piecing, which is great for the high-speeds, but I love to make bags and other projects too. I try to use this machine and my serger as much as I can to make garments, but occasionally pull out my backup machine (a Janome Memory Craft 4800) for it's free arm and buttonhole capabilities.
Happy Quilting!
Thursday, February 23, 2017
Happy Thursday! Today I have a finished quilt to share, my Over and Above Quilt!
This past Fall and Summer, I went about finishing up the series of half-square triangle sampler quilt tops I made. I took the 60 blocks from the block chart section of my book, Patchwork Essentials: The Half-Square Triangle, and put them together into three sampler quilts. I shared a setting tutorial for each quilt, and now I have them all finished up! The first one I want to share is the Over and Above Quilt. Find the tutorials for all three settings here: Over and Above Quilt Setting Tutorial, Blockade Quilt Setting Tutorial, Interlaced Quilt Setting Tutorial.
For each quilt, I focused on one of the colors that I used in the blocks. This quilt was focused around this lovely color of purple. I used one of my very favorite prints by Erin McMorris from her Weekends line for the background. It's the perfect color and the little bikes are just too sweet. This particular quilt used 27 quilt blocks.
This quilt was quilted by local Madison quilter, Gael Boyd of Stitchlilly. We chose this airy feather pattern, and I think it fits the quilt really well.
I used another print from Weekends for the back, more purple of course! For the binding, I used a dark purple cirrus solid from Cloud 9. I didn't have quite enough, so I added a strip of yellow to one of the corners to finish it off.
Happy Quilting!
Tuesday, February 21, 2017
I thought it would be a good idea to have a dedicated post to all of the variation tutorials for my Lined Drawstring Bag Pattern. I'll continue to update this post as new tutorials are added. Hint, there may be a new one coming up soon!
Lined Drawstring Bag Tutorial
Lined Drawstring Bag Full Video Tutorial
Lined Drawstring Bag Pattern
(featuring 8 sizes + custom sizing)
Lined Drawstring Bag Expansion Pattern
(Full of variations and techniques to customize your bags.)
Tips for Choosing Fabrics for Drawstring Bags
How to Put a Gusset on a Bag Video Tutorial
How to Sew a Drawstring Casing Without a Free-Arm Sewing Machine
Alternative Method for Marking the Drawstring Casing
Variation Tutorials
Wine Bottle Drawstring Gift Bag Tutorial
Adding an Exterior Pocket
Easy Going Lined Drawstring Bag Tutorial
Patchwork Drawstring Bag Tutorial
Striped Drawstring Bag Tutorial
Lined Drawstring Bag Pocket Tutorial
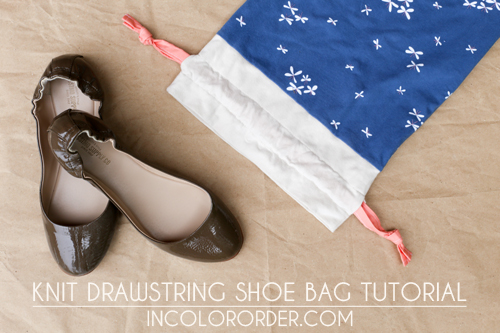
Knit Drawstring Shoe Bag Tutorial
Need some inspiration? Check out my Drawstring Bag Projects Pinterest Board or the #lineddrawstringbag hashtag on Instagram.
Thursday, February 16, 2017
Happy Thursday! Today I have my latest Sew Together bags to share. I just can't stop making these bags. I love to give them as gifts, and I made and gave these both in December. See the other sew together bags I've made here: Dreamin' Vintage Sew Together Bags, Nordika Sew Together Bag, Geometric Bliss Sew Together Bag, Carolyn Friedlander and Paris Map Sew Together Bags.
Sew Together Bag pattern by Sew Demented can be found here. All zippers are from Zipit.
The first bag I made for my friend Holly. She loves black and white, and we bond over our mutual love for purple. I knew I wanted to use one of the purple prints from her Brushstrokes fabric collection in her bag. I decided to use the purple only inside the pockets. So the entire bag is different black and white prints, except for the pocket linings.
I used the 2" gingham from Cotton and Steel for the exterior. I had fun digging through my black and white fabrics for this bag.
The second bag I made for my friend Anna. Last Summer she tried indigo dyeing at our annual retreat, so I thought she would appreciate a bag made from some indigo dyed fabrics. It was a great opportunity to use some smaller pieces of fabric I've dyed over the years.
For more information on indigo dyeing, check out my Indigo Dyeing Tutorial.
I used dyed kona cotton fabrics for the inside, sides, and exterior. The pocket linings are a dyed white on white print, and it's bound in a textured cotton dot fabric.
I'm sure these won't be the last sew together bags I've made! At this point they come together pretty quickly, without too much trouble.
Sew Together Bag pattern by Sew Demented can be found here.
Happy Sewing!
Tuesday, February 14, 2017
This past Summer I was given the opportunity to be a part of a fun feature in Quilts and More magazine called Scrap Lab. Three designers are given the same fabrics and asked to design I project using only those fabrics. It sounded like a fun challenge to me, so I gladly took it on. The first round that I participated in is in the Spring 2017 issue of Quilts and More, on newsstands now!
Used with permission from Quilts and More magazine. ©2017 Meredith Corporation. All rights reserved.
We were each sent a fat eighth bundle of Moda Grunge Fabrics. I had never worked with Grunge before. I have dabbled in all-solid projects, but not in semi-solids. Grunge has a really interesting painterly texture, which is not quite as intimidating or stark has total solids. I immediately thought back to my days in college, working towards my Studio Art minor. That inspired me to come up with a roomy tote bag for my project. The perfect size to carry around art, sewing or quilting supplies!
Of course I couldn't help myself, I had to add half-square triangles. What can I say, I can't stay away!
I wasn't totally sure how the finished bag would look in these fabrics, so I made a sample first in some semi-solid woven fabrics including various shot cotton, cross-weave and chambray fabrics from my stash. I liked the idea, so I went ahead with the design for the Grunge fabrics.
Used with permission from Quilts and More magazine. ©2017 Meredith Corporation. All rights reserved.
In addition to my tote bag, you'll also find Scrap Lab projects from Sherri McConnell (pillows) and Christa Watson (quilt). This was a fun experience for me, and I look forward to sharing my future Scrap Lab projects!
Subscribe to:
Posts
(
Atom
)