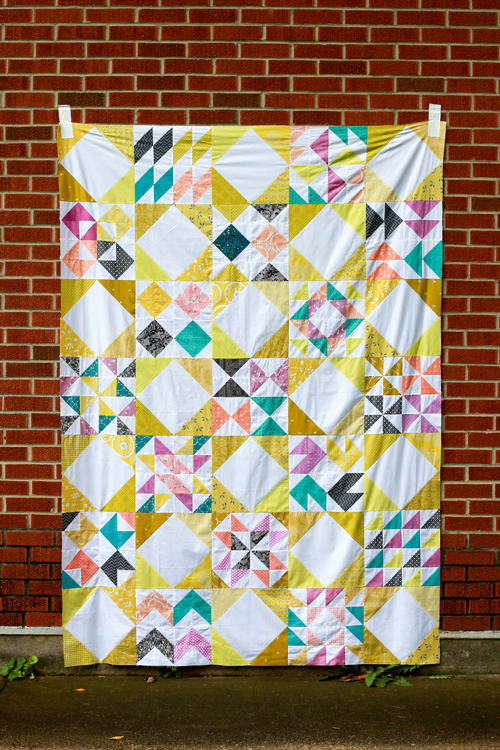
Happy Tuesday! Today I have a special quilt finish to share. For the past year and a half I've been a part of a traveling quilt bee with some really lovely ladies. Our bee is called Fantastic Quilt Voyage, and you can see the blocks we've been making in the hashtag #fantasticquiltvoyage on Instagram. We each started our own quilt, and then it is passed along to each member and they add to it. I haven't posted any of the blocks I've made, but I did share my quilt start last February, in this post. I need to do a catch-up post with all the blocks I've made for each person's quilt at some point.

When my sweet friend Amanda became unable to finish her quilt, I offered to put it together and finish it for her. I happened to have her quilt to work on at the time, so it just made sense. Her quilt had a Buffy theme, so vampires and Amanda's signature black, white, red, navy, and a pop of aqua color scheme. You can see some of her inspiration here.

I brought the blocks that had been made so far with me to the retreat I attended at Stitch Supply Co. in January. I made a few blocks that weekend and a few friends made some blocks too.
Putting this quilt together was pretty outside of my comfort zone. I arranged the blocks out on the floor of my sewing room and started putting blocks together, adding to blocks and making more blocks to eventually put together a top with no obvious grid. I didn't remember to take photos of the blocks I made until the quilt was done, but that's okay! Here are my blocks:

I drafted up this interlocking plus block, I needed something big to fill that space!

I made a few blocks using Carolyn Friedlander's Sessoms pattern.


Some simple wonky cross blocks.

I made a Monty Python inspired crazy-eyed bunny using Elizabeth Hartman's Bunny Pattern.


I made use of scraps and made a few scrappy improv blocks.

I drew up with cross made from half-square triangles early on and was glad I could squeeze it in.

Extra pointy star block from my Shining Stars Sampler Pattern.

And finally some funky striped half-square triangle blocks.


In an effort to use my stash, I pieced the backing. I used a favorite print of Amanda's (from Luxe in Bloom by Sarah Watson) for the binding. I sent the top to Melissa of Sew Shabby Quilting for quilting. The crackle pattern seemed like a perfect match for the theme of this quilt.

I needed a way to transport the quilt and decided to make a set of pillowcases to go with it. This is my favorite way to gift quilts. Most quilts can fit comfortably folded up inside a pillowcase! I use this tutorial when I make pillowcases.

Jacey and I went out to visit Amanda this past month and we were able to give her the quilt in person! It was so fun to surprise her with the finished quilt! I have to admit, it was a bit nerve wracking working on this quilt. I wanted to make sure that I did everyone's blocks justice and that I stayed true to Amanda's vision. Based on her reaction when we gave it to her, it was a success! :)
Happy Quilting!


