Pages
▼
Friday, January 29, 2016
Knit Mittens
Happy Friday! Today I want to share two pairs of mittens that I knitted in the last few months. They've both been getting a lot of wear so far this winter!
Mittens are the real reason that I wanted to learn to knit. I remember seeing Adrian Bizilia's Fiddlehead Mittens on Flickr back in the day and it was love at first sight. Ever since then I've wanted to knit so that I could make my own. I've been knitting pretty consistently for the last two years, and I finally convinced myself I was ready to tackle mittens this past November. One weekend, I was looking for a project to work on, and I decided I'd just go for it! I knit a pair of quick mittens with super bulk yarn (see them here), and I finished them that weekend. They're a bit small, and a little wonky, but I made them!
I was so excited that mittens were no longer this far off thing to tackle. I immediately cast on another pair, this time out of worsted weight yarn. I used a skein of Sun Valley Fibers yarn that I picked up at the Sows Ear a while back. It's dyed here in Wisconsin, which is fun! Plus it matches my most used hat and cowl, bonus! They're super soft and warm!
I am not a huge fan of magic loop or DPNs, so I powered through on a pair of 9" circulars until I got used to them. Now they are so easy and comfortable to use, I'm thankful that I made the effort to stick with them. I don't think I'd knit mittens any other way now! I still had to do the thumbs and decrease with magic loop, but that's fine with me! For this pair, I used Tanis Lavallee's Grammy's Mitts pattern. See more on my Ravelry.
Once I finished my second pair, I was sort of itching to make a pair of mittens for Michael. He didn't really have any good mittens and I thought it would be fun to make a pair for him. Of course he wanted convertible mittens. I was a little nervous about knitting them, but they really weren't hard!
For his pair I used this delicious smoky gray Malabrigo Rios yarn. I wanted something that would be able to take a bit of a beating, but was still primarily wool for warmth. They're a perfect fit and he has been wearing them a lot!
The only part that I had a little trouble with was picking up the stitches on the back and starting the mitten top correctly. Just took a little fiddling to wrap my mind around it! Then it was smooth sailing. I used the Red is Best pattern by Jane Richmond. See more about these mittens on my Ravelry.
I'm so pleased with how the mittens I've tackled have turned out so far! I am SO close to trying my hand at the Fiddlehead mittens. I am currently working on another colorwork hat, then I think I'd like to knit one more pair of mittens. Then, the game is on!
Have a great weekend!
Tuesday, January 26, 2016
Deer Sparkling Cider Quilt
Happy Tuesday! A day late, but I have another quilt finish to share! The quilt has been a long time coming, I bought all the fabric for it a few years ago and it has been waiting to become a quilt.
When I saw that they were reprinting Lush by Erin Michaels, I jumped up and down a little! My Dad loves the outdoors, and the deer prints in this collection are especially perfect for him. I snatched up a sizeable amount, including enough for a backing. I always knew I'd turn them into a quilt for him. Last year, I came upon this awesome shot cotton at a local shop that is a perfect match to the blues in the collection.
This is the third time I've used the Sparkling Cider Quilt Pattern by All Washed Up, and it's still a favorite. It comes together so easily and I love the finished product. You can see my first two quilts here and here. I knew it would be a good choice for this fabric, and I used the large stars to showcase the deer fabric.
It's always fun to step outside my neutral solid comfort zone, and I'm glad I did with this quilt. The background has a nice sheen to it in person and I think something neutral would have been too flat. For the binding, I decided to use up scraps from cutting the blocks. It was a good way to use some of those up.
For the quilting, I sent it to Melissa of Sew Shabby Quilting. She had the perfect pattern for it, a Maple Leaves pattern. I love how much it adds to the quilt!
I gave this quilt to my Dad for his Birthday, which is right before Christmas. He loved it, yay! I'm glad that I stashed away so much of it and was able to make a quilt that was perfectly tailored to him. Plus, it was a great excuse to make another Sparkling Cider! I'm sure it won't be the last one I make!
Pink Castle Fabrics currently has this pattern in stock, here.
Wednesday, January 20, 2016
Baa-ble Hat and Downton Cowl
Happy Wednesday! I am back today sharing a few more finished knits. These were my last two finishes of 2015, both projects were finished either in the car or while staying with family!
First up is my Downton Cowl. For a while, I was really interested in knitting long cowls that I could wrap around my neck more than once. They just seemed like they'd be warmer! The trouble with that though, is they can be too warm when I want to wear something as more of an accessory, especially when it isn't that cold. Two years ago, Jacey made me a short cowl, and I have gotten tons of wear out it. It's easily one of my most worn knits! So, I decided to make one too, so that I have another color to wear!
I started this cowl in October 2014, and finally finished it in late December of this year. It wasn't a difficult project, but it kept getting set aside. Honestly, I think what kept me from working on it the most was the needles I was using. They had a really stiff cord that was driving me nuts. I took this project with me to work on in the car, and I finished it by the time we got back to Ohio!
I was really happy to get this project finished, and I know I'll wear it a lot. It's the perfect purple gray. The yarn is Madelinetosh Tosh DK in Composition Book Grey. The pattern is by Shannon Cook. For more info on my cowl, see my ravelry.
I was so excited to make this Baa-ble Hat! This was my "reward project" that I was allowed to start once we got on the road, and once I finished that cowl! It was a good motivator! This is my second stranded colorwork project (still need to get photos of the first, it's also a hat!). I was excited to try it, but was a little afraid of it, honestly. I knew if I made a mistake and didn't catch it, it would really show.
There were a few times that I had to rip back mistakes, but overall, knitting this hat went really smoothly. And I got the hang of holding both yarns at once continental. On my first project, I was only holding one yarn at a time, constantly dropping one and picking up another. It was definitely not ideal, so I'm glad I figured out how to do it right! I'm still getting used to tensioning the yarns, but I think my tension is better than my first project!
This hat went SO fast! Especially once I got to the colorwork. I've been wearing it a lot, it's so cozy and seriously cute. It did turn out a little big, but that's okay. I'm not 100% sold on the double brim either, but it won't stop me from wearing it. I kind of want to make another! I think next time I would knit a single layer brim and go down a needle size. The two main yarns in this hat are Madelinetosh Tosh Vintage in Astrid Grey and Heuchera. The pattern is by Donna Smith. For more info on my hat, see my ravelry.
Happy Knitting!
Monday, January 18, 2016
Knit Stuffed Animals
Happy Monday! Today I want to share some more gifts that I stitched up at the end of last year. One was a Christmas gift, and the other two were "congratulations!" gifts, but were given at Christmas.
When I was at Quilt Market in Houston this past Fall, I saw these softies sewn up in knit fabrics in the Cloud 9 Fabrics booth (see them here). They were so cute and soft, I could not get them out of my head. The patterns are all from Shiny Happy World, and I'll link them individually below. I think I bought the patterns in my hotel room after the show closed one of the nights. I thought it was such a fun way to use knit fabrics and I love stuffed animals, so it was the perfect match!
I also happen to have plenty of knit fabrics on hand! I have eight different knit prints with Art Gallery Fabrics, four from Geometric Bliss and four from Curiosities. I've been trying to focus on finding non-garment projects that use knits, in addition to slowly building a wardrobe of handmade shirts.
I made all three softies at the same time, assembly line style. I used my Janome Memory Craft 4800, which is my backup machine. It's easier for me to use when sewing with knits. I used a stretch needle to sew all of these, along with Aurifil 50wt cotton thread. I thought I might use my serger for parts, but didn't end up using it.
First up is Franklin the Fat Cat! As soon as I read the name of the pattern, I was in love. I love a good fat cat! This one was the easiest of the three patterns, and also the smallest. One of Michael's cousins had a baby in December, so of course I had to make one for the baby! I was giving them a baby quilt made with Curiosities, so I decided to make a softie to match.
I used the Sweet Nothings Fond Knit along with a little bit of the Amaranth Knit Solid for the ears. Since this was for a baby, I embroidered the face instead of using plastic eyes. I also reinforced the arms, legs, ears and tail. Instead of using plastic pellets, it's filled only with fiberfill.
Next up is Benson Bunny! This one might be my favorite, since it is a bunny! This one probably took the longest. It has soft and stable in the ears to give them shape. It also has a stuffed tail and felt nose, both of which are attached by hand at the end. This bunny went to live with baby's big sister! I figured it has to be hard sharing all the attention, so she needed a softie too.
I used the Radical Blooms Blush and Parallel Segments Quartz Knits from Geometric Bliss for this bunny. The head and ears are Peachy Custard Knit Solid. I was able to find the perfect matching mint felt from The Sewcial Lounge, score! I filled the arms and legs with plastic pellets and there is some in the body along with fiberfill. I also used safety eyes on the bunny. I am very thankful that I reinforced the limbs and ears on this one too, since upon opening he was already getting played with and tugged on!
Last up is Munch! He has a mouch that you can stick your hands (or his!) in, which is really fun. I thought the construction of this guy would be the hardest of the three because of the mouth, but it really wasn't. It came together easily in the end! I made Munch for my brother for Christmas!
For Munch I used the Spherical Buds Aqua Knit from Geometric Bliss. For his mouth and ears I used the Turquoise Knit Solid. As instructed, I used a mix of fiberfill and plastic pellets to fill Munch. I also used safety eyes for him. I had to be extra careful when cutting him out since I was using a directional print. Luckily I did it right!
I really enjoyed sewing these! It is always fun taking flat fabric and turning it into something three dimensional. It's so satisfying. I haven't sewn a lot of softies before, so this was a learning experience for sure. I have a few other patterns I'd like to try this year. I think the softies turned out so sweet, and they were well received. Now that I've made all three, I need to decide which to make for myself! :)
Happy Sewing!
Wednesday, January 13, 2016
Exploration Station Shawl
Happy Wednesday! I feel like I'm always saying this, but I have a decent backlog of projects to share here. I'm going to try over the coming weeks to share quilting/sewing projects on Mondays and knitting projects on Wednesdays to get caught up. Hopefully having a schedule will help me actually stick to that!
Today I want to share the shawl I finished just before the end of the year. I was excited to tackle the Exploration Station pattern by Stephen West this Fall. Last Spring a few of us decided to knit it together, and while I did pick out yarns right away, it took me a while to finally start mine. Yahaira and Jacey finished their shawls too, and they're both beautiful! It's cool how different the pattern looks in other colors!
I used three skeins of Madelinetosh Sock (Moonstone, Curiosity, and El Greco), plus a skein of Tanis Fiber Arts Purple Label in Lilac. My selection is pretty subtle in terms of contrast, so I ended up with a softer design, which I really like. Plus I love purple, so this is basically my favorite thing I've ever knit.
This shawl was such a challenge, there were so many things I had never done before: Short rows, double yarn overs, brioche, and i-cord edging/bind-off. I think the biggest challenge for me was staying focused and committed to finishing it at the end. By the time I bound off, there were nearly 500 stitches, so each row seemed like it took FOREVER. The i-cord bind off took several hours, and definitely tested my patience.
I am so happy with how this shawl turned out, it was totally worth the effort. I soaked it (with Soak, of course!), and blocked it pretty aggressively. This is officially my first finished knit using fingering weight yarn! Yay! It is a huge shawl, which makes it super cozy and warm. Perfect for the winter weather we've been having!
For more info on my shawl, see my ravelry page.
Happy Knitting!
Sunday, January 10, 2016
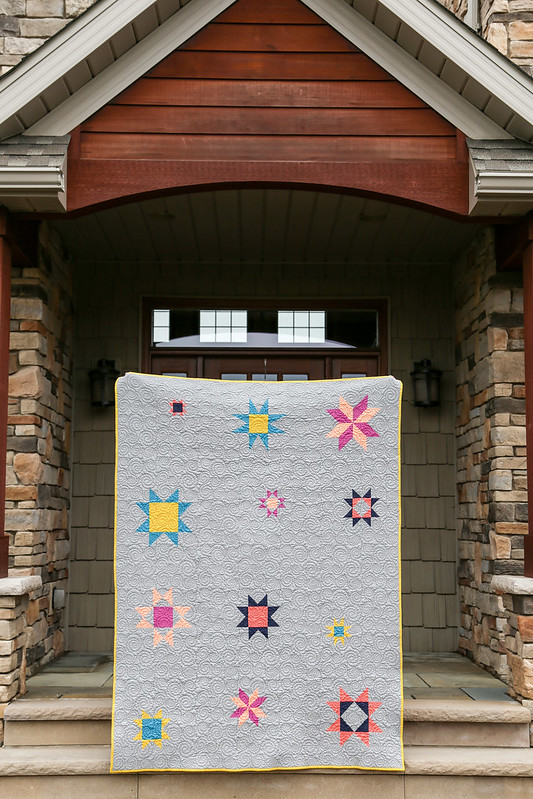
Shining Stars Sampler Quilt
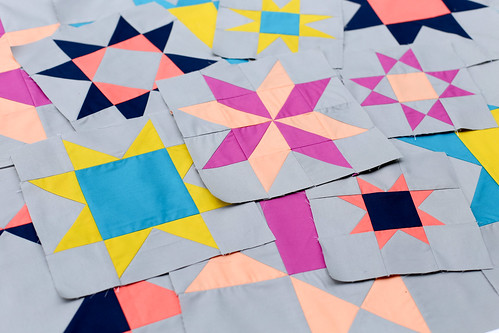
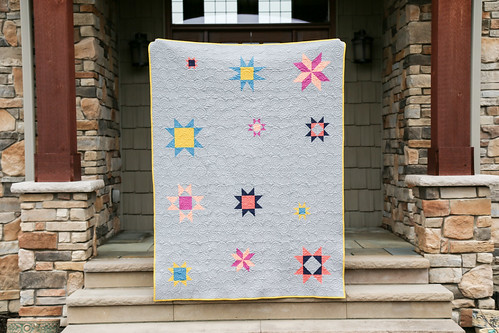
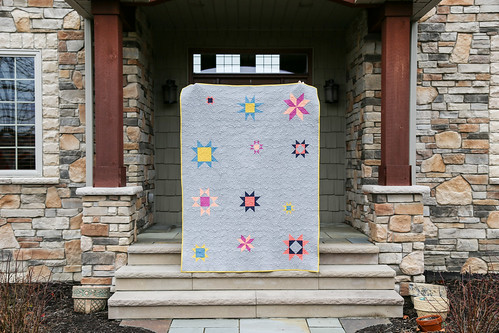
Happy Monday! This past Spring I decided to sew up a new version of my Shining Stars Sampler Pattern. The pattern features six different star blocks, which are sewn up in two sizes.
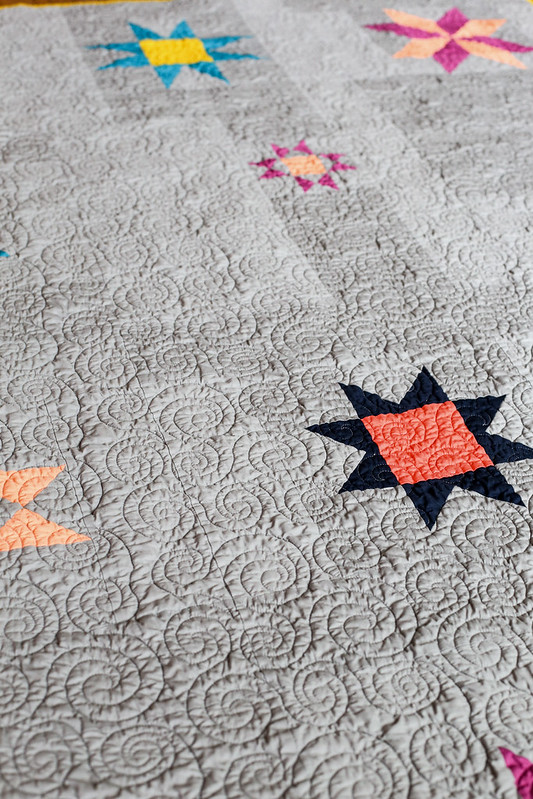
I wanted to challenge myself to sew a large quilt with just solids! This is pretty far outside of my comfort zone, but I have to admit, I really ended up enjoying it. I limited myself to only six colors plus the background.
These are fun blocks to make, especially the small ones. I think I'd like to make a quilt of just small start blocks this year. We'll see!
This quilt pattern is one of the classes I'm teaching at QuiltCon in Pasadena, CA next month! We also just wrapped it up as a Block of the Month Club at The Sewcial Lounge.
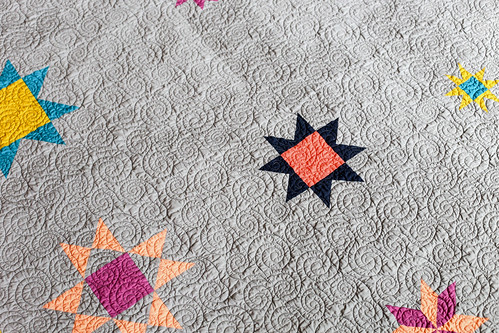
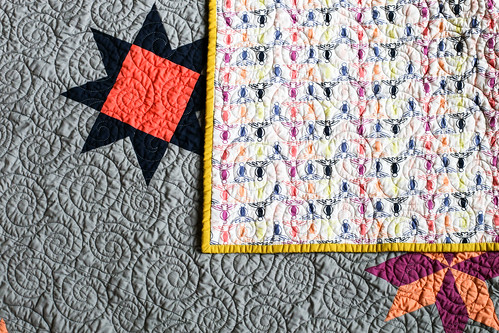
The quilting was done by Melissa of Sew Shabby Quilting. I cannot get enough of swirly quilting!
I used the following Pure Element solids from Art Gallery Fabrics: Nocturnal, Coral Reef, Verve Violet, Apricot Crepe, Empire Yellow, Tile Blue and Ash.
For the backing I used some Luxe in Bloom yardage that I've been hoarding. The colors are almost a perfect match to the front, it's kind of crazy! I bound it in Pure Element Empire Yellow.
It was fun working through the restrictions I set for myself with this quilt. I love sewing up star blocks, and the variety in this quilt help keep the sewing interesting!
Happy Quilting!
Wednesday, January 6, 2016
Waxed Canvas Duffle Bag
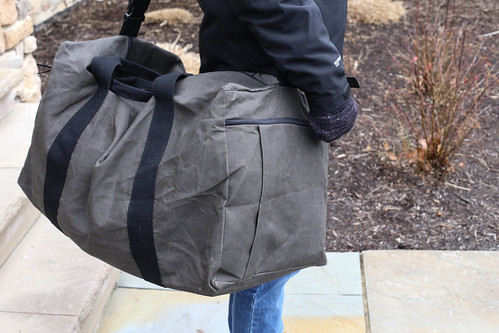
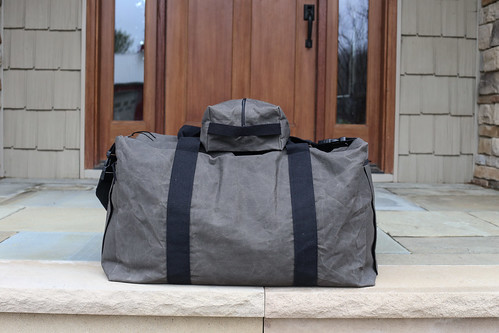
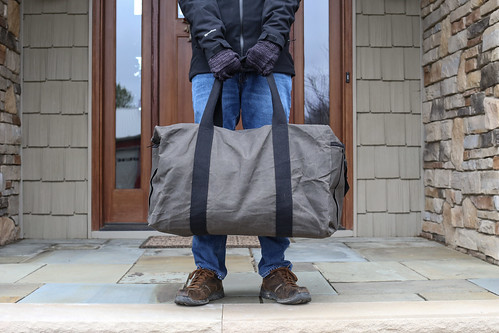
Happy Wednesday! Let's start off the first week of the new year with a finish to share! I gave a few handmade things this holiday, and this project was one of my favorites. Michael had this old green duffle bag that was in complete disrepair and in need of being replaced. I knew I wanted to give him one this Christmas, and early in October it hit me that I should make one!
I used Simplicity #2274 (which I've made before: one, two, three) as a base, but made it quite a bit larger. It's about 2" taller and deeper, plus about 7" wider. It took a bit of fiddling to adjust the pattern correctly, but it all came together just fine! I did a pocket on each end, but skipped the pocket between the handles.
Knowing how much use this duffle bag could potentially get, I wanted it to be super sturdy. I ordered 12oz waxed cotton canvas in dark olive from A.L. Francis on Etsy. I had been wanting to try out waxed canvas for a while, and this seemed like the perfect project. The canvas I bought is super wide, so I have enough leftover to make something for myself too. The fabric was really interesting to work with, you scrunch it up to give it texture and a worn in look. I used a size 16 needle and black polyester thread for the entire bag. Bonus: it smells really good, like beeswax!
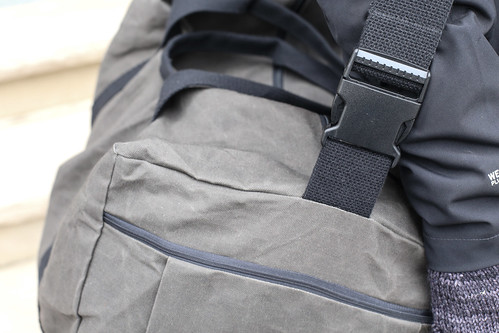
For the handles, I used 2" cotton webbing instead of jute/fabric. I found webbing that wide here. I referenced the original duffle for the handle length and placement. I knew I wanted to also make an over the shoulder strap that was removable. I found 2" side release buckles here. I serged all of the edges of the bag pieces before I did any sewing. I also doubled stitched almost every seam, and backstitched over any stress points. It took a while, but I think it will wear well.
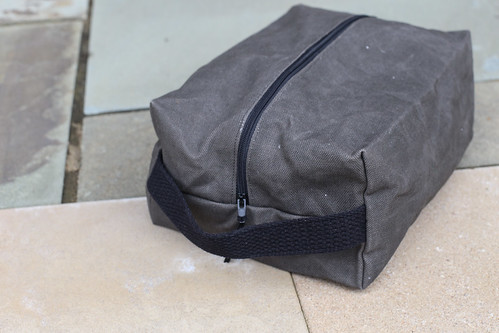
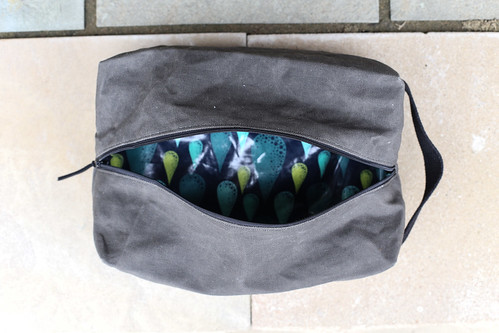
I also made a matching toiletry pouch to go with the duffle bag. I sized up the boxy pouch from my Triplizip Pattern. I used laminated cotton for the interior, waxed canvas for the exterior and black 1" cotton webbing for the handle.
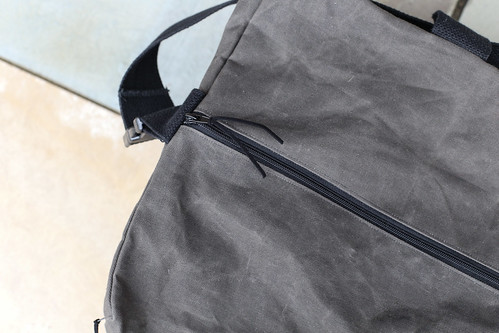
To finish off both the duffle and pouch, I used black suede cording for the zipper pulls. I also recycled part of the original hard removable bottom for the duffle bag. I had a piece of binders board the right size already, and I wrapped it with the black nylon from the original.
Michael was really pleased with the set, and didn't realize I made it at first. I gave it to him before Christmas so that he could use it on our trip home. It held SO much! I am glad I was able to make something for him that he'll use!