Happy Wednesday! Today I have a quick and easy apron tutorial to share with you! I promised this tutorial way back when, and I finally made time this week to write it up.
This craft apron is plain and simple, nothing fancy! The nice thing about it is that it's completely customizable! You can do more or less pockets, add patchwork, use another fabric for the pocket lining, it's up to you!

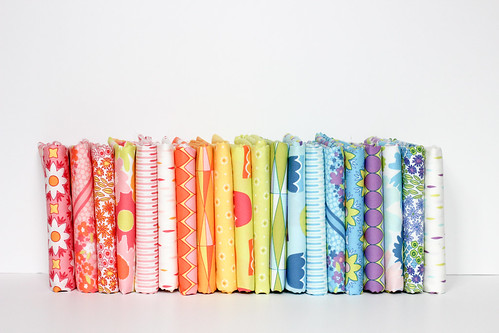
[Photo by Art Gallery Fabrics]
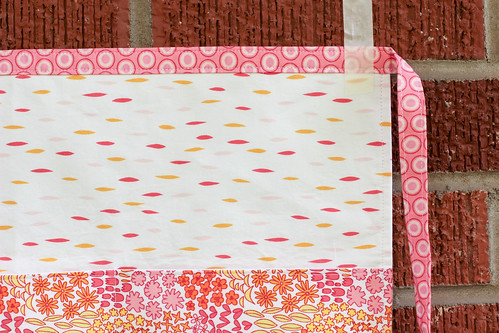
For my apron, I used a few prints from Dreamin' Vintage! The Jolly Dots Petal for the main apron pieces, and Sweet Meadow Rose for the pocket. It finishes off with an Oval Elements Sweet Pea tie! This is a fat quarter friendly project, you can make the entire apron with four fat quarters!

Sewing Level: Beginner
Materials:
- 1 fat quarter of main apron fabric (front)
- 1 fat quarter of main apron fabric (back)
- 1 fat quarter of pocket fabric
- 1 fat quarter of apron tie fabric
- 5/8 yd of medium weight interfacing (Pellon SF101)
- Coordinating thread
- Marking pen
Notes:
Finished Size: 19.5" W x 12.25" H (Ties measure 31" from either side)
Fat Quarter = 18"x21"
Cutting:
From main apron fabric:
- Cut (2) 12.5"x20" rectangles
From pocket fabric:
- Cut (2) 7.5"x20" rectangles
From apron tie fabric:
- Cut (4) 2"x21" strips
From interfacing:
- Cut (1) 12.5"x20" rectangle
- Cut (1) 7.5"x20" rectangle
Instructions:
*Use a 1/4" seam allowance unless otherwise noted.*
1. Apply interfacing to the front main apron piece and the exterior pocket piece according to the manufacturer's instructions.

2. Place pocket pieces right sides together. Sew along the top long edge. Backstitch when you start and finish. Press seam open, then fold in half with wrong sides together along the seam and press again. Topstitch along this edge to secure.

3. Place the pocket piece on the right side of a main apron piece (front piece), aligning raw edges along the bottom and sides. Secure in place with pins.
4. Measure 6.5" from either side of the apron and mark a line down the pocket. Sew on top of this line, this creates the pockets. You may choose to do more, less, or different sized pockets if you want! Backstitch when you start and finish.

5. Place the second main apron piece (back piece), right sides together with the front of the apron (main + pocket). Pin in place. Sew along sides and bottom, backstitch when you start and finish. Clip the corners and turn. Press well. Topstitch along the sides and bottom.

6. Join the apron tie strips together so that you have one long strip. Press seams open. Fold down 1/4” on each short edge, wrong sides together. Press. Topstitch to secure. Fold in half lengthwise, wrong sides together. Press. Unfold, and fold each raw edge into the crease you just created. Press. Fold in half again and press.
7. Nestle the apron into the folded tie, lining up the center of the tie strip with the center of the apron. Secure with pins. Topstitch along both edges of the tie, securing the apron in place. Backstitch when you start and finish. Voila! You're done!

As always, if you make something from my tutorials, patterns or with my fabric, I'd love for you to add it to the In Color Order Flickr Group!
I hope you enjoyed this tutorial!

These are so cute and handy. I make a similar one that I made up and use for work in the garden and at the nursery. Love having pockets for when my hands are full. Instead of interfacing though I have found that flannel for a lining gives the apron a little body and makes it absorbent. I do a lot of watering so that was important. Nice job on your tutorial!
ReplyDeleteVery cute! Those pink fabrics from dreamin vintage are so fresh and pretty.
ReplyDeleteSuper cute, thanks for sharing!
ReplyDeleteMy mom and I are participating in a community yard sale. I am using your tutorial to make utility aprons for us to hold pen, paper, calculator and cash. Great tutorial! I am using some of my home dec stash so this is a win/win situation for me - an cute, useful apron and reduction in stash!
ReplyDeleteLove this adorable and not-too-difficult project---I can think of lots of ways to enjoy an apron like these! We noticed your left hand in the pictures....:)
ReplyDeleteHehe, if only that was me modeling the apron! That's Amanda, one of the Art Gallery Fabrics staff! :)
Delete