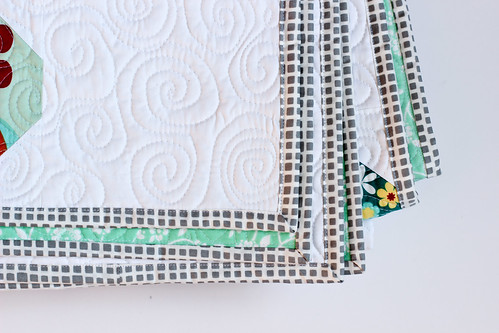
Happy Tuesday! I'm here to share another quilt with you! Now before you start thinking that I'm crazy productive or something, let's note that I made this particular quilt in the summer of 2012! I have been having a pretty productive month, but not quite that productive! This is another one of the unshared projects that I'm trying to get posted before the end of the month!
Clearly I took these photos quite a while ago too! We haven't seen the grass here in ages. I think we've had snow on the ground constantly since the end of November. Anyways, onto the quilt!
This quilt is the result of a virtual quilting bee turned book! It's called Stacked Windmills and can be found in Modern Bee Book - 13 Quilts to Make with Friends, published in October 2013!
When I designed this quilt I was in the middle of the Half-Square Triangle Block of the Month and so I had half-square triangles on the brain. As a result, these blocks feature them too. I was on quite a kick! I really still am, I think they're great.
I used a favorite sheet for the back. It isn't vintage, but it was thrifted!
I think this quilt would make a great scrap buster! I'd love to make another someday, if only there were more than 24 hours in a day! If you'd like to learn more about this book, the other quilters, and the other quilts, I recommend checking out the website dedicated to it, here! You can find the book in bookstores, quilt shops and of course, on Amazon.
Happy Sewing!
Modern Bee Book - Stacked Windmills Quilt
Monday, January 27, 2014
Happy Monday! Hope you are all keeping warm in your part of the world.
It's brutally cold here again this week, so we're sticking pretty close
to home. I have some very long overdue new patterns to share today!
Embarrassingly enough, these patterns debuted at Fall Quilt Market and
I'm only just now chatting about them. Whoops!
Last Fall, as I was thinking about new patterns, I decided to try doing something a little different. That's how these idea for these mini patterns was born. The printed copies are the size of a postcard. the PDF version can be printed on a single sheet of letter paper. They're simple, straightforward patterns. Quick to cut and quick to put together.
Along with being mini in size, they're also mini in price at half the cost of my regular patterns. Let's check them out!
The first pattern is called Honeydew, and features my Color Me Retro collection. This sawtooth quilt design has been hanging around for a while waiting to be made. I made up a baby version in Nordika early last year. It finishes at 64"x74".
I quilted this one with a meandering loop with a few swirls, stars, and some words too! I had a bit of fun with this one! It's backed in a vintage sheet and bound up in Lemonade Pure Element!
The second pattern is called Stellar, and features my Nordika collection. It plays with patchwork to use up every bit of 20 fat quarters. I revisited this design after pulling out the first bed quilt I made a few months back. It would be perfect for a beginner just getting into quilting! It finishes at 64"x80".
I just finished quilting this quilt over the weekend. I used a delicious mint 50wt Aurifil thread, #2835. I went with my signature loop quilting, extra big! It's backed in another vintage sheet and bound up in the Flowerfall Jade print.
The final pattern is called Lazy Daisy, and features my Dreamin' Vintage collection. It takes advantage of my very favorite method of piecing, random grab bag chain piecing. Very technical terminology I use around here, huh? You get a different design every time! It finishes at 58"x72".
This quilt hung in my Fall Quilt Market Booth. It was my first time quilting spirals and it took forever! I also backed this one in a vintage sheet and bound it with Sweet Pea Oval Element.
All of these patterns are available as PDFs and paper copies. They're all 25% off now through Sunday in my shop.
If you're a shop that would like to carry these patterns, send me an email or use the form under the Wholesale tab!
Happy Sewing!
Sunday, January 26, 2014
Happy Sunday! Hope you're all enjoying your weekend! I've been trying to relax a bit more than usual after a long week behind me and another coming up. I'm here today to share with you a new quilt along starting up next month!
I met Sharon McConnell in December 2012 at the very first Camp Stitchalot put on by Pink Castle Fabrics! We sat across from each other in the sewing room all weekend. While I went back and forth between a multitude of different projects Sharon plugged away on a single quilt. Let me tell you, I was so blown away by it the entire weekend. You couldn't help but be distracted by the bright and cheerful colors, prints, and design. Lucky for us, she has just published a pattern for her cool creation, the Polka Dot Bikini Quilt Pattern!
To kick off it's release, Sharon is holding a quilt along starting February 6th! She already has a great curved piecing tutorial up here. The schedule is nice and reasonable at about 6 blocks every two weeks, but of course you can sew at your own pace! Follow along on Sharon's blog for all the quilt along action including posts to help put your quilt together, alternative ideas, and giveaways as well!
You can pick up a copy of the pattern in Sharon's shop, here!
I feel like I could stare at that quilt forever, there is just so much to look at! I hope I can find time to start one soon, even if it's just enough blocks for a wall hanging. I've already started scheming what fabrics and combinations to use! I think the new Chromatics collection by Art Gallery Studio would be fun with maybe all shades of gray for the solids. Or maybe my Color Me Retro collection along with an array of green solids! There are so many possibilities, I don't think you could really go wrong!
Make sure to check out my Art of Choosing series from a few years back for color inspiration and fabric selection advice!
Sharon has kindly offered to give away a copy of the Polka Dot Bikini PDF pattern to two lucky In Color Order readers! Just leave a comment to enter. Tell me what fabrics/colors you'd use if you want! Giveaway will end Wednesday, January 29th at 5pm CST.
Good luck!
Friday, January 24, 2014
1. Chicopee Hopscotch in the snow!, 2. 20:365, 3. Shivaun Place Quilt, 4. essex linen cross quilt., 5. Flying Geese Quilt Top, 6. dgs dec 2, 7. LondonCalling4 by Kaufman Quilt, 8. Not-so-Lonestar quilt finished, 9. Garden District Cushion - Pillow Pop
Every week I go through my favorite photos on Flickr, and choose nine sewing/quilting related projects to showcase here. These photos and projects are not my own, you can find the original images and creators by clicking the coordinating links! If for any reason you do not want your project featured here, please email me and I'll remove it!
Happy Friday!
Thursday, January 23, 2014
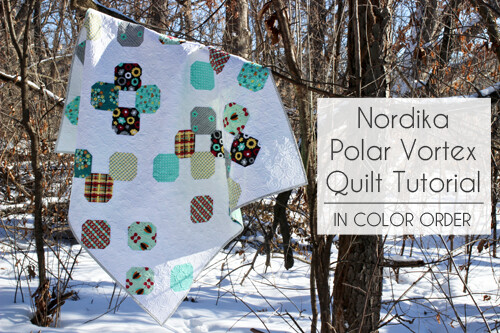
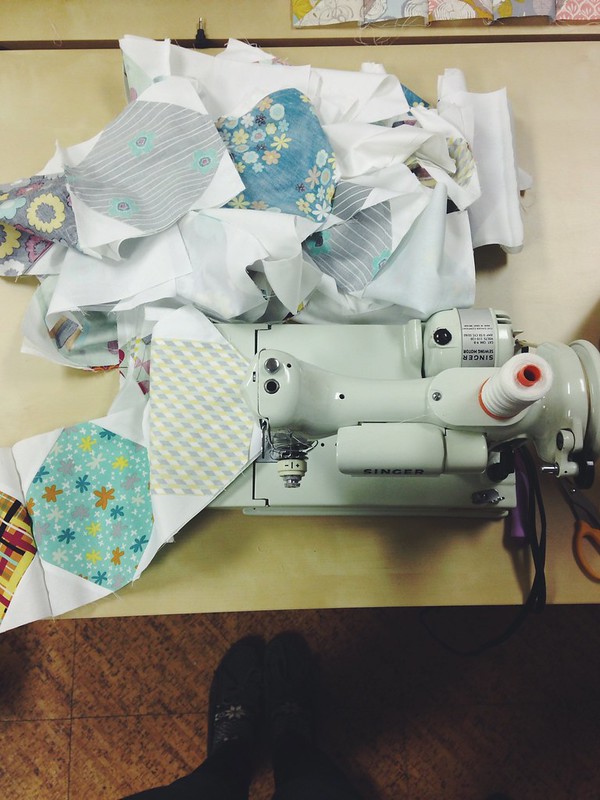
Happy Thursday! I have a fun quilt tutorial to share with you today! I was recently making snowball blocks for a different quilt and managed to make the wrong size! So this quilt was a way to use those up! It's a great project for a small group of fat quarters, and would make a great lap quilt for the car or relaxing on the couch. It's somewhere between a baby quilt and a regular throw quilt!
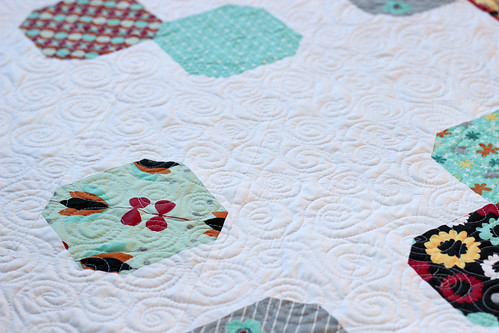
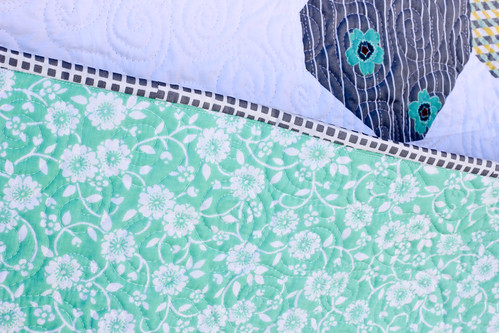
I used my Nordika collection for my quilt. The line feels very wintery to me, so a snowball quilt felt appropriate! I've named this quilt Polar Vortex to commemorate this crazy cold we've been having! I used the Snow Pure Element solid for the background and Shadow Squared Element for the binding, both by Art Gallery Fabrics. I backed it with a vintage sheet!
Sewing Level: Intermediate
Materials:
- 9 fat quarters of print fabrics
- 2 1/4 yards solid fabric
- 1 3/4 yards of 90" wide cotton batting
- 3 1/2 yards of backing fabric*
- 1/2 yard of binding fabric
- Coordinating thread
- Water soluble marker or pencil
*Optional pieced back: 1 3/4 yards + 4 fat quarters
Notes:
Finished Quilt Size: 54"x54"
Width of Fabric (WOF) = 42" assumed
Fat Quarter = 18"x21"
Cutting:
From 9 fat quarters:
- Cut (4) 6.5"x6.5" squares
From solid fabric:
- Cut (9) 2.5"xWOF strips
- Subcut each strip into (16) 2.5"x2.5" squares
- Cut (8) 6.5"xWOF strips
- Subcut each strip into (6) 6.5"x6.5" squares
Total print squares: 36
Total solid 2.5 squares: 144
Total solid 6.5" squares: 45
Instructions:

*Use a 1/4" seam allowance unless otherwise noted.*
1. Using a water-soluble marker or a pencil, mark a diagonal line across the wrong side of four solid 2.5" squares. Place one square in the upper-left corner of the a print 6.5" square, right sides together. Stitch across the corner on the line you marked. Trim off corner, leaving a 1/4” seam. Press corner up.
2. Turn block clockwise and repeat step 1 with the remaining three corners.
3. Repeat steps 1-2 with remaining 2.5" solid squares and 6.5" print squares. You'll have a total of 36 blocks.
4. Mix up pieced blocks and 6.5" solid squares in a bucket or bag. Randomly piece together rows of 9 blocks.

5. Arrange rows until you find a layout you like. Press seams in each row in a single direction, alternating direction every other row.
6. Sew rows together to finish the quilt top, press seams open.
7. Prepare Backing: It’s good practice to cut your backing and batting at least 4” larger than your top on all four sides. I’ve included this overage in the backing yardage requirements. Cut your backing yardage in half. Press. Trim off the selvedges and sew your pieces together lengthwise. Press seam open.
---------------------------------------------------------------------------------------------------------------
*Optional pieced backing
This is an easy pieced backing that doesn't require tons of yardage!
Cutting:
From 4 fat quarters:
- Cut (1) 16"x21" rectangle
From backing yardage:
- Cut (2) 62"x21" rectangles
Instructions:
*Use a 1/4" seam allowance unless otherwise noted.*

1. Sew 16"x21" pieces together in a row along the long edges. Press seams open. Piece should measure 62.5"x21". Trim down to 62".
2. Sew a yardage rectangle to the top and bottom of the pieced unit from step 1. Press seams open.
---------------------------------------------------------------------------------------------------------------
8. Basting: Using masking or painter’s tape, tape the backing to a clean, hard surface, right side down. Spread out your batting on top of the backing. Smooth out any wrinkles. Carefully spread out your quilt top on top of the batting, right side up. Pin your top, I like to use curved safety pins, spacing the pins a few inches apart. Make sure that your pins are going through all three layers.
9. Quilting: Quilt as desired, by machine or by hand. Trim away excess batting and backing fabric.
10. Binding: Cut yardage listed for binding into 2.5” strips. Trim off selvedges and sew your strips together to form one long strip, press seams open. Fold in half lengthwise, pressing with your iron as you fold. Attach binding using your preferred method. For a detailed tutorial on attaching your binding to both sides by machine, see here.
As always, if you make something from my tutorials, patterns or with my fabric, I'd love for you to add it to the In Color Order Flickr Group! :)
Happy Sewing!
I used my Nordika collection for my quilt. The line feels very wintery to me, so a snowball quilt felt appropriate! I've named this quilt Polar Vortex to commemorate this crazy cold we've been having! I used the Snow Pure Element solid for the background and Shadow Squared Element for the binding, both by Art Gallery Fabrics. I backed it with a vintage sheet!
Sewing Level: Intermediate
Materials:
- 9 fat quarters of print fabrics
- 2 1/4 yards solid fabric
- 1 3/4 yards of 90" wide cotton batting
- 3 1/2 yards of backing fabric*
- 1/2 yard of binding fabric
- Coordinating thread
- Water soluble marker or pencil
*Optional pieced back: 1 3/4 yards + 4 fat quarters
Notes:
Finished Quilt Size: 54"x54"
Width of Fabric (WOF) = 42" assumed
Fat Quarter = 18"x21"
Cutting:
From 9 fat quarters:
- Cut (4) 6.5"x6.5" squares
From solid fabric:
- Cut (9) 2.5"xWOF strips
- Subcut each strip into (16) 2.5"x2.5" squares
- Cut (8) 6.5"xWOF strips
- Subcut each strip into (6) 6.5"x6.5" squares
Total print squares: 36
Total solid 2.5 squares: 144
Total solid 6.5" squares: 45
Instructions:

*Use a 1/4" seam allowance unless otherwise noted.*
1. Using a water-soluble marker or a pencil, mark a diagonal line across the wrong side of four solid 2.5" squares. Place one square in the upper-left corner of the a print 6.5" square, right sides together. Stitch across the corner on the line you marked. Trim off corner, leaving a 1/4” seam. Press corner up.
2. Turn block clockwise and repeat step 1 with the remaining three corners.
3. Repeat steps 1-2 with remaining 2.5" solid squares and 6.5" print squares. You'll have a total of 36 blocks.
4. Mix up pieced blocks and 6.5" solid squares in a bucket or bag. Randomly piece together rows of 9 blocks.

5. Arrange rows until you find a layout you like. Press seams in each row in a single direction, alternating direction every other row.
6. Sew rows together to finish the quilt top, press seams open.
7. Prepare Backing: It’s good practice to cut your backing and batting at least 4” larger than your top on all four sides. I’ve included this overage in the backing yardage requirements. Cut your backing yardage in half. Press. Trim off the selvedges and sew your pieces together lengthwise. Press seam open.
---------------------------------------------------------------------------------------------------------------
*Optional pieced backing
This is an easy pieced backing that doesn't require tons of yardage!
Cutting:
From 4 fat quarters:
- Cut (1) 16"x21" rectangle
From backing yardage:
- Cut (2) 62"x21" rectangles
Instructions:
*Use a 1/4" seam allowance unless otherwise noted.*

1. Sew 16"x21" pieces together in a row along the long edges. Press seams open. Piece should measure 62.5"x21". Trim down to 62".
2. Sew a yardage rectangle to the top and bottom of the pieced unit from step 1. Press seams open.
---------------------------------------------------------------------------------------------------------------
8. Basting: Using masking or painter’s tape, tape the backing to a clean, hard surface, right side down. Spread out your batting on top of the backing. Smooth out any wrinkles. Carefully spread out your quilt top on top of the batting, right side up. Pin your top, I like to use curved safety pins, spacing the pins a few inches apart. Make sure that your pins are going through all three layers.
9. Quilting: Quilt as desired, by machine or by hand. Trim away excess batting and backing fabric.
10. Binding: Cut yardage listed for binding into 2.5” strips. Trim off selvedges and sew your strips together to form one long strip, press seams open. Fold in half lengthwise, pressing with your iron as you fold. Attach binding using your preferred method. For a detailed tutorial on attaching your binding to both sides by machine, see here.
As always, if you make something from my tutorials, patterns or with my fabric, I'd love for you to add it to the In Color Order Flickr Group! :)
Happy Sewing!
Tuesday, January 21, 2014
Happy Tuesday! Hope you're ready for lots of photos today! I have a few sewing projects to chat about, most of them Christmas gifts! Without further ado, off we go!
Late this past Fall I stitched myself up a zippered pouch for small knitting projects using the mini dresden from Jessie Lathroum's class at Sewing Summit. I used prints from my Nordika collection for the dresden and lining, paired with a natural linen. I love the way this turned out, considering I kind of made it up as I went along!
Another late Fall finish was a knitting needle case! I very quickly amassed quite a few knitting needles and I knew I'd want some type of case to keep them all in. Lucky for me, my friend Amanda released her Circular Knitting Needle Wallet Pattern, so I stitched on up right away! I used the panel print from Nordika for the outside and inside. For the pockets I choose a few coordinating prints. I love finding new ways to use the panel, and this is one of my favorites!
It fits all of my needles quite nicely and gets a ton of use. I used my favorite ruler twill tape from Little Red Cottage to finish it up.
I enjoyed making the needle wallet so much, I made two more as gifts! The first was for my friend Lei! I used various prints from Indie by Pat Bravo and Rhapsodia by AGF In-House Studio. I thought a matching Lined Drawstring Bag would be the perfect addition. I used Terri's add-on tutorial for the outside pockets!
I made a second knitting set for my Mom! For her set I used two focal prints from LillyBelle by Bari J along with various other prints from Art Gallery Fabrics.
For my younger brother, I made a tote bag with a geeky Harry Potter screen print made by Amanda. It's simple and sturdy, hopefully perfect for getting groceries or going back and forth to school. The panel is framed with Oval Elements by Art Gallery Fabrics and some natural linen.
Finally, I made my Dad a pillow for the man cave! This time I used a Big Bang Theory screen print, also by Amanda! I used another Oval Element by Art Gallery Fabrics to frame the panel.
Happy Sewing!
Monday, January 20, 2014
Happy Monday! I'm happy to say I have a new pattern to share with you today! Actually, I should have more new patterns to share later in the week that are WAY past due for me share and make available! For now, let's meet the Mystery Quilted Pillow Pattern!
You may remember this pillow from last Fall, it's the pattern I taught at Camp Stitchalot in December. It's a really fun technique and it looks so different depending on the fabrics you use!
For the original pillow (which is included of course!), I choose to use a single collection, my Nordika collection. I think it's a really nice way to show off your favorite fabrics! I used Aurifil 50wt thread #2600 for the quilting. The pillow finishes at 16".
In addition to the original pillow pattern, I'll show you how to make a second pillow using the same technique but using smaller squares! I love how a secondary pattern shows up when you have additional blocks! This one was made with all Art Gallery Fabrics Blenders! It also finishes at 16".
I tried out some alternative quilting for this pillow, I did a cross-hatch of the triple zig-zag stitch! It turned out really crazy looking, but super fun. I think it fits the crazy amount of color in this pillow! I used Aurifil 50wt thread #2021 for the quilting.
There are instructions for both a traditional envelope pillow closure and a zippered pillow closure, so you can choose your favorite way! I love how fast the envelope closure is, but the zippered closure is a really nice touch!
Note: The back of that pillow is indeed totally soaked, haha. That's what you get when you take snow photos! ;)
On top of both pillows, I've included a BONUS quilt pattern using this technique! I am itching to make it out of Dreamin' Vintage when it arrives! This one is definitely not for the faint of heart, it would be a long term project for sure! You could really bust your stash or scraps making this!
If you're interested, the Mystery Quilted Pillow Pattern is available as a PDF only, in my shop. You can find it here! It's 25% off from now until Sunday!
Happy Sewing!
Subscribe to:
Posts
(
Atom
)

