
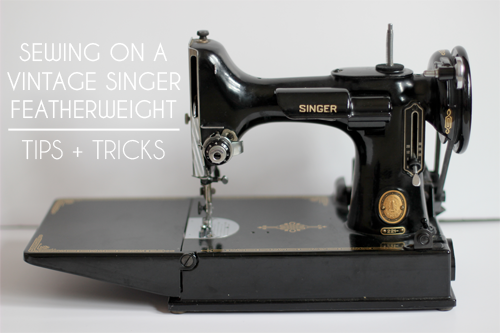
Happy Wednesday! Today I want to share a few of my favorite resources, tips, and tricks for Sewing on a Vintage Singer Featherweight 221. I was very lucky to find a featherweight under the tree this past Christmas from my parents. It is in beautiful condition, and had been picked up with it's original case, accessories, and even the loan agreement. You can read a bit more about that story here.
I had it cleaned and serviced at my local sewing machine shop after I got it, wanting to make sure it was in true working order between I started using it. I don't regret having it serviced that first time, because I really felt like it needed to be seen first by a professional. However, since that first cleaning I've serviced and cleaned it myself. Now that I've been using it pretty heavily for the past 5-6 months, I want to share my experiences with you all!

Ever since my machine returned from it's first tune-up, I've been using it almost exclusively for piecework. Nearly anything that was just simple piecing, since March has been done on my featherweight. That includes the majority of the projects that I made for my Quilt Market booth this past Spring!
I continue to use my Janome Horizon 7700 for anything that requires a walking foot, like bags with interfacing, shirring and for all my quilting. I wouldn't trade it for those things for sure. But for pretty much everything else, I'm preferring the featherweight. It is so easy to use for piecing, and creates amazing stitches. In addition, it is so lightweight and it takes up such little space so it's great for traveling.

Two resources that have been really helpful for me is Featherweight 221: The Perfect Portable And It's Stitches Across History by Nancy Johnson-Srebro, and The Featherweight 221 and I by David McCallum. Nancy's book is all about the history of the featherweight, the different models and accessories. There is part of the original manual in it as well, but in general it is more of a commentary on featherweights rather than a how-to manual. It was really interesting, I read through most of it in one sitting!
David McCallum's book is a true how-to guide. It is a comprehensive guide to care and also repair. I turn to this book every time I need to oil my machine. It has very clear, easy to read diagrams for where to oil and how often each spot should be oiled. Only the front of each page is printed, so you can use the backs of the pages to take notes. I keep track of each time I oil my machine to make sure I don't oil it too often or not enough.
I highly recommend both books, but if you only buy one, buy The Featherweight 221 and I by David McCallum.

You don't need much to take care of regular maintenance on a featherweight. These are some of my favorite tools:
I always have compressed air on hand to use on all of my machines. It's great for getting dust and lint from hard to reach places, like under the needle plate and in the bobbin case. I seem to keep buying this one by 3M, it lasts a while. Early on I picked up a non-abrasive car wax to protect the surface of the featherweight and keep it nice and shiny. This butter smooth wax has worked great and doesn't have a strong smell. Make sure to test any wax on a hidden place first. I buff it on with a microfiber cloth.
Unlike most of today's machines, featherweights need oiling on a regular basis to make sure it's running smoothly. I oil mine after every 8 hours or so of use. Not all parts of the machine need oiled that often though. Once you get used to your machine, you'll be able to hear and feel when it needs oil.
I really like the Zoom Spout Oil*. It has a thin spout that comes way out of the bottle, making it easy to get hard to reach places. You only need a tiny drop in each spot, and this oil makes it easy to control the oil. I use q-tips to clean up any excess oil. You'll also need Singer Motor Lubricant for the gears and motor. Before you start sewing again, sew through some scrap fabric to make sure everything is running okay and to let any excess oil run onto the scrap instead of your project.
*Update: I recently started using this oil pen, which makes it even easier to deliver one drop at a time. I absolutely love it, and it's refillable!

Once the machine is all nice and clean, it's back to sewing! I use Schmetz Universal Needles in my featherweight. They work great in all my machines, I like not having to order anything special. The needles go in sideways and you thread it from right to left. I only use Aurifil cotton thread in my featherweight. It feeds so smoothly through the machine, and it only seems right to treat it to the best thread!

Like all machines, featherweights have their own quirks when it comes to actually sewing. I like to use the stock foot that came with the machine to do all my piecing. It's super skinny which makes top stitching really nice and the 1/4" guide is easy to see. You can buy a 1/4" foot for your featherweight, but I don't have one for mine. I don't ever use the 1/4" foot I have for my Janome, so I probably wouldn't use one for this either. I'm not sure why, I just don't like using them!
One of the biggest tricks that helped make things easier for me, was learning how to loosen the hand wheel so that the needle doesn't run up and down while you wind a bobbin. Before you start winding, hold the large wheel in place with one hand and turn the small wheel towards you until it loosens. Wind your bobbin and turn it back until it locks in place when you're done.

I do have the original carrying case for my featherweight, but I decided to create my own set of accessories for travel and storage. I wanted something cuter and also a little more functional. You can read more about my featherweight travel set here. Want to make your own set? Check out my Sew Portable Travel Set Pattern! I also have a tutorial for a patchwork mat to match!
I'm not a featherweight expert, but I've definitely learned a lot using it these last few months. I'm looking forward to stitching up lots more projects with it!
I hope this was helpful to some of you! Do you sew on a vintage machine? What are your favorite tips, tricks, and resources?


