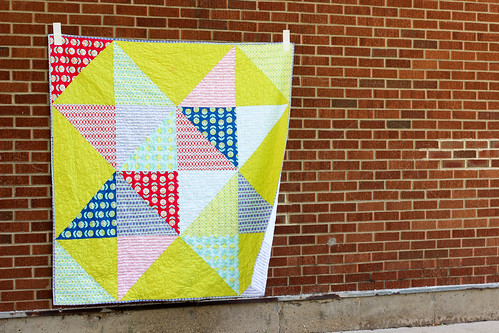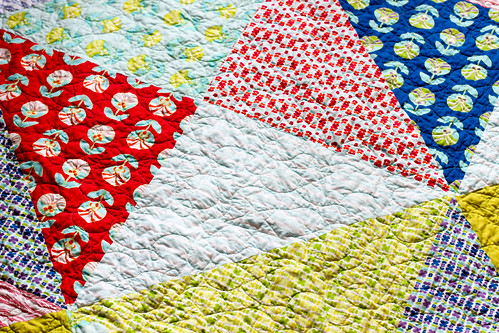
Happy Monday! Today I've got a fun Scrappy Star Quilt that comes together really fast by taking advantage of giant blocks! It's a twist on my Giant Vintage Star Quilt Tutorial! This is a fun summery quilt, perfect for a picnic at the park or a quick gift! It's a healthy throw size finishing at 68" square!
This was originally published as a guest tutorial on the Art Gallery Fabrics Blog.

I'm using my fabric line with Art Gallery Fabrics, Color Me Retro, for this quilt! I paired it with my favorite Pure Element solid, Lemonade!
Sewing Level: Beginner Friendly
Materials:
- 10 fat quarters of Color Me Retro
- 1 1/2 yards of Pure Element solid in Lemonade
- 4 1/4 yards of backing fabric
- 2 1/4 yards of 90” wide batting
- 1/2 yard of binding fabric
- Coordinating thread
Finished Size: Approx 68" square
Seam Allowance: 1/4" unless otherwise noted
Cutting:
(WOF = Width of Fabric)
From each print:
- Cut (1) 18”x18” square
From solid fabric:
- Cut (3) 18”xWOF strips
- Subcut each strip into (2) 18”x18” squares
Instructions:
1. Cut each of the 18” squares and cut in half along the diagonal. A 24” ruler isn’t long
enough, you can extend it temporarily by taping another ruler to one end. You should
have a total of 20 print triangles and 12 solid triangles.
2. Sew pairs of triangles together to create 16 blocks. First pair up solid triangles with
print triangles, then pair up remaining print triangles. Press seams open.
3. Arrange blocks using the diagram above. Sew blocks together in each row. Press
seams in one direction, alternating every other row.

4. Sew rows together. Press seams open.


Baste, quilt, bind and enjoy! For more photos and info about the finished quilt, see here.
If you make this quilt, I hope you'll add a photo to the In Color Order Flickr Group!
Happy Sewing!


