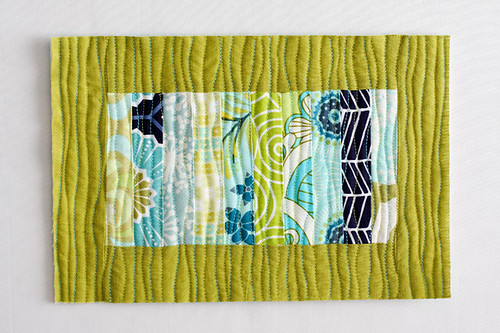
Today I'm sharing a mug rug tutorial with you that will help bust your scrap stash! This little mug rug is a great way to use up long skinny scraps. Let's get started!
Sewing Level: Intermediate
Finished Size: Approx. 10"x7"
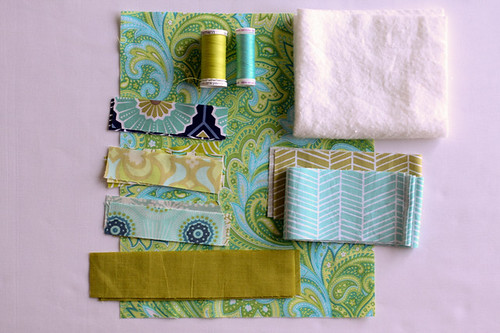
Materials:
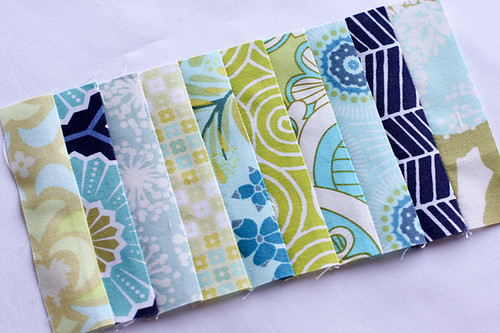
- 10 print strips 4.5"x1.25"
- 2 sashing strips 8"x1.75"
- 2 sashing strips 6.5"x1.75"
- 1 binding strip 2.5"x44"
- Backing fabric 12"x9"
- Batting 12"x9"
- Coordinating thread
Looking for supplies? Check out my Pattern Supplies and Resources post.
Instructions:
*Use a 1/4” seam allowance unless otherwise noted*
1. Take your 10 print strips and sew them together to create a little patchwork rectangle! Press your seams however you'd like!
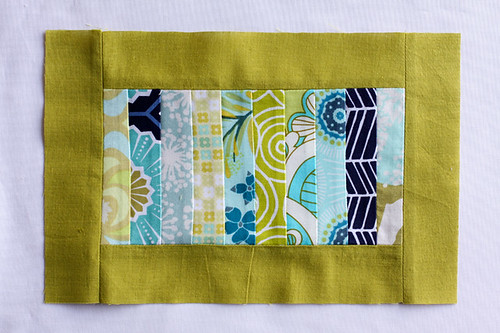
2. Attach your 8" sashing strips on the long side of your pieced rectangle. Press your seams open. Attach your remaining sashing strips to the short ends of your rectangle. Press your seams open.
3. Make a little quilt sandwich with your backing fabric, batting, and pieced top. Baste!
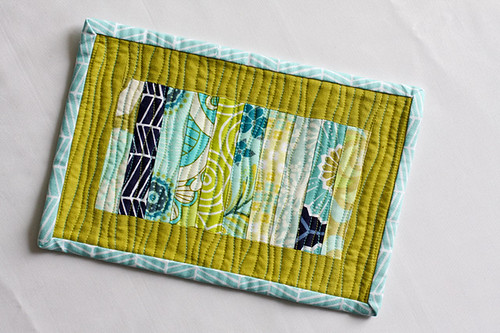
4. Quilt as desired using coordinating thread. I quilted mine with wavy lines using my walking foot, purposely wiggling the quilt as I stitched. I stitched using green thread every 1/2" or so, then went back and stitched with turquoise thread in between my previous quilt lines!
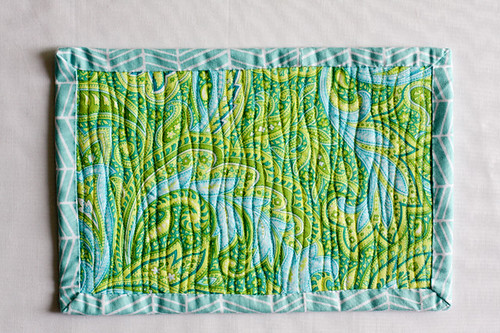
5. Trim your backing and batting and square up your mug rug. Create your double fold bias tape and bind away. I bound mine by machine stitching it to the front and hand stitching it to the back.
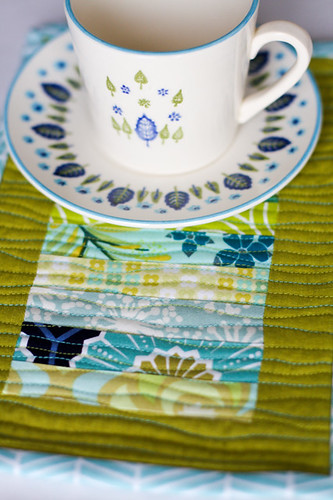
Voila! Now go get some tea and a cookie and test it out! ;)
Happy Sewing!

I love your color choices! The sashing strips really set it off. Thanks for sharing!
ReplyDeleteWhat a great idea. Can't wait to give it a shot!
ReplyDeleteGreat quilting idea..the waves and colours used are genius!
ReplyDeleteBeautiful! I love the wavy line quilting, I am inspired to give this one a try.
ReplyDeleteThanks so much for sharing your mug rug - I love the wavy lines of stitches, and the colors of the fabrics, too. I'm a newbie, so I need to ask: is that all from one collection or line? And if so, what is it? I just love it.
ReplyDeleteJacque in SC
quiltnsrep(at)yahoo(dot)com
Such a cute mug rug! Where's your cookie?
ReplyDeleteI love the colors you chose!
ReplyDeleteThe wavy quilting is so perfect for your color theme. Beautiful!
ReplyDeleteDelightful, those colours go together beautifully, thank you for sharing Caroline x
ReplyDeleteIt looks great! Thanks for your great tutorial, I must have a go at making one myself.
ReplyDeleteLove the mug rug! The quilting really "makes" it!
ReplyDeleteThis is perfect! I've got tons of skinny little scraps that need to be used up. Thanks :)
ReplyDeleteBeautiful! Just the project to work on, on a rainy day like today. Now if I only had a cookie...
ReplyDeleteI love it. I need to try quilting those wavy lines they look great.
ReplyDeleteSimple and sweet. I really like your quilting too! I think I'm quilting-challenged...
ReplyDeleteThis is beautiful! I have been wanting to make a few but having a hard time deciding on a design, thanks for the reminder that it doesn't have to be too complicated to be really nice.
ReplyDeleteThis is so awesome Jeni, I love the colors!
ReplyDeleteWhat a darling mug rug! Your wavy quilting lines are just perfect, I love the way they hide the border seams and make the pieced center seem to float on a wonderfully crinkly background. I think I need to make one of these, just so I can play with wavy lines :)
ReplyDeleteLovely, pretty colors and love the quilted lines - so perfect!
ReplyDeletethis is so awesome!! simple and clean and just fabulous! LOVE the quilting too! :)
ReplyDeleteLove it! My favorite so far this week in mug rug madness! : )
ReplyDeleteThis is adorable. Love the wavy line quilting. Somehow when you do it, it looks so purposeful versus the hot mess I would end up with. Thanks for the inspiration :)
ReplyDeleteLove this! Great design and great quilting!
ReplyDeleteThat's so sweet! I love the wavy quilted lines. So adorable, nice work!
ReplyDeleteSeriously cute! I have to admit that I haven't been totally into mug rugs but with all these cute tutes- I'm really starting to love them!
ReplyDeleteit's gorgeous Jeni. Love the colours & the quilting is ace :)
ReplyDeletexxx
What a great way too use all those skinny scraps, and the quilting gives it such great texture - lovely!
ReplyDeleteBeautifully simple and effective
ReplyDeleteThe colors are wonderful!
ReplyDeleteOh my gosh! Your mug rug is so cute and I was so surprised to see your dishes. My mom had those dishes as our everyday ones when we were little (in the 70's).
ReplyDeleteWhat a lovely collection of colours-- I really like the idea of the quilting, and of using 2 harmonious thread colours! :- ) Very inspiring!
ReplyDeleteHazle
very cute mug rug, thank you so much for taking the time to share it with us!
ReplyDeleteAnn Flowers
flowerscrazyq@gmail(dot)com
This one is def on my "to do" list. Thank you for sharing.
ReplyDeleteLove that green! I like the way you quilted it too! Thanks for sharing.
ReplyDeleteWavy quilting lines make a great contrast to the straight piecing you have done. Thanks!
ReplyDeleteThis comment has been removed by the author.
ReplyDeleteWhat a great idea - will definitely make this one.
ReplyDeleteLovely!
ReplyDeleteThanks for the tutorial.
ReplyDeleteReally cute! :) I love how you used two different threads, too!
ReplyDeleteHoly snap.. I LOVE THE COLORS that you picked out for this mug rug! They are so fresh and vibrant.
ReplyDeleteAdorable mug rug and great tutorial! Thanks for posting!
ReplyDeleteSimple but v.effective & stunning. Nice having the quilting lines as a feature too. Jxo
ReplyDeleteThis was a great tutorial. I love how you got the wiggles. Great color choices as well. Thank you so much for sharing with us such a neat idea for Mug Rug madness:)
ReplyDeleteAnn Flowers
flowerscrazyq@gmail(dot)com
That is adorable---I want to make one today! :) Thank you bunches for sharing your tutorial with us. These mug rugs are just so fast and FUN!
ReplyDeleteThis is really a very cute idea..thanks for the info. You have a wonderful blog by the way....I have become a follower..
ReplyDeleteThank you for your tutorial...in fact I made one today. Went fast and love the results.
ReplyDeletethanks!
Donna
Cute mug rug! Thanks for the tutorial! :)
ReplyDeleteBeautiful colorchoise.I´ve never made a mug rug before, but now I feel inspired after seeing yours ! Thank you!
ReplyDeleteRegards from Spain
I love the colors in this! Great mug rug, thanks so much for the tutorial!
ReplyDeletebeautiful jeni, and those quilting lines are super amazing!
ReplyDeleteThank you for the great idea.
ReplyDeleteYours is totally gorgeous Jeni! Love it tons especially the quilting.
ReplyDeleteLove the waves. Great way to use up those little pieces I can't bear to throw away!
ReplyDeleteWell your quilting really makes it special.....great colors and inspiration...thank you!
ReplyDeleteHappy Sewing
Oh i love this...and that quilting!! x
ReplyDeleteAWW! This is darling! I love the quilting. Thanks so much for adding it to the One Pretty Thing Flickr pool, I'll be linking.
ReplyDeletegreat tut love the stitching, did mine for FNS and practice with FM quilting..no binding yet but it's put away for chritstms giving. thanks
ReplyDeleteLovely tutorial, thank you. I have to try this. You and your blog are always inspiring to me!
ReplyDeleteWhen you're not using this for tea and a muffin, it would be a sweet mat for George to lounge on ( if he wouldn't nibble on it : )
it is adorable and...easy!!! thanks lalla
ReplyDeleteThis is the most adorable mug rug I have ever seen!!! I absolutely MUST try it:-)
ReplyDeleteThis is a great little mug rug! My favorite part of the tute is at the end. The cup and saucer is just like my first set of dishes. I have been married for 47 years. cute, cute, cute!
ReplyDeleteSuzi
I love, love, love the colors and fabrics you are using! I'm going to pull some of mine for the same look...!
ReplyDeleteThis one is my favorite!! Can't wait to try it out thanks!
ReplyDeleteThank you for the tutorial! Very cute idea. I have to tell you that we had those dishes when I was a little girl!!!
ReplyDeletecarol
Super cute! I love the colors and texture you added to this!
ReplyDeleteThe cup & saucer! Heavens I've been married almost 50 yrs. & THAT is the pattern I started housekeeping with! Got it at the grocery store! We were poor as church mice!! Love the rug & loved the memories the cup & saucer brought back!
ReplyDeleteI like it...I like it a lot!!! Perfect stash buster, and functional, too.
ReplyDeleteLooks really great. They are so amazing and creative!
ReplyDeleteHi Love this mug rug and thanks for sharing the tutorial. I am not sure how to print this tutorial or save it to my own computer, can I do this? Thanks you and best wishes,
ReplyDeleteAnnie in Saudi Arabia
http://www.twopeasinabucket.com/mb.asp?cmd=display&thread_id=3125284
ReplyDeleteThanks for the inspiration!!!
ReplyDeletehttp://dressed2atee.blogspot.com/
I am such a newbie that my sewing machine is still in the box. Amazon delivered it while I'm in bed with the flu. I'm passing time exploring wonderful blogs like yours. I have a question about the quilting. Do you just lift your needle after completing one row and drop it at the beginning of the next row? Your work is so neat I can't tell how you did it. Thanks.
ReplyDeleteJenni, I'm the one who won this beautiful little pieced you made. I have it hanging on my cube wall at work, and I admire it almost every day. It's adorable and I thank you so much!
ReplyDeleteToday I'm sharing a mug rug tutorial with you as part of Mug Rug Madness! ... mooseglasses.blogspot.com
ReplyDeleteBeen looking for some Christmas prezzies. Great idea! Thanks!
ReplyDeleteNever done mug rugs but they look fun
ReplyDelete